Page Sections
In Klarity, Applications make it possible for you to build your own multi-cloud world by representing exactly what exists in your cloud architecture.
In Klarity, Applications are treated as the fundamental base-unit, which means that Applications are:
- where you organize all your resources into environments
- used in the mechanism which automatically lands cloud resources in the correct location in Klarity by using our mapping system (See Discovering guide).
Applications
Viewing applications
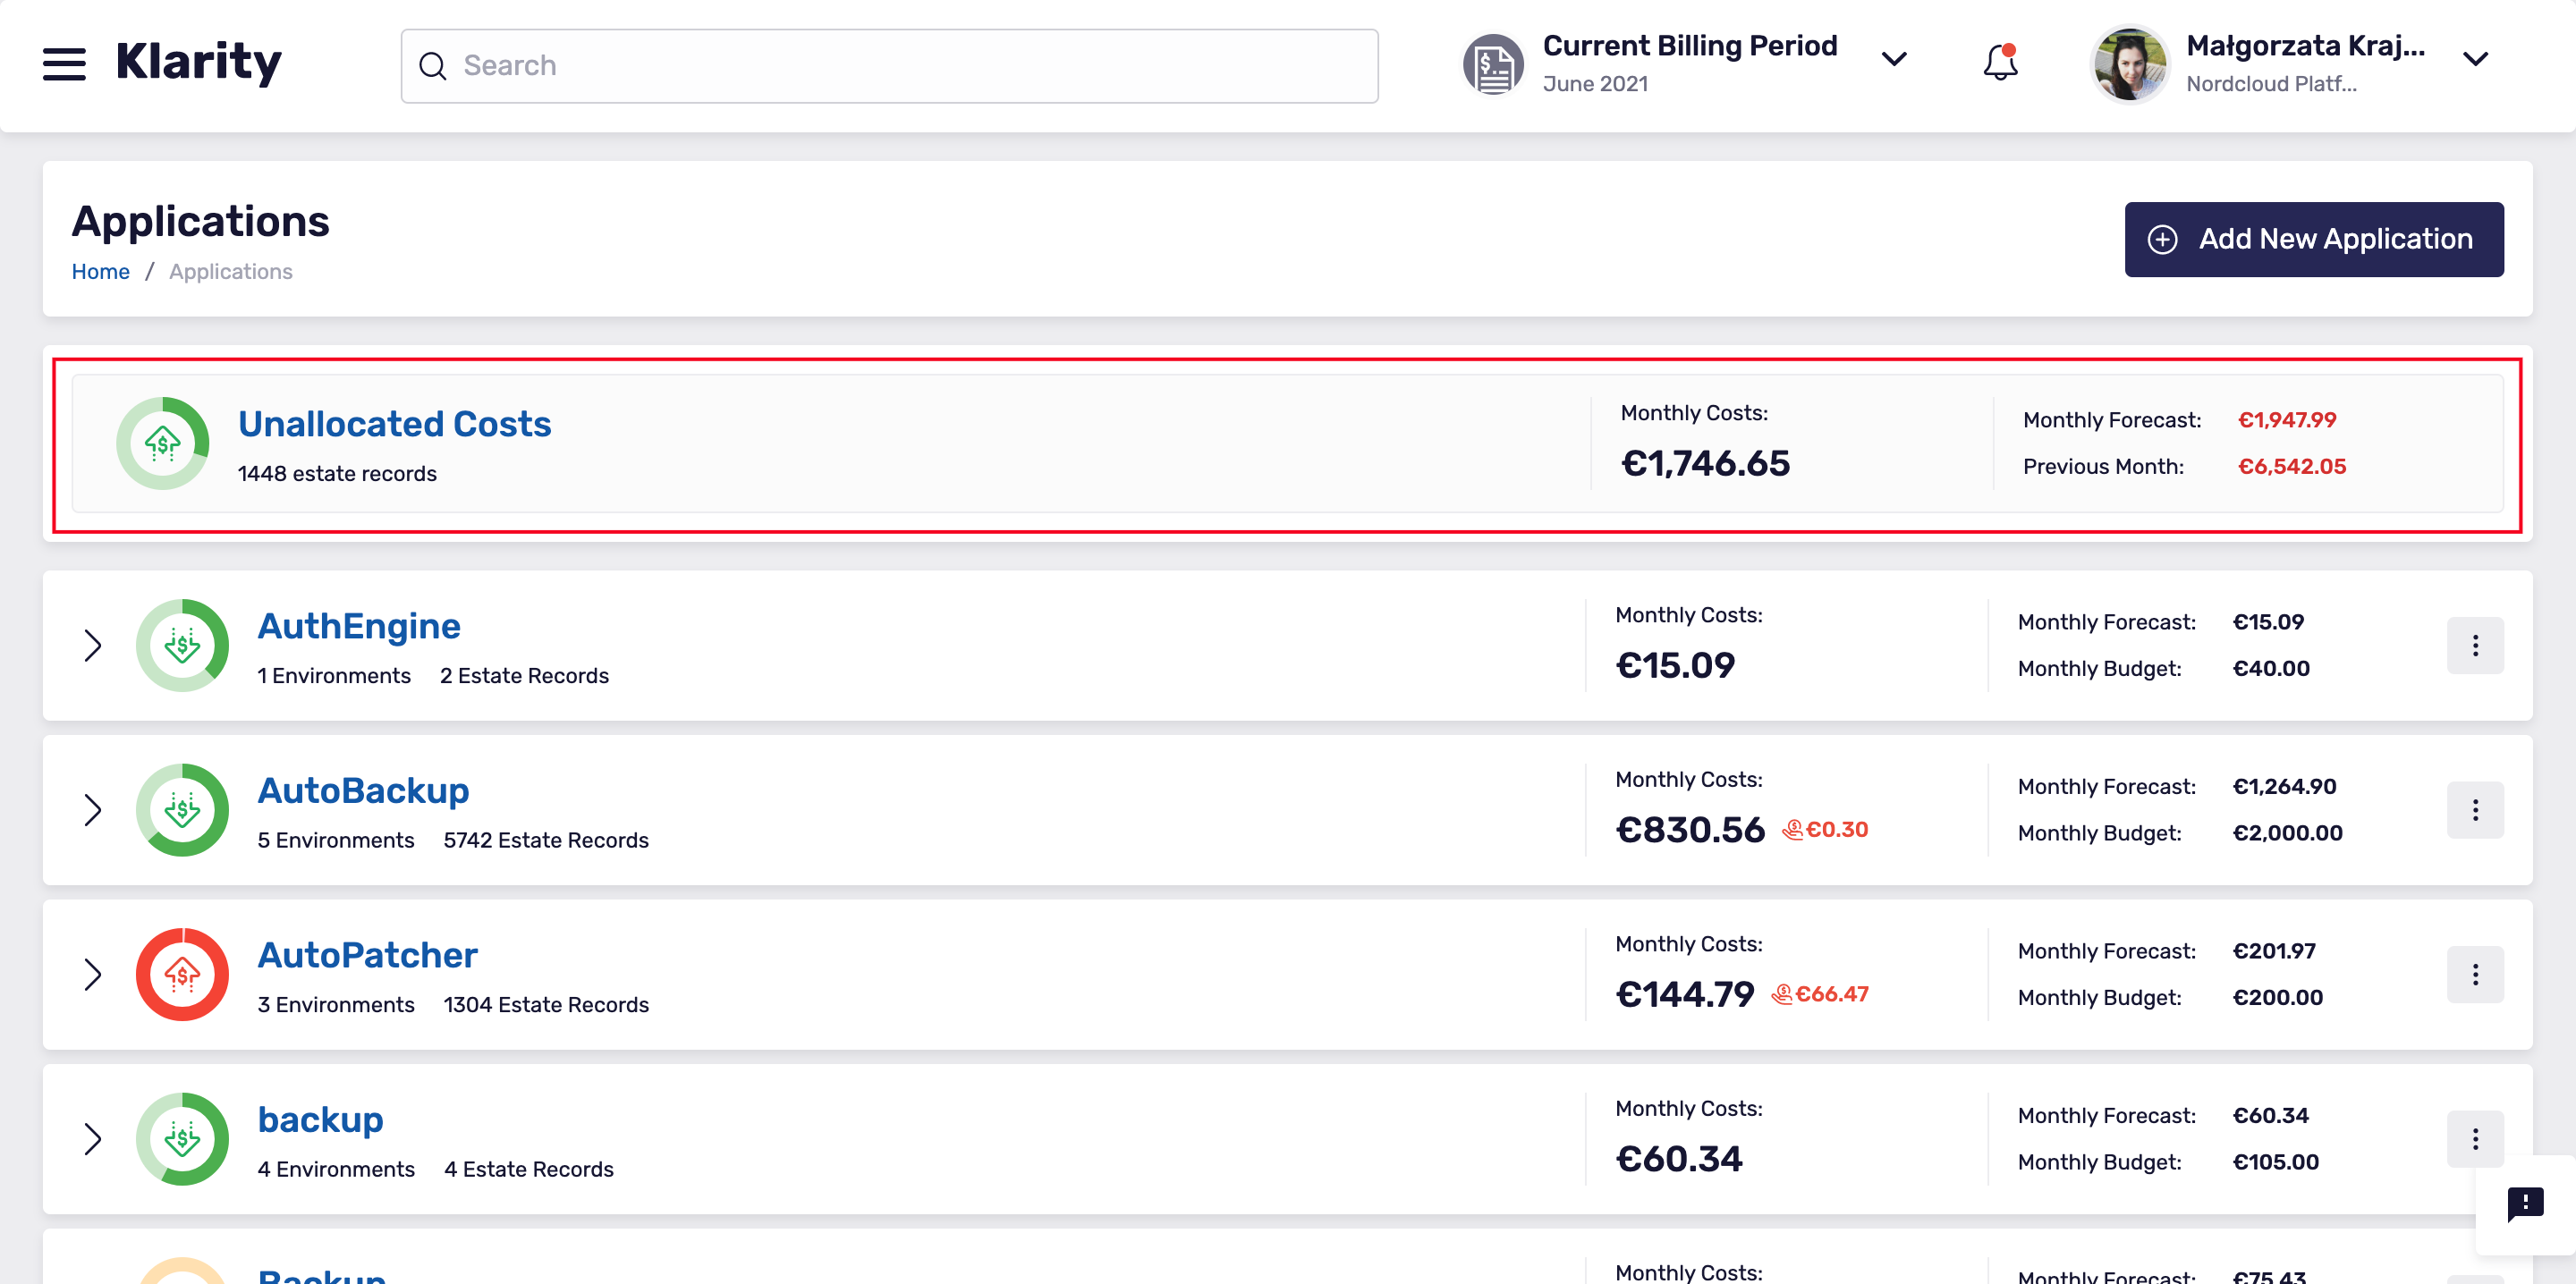
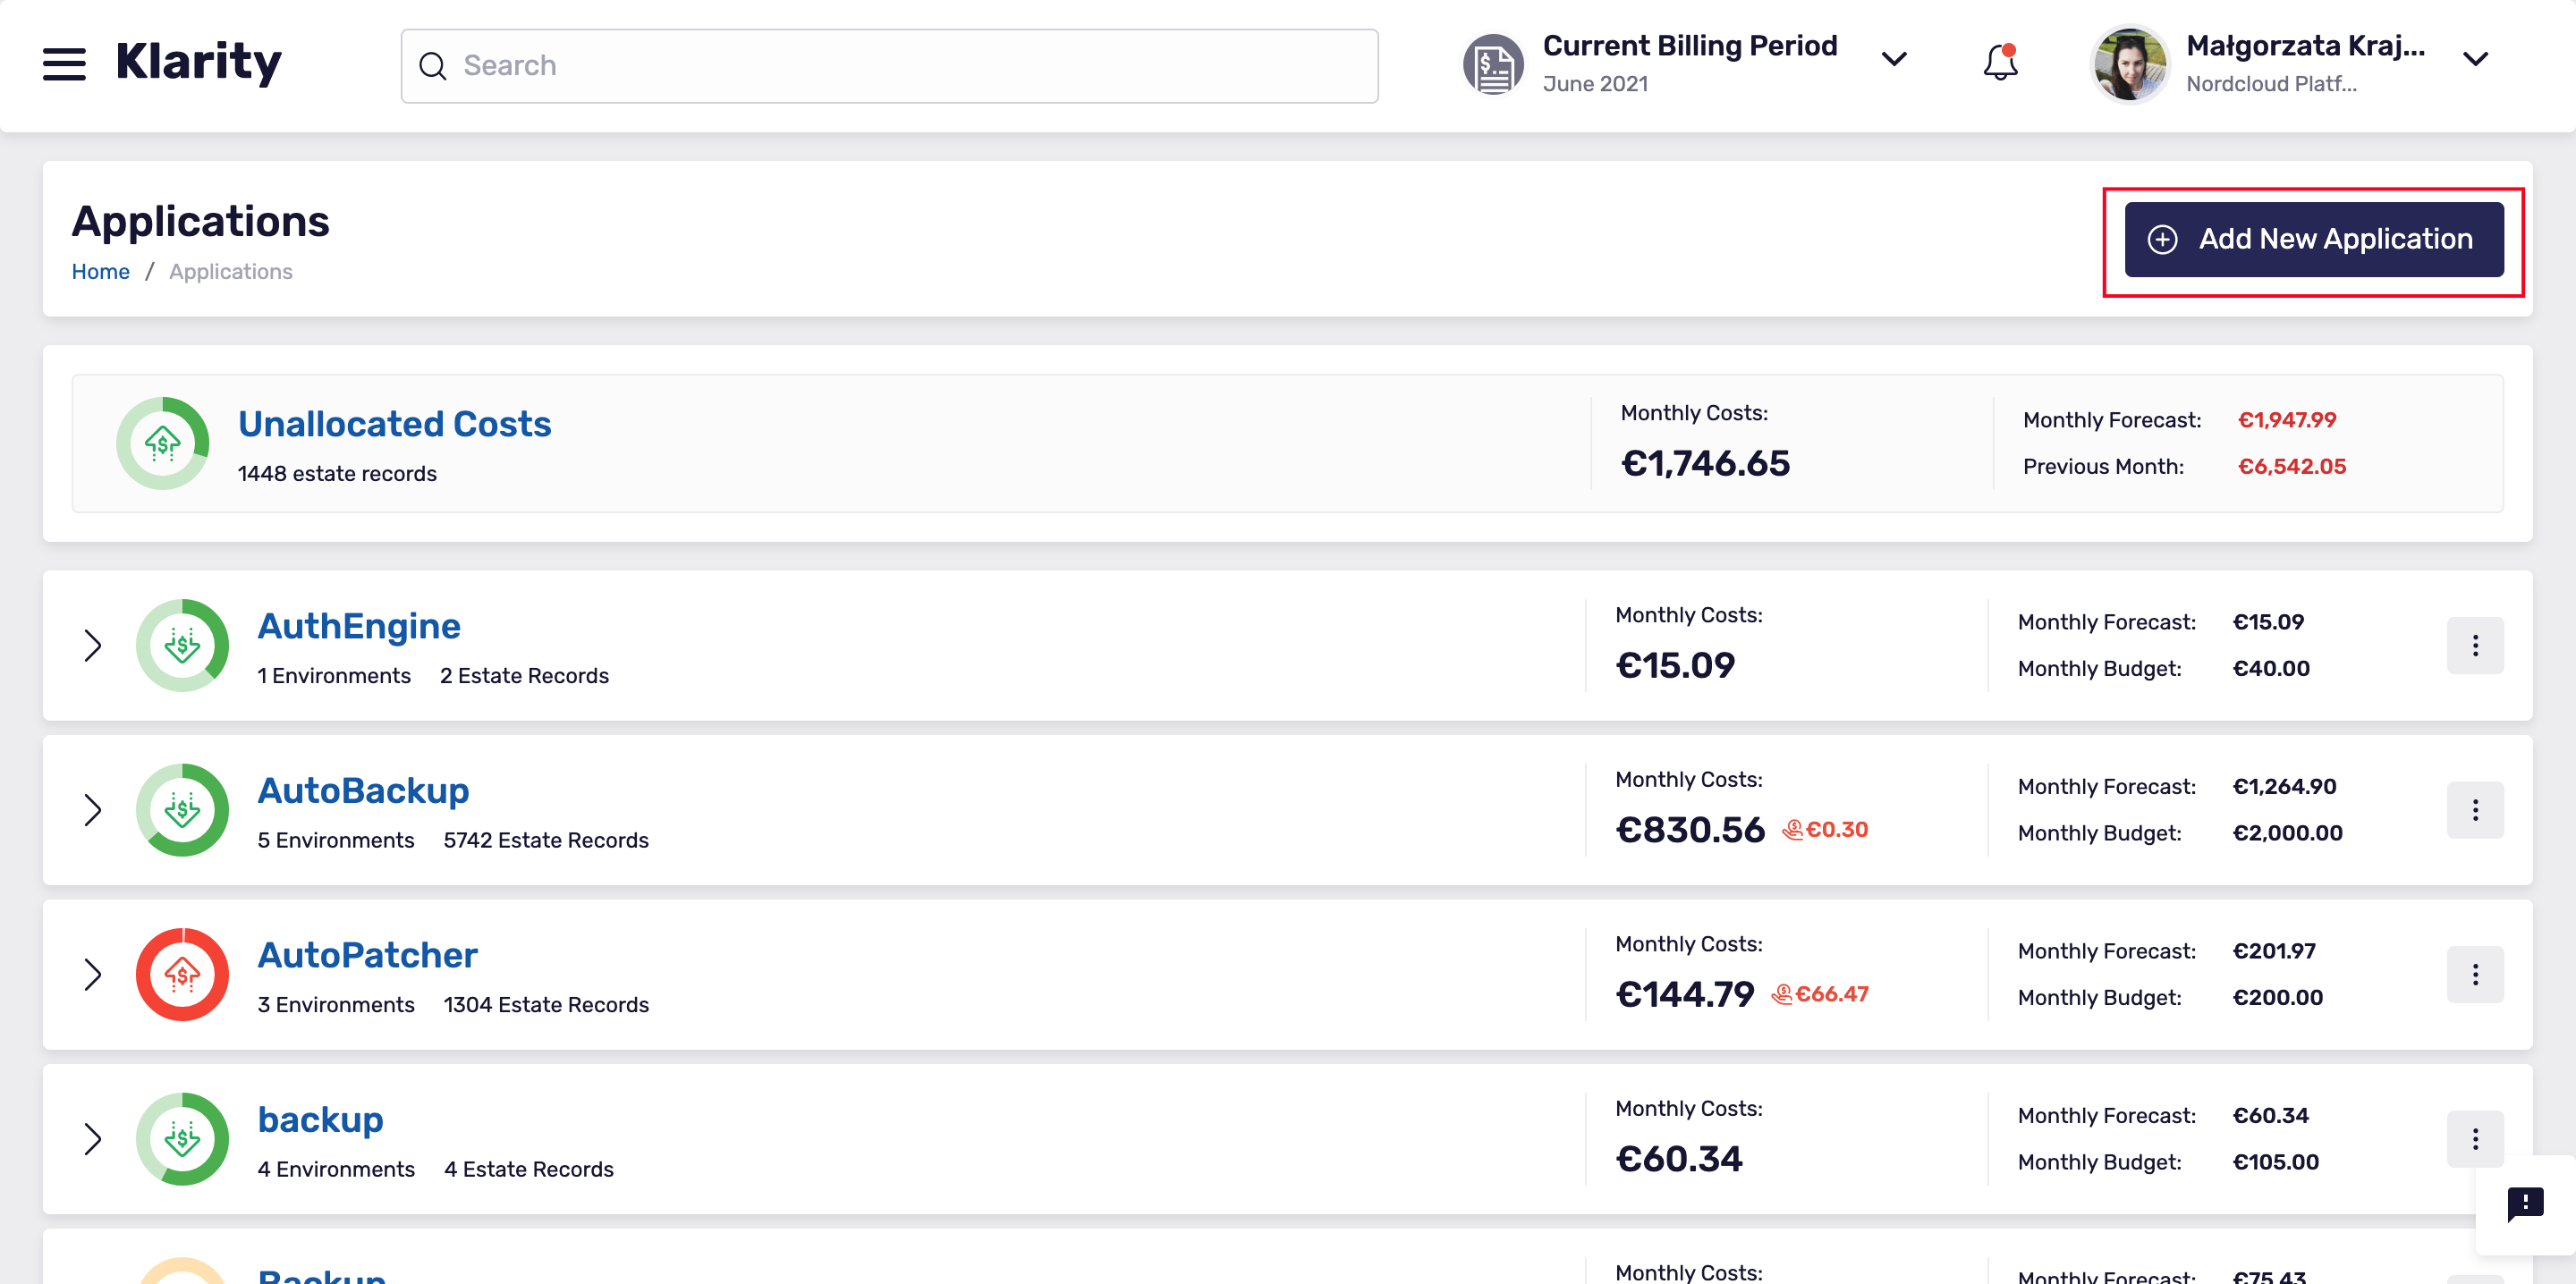
To see all your applications, go to 'main', then 'Applications':
When you set up onboarding prerequisites, Klarity's scanners then scanned your cloud environments for the first time. In this case, in Klarity, you will see the Unallocated costs item on your applications list. This is because Klarity cannot yet create any applications automatically. For Klarity to create applications automatically, you must first define relevant discovery rules. For step-by-step instructions on defining discovery rules, see: Discovering guide).
In Unallocated costs, you see all the resources that were found, based on level of access that was given to Klarity:
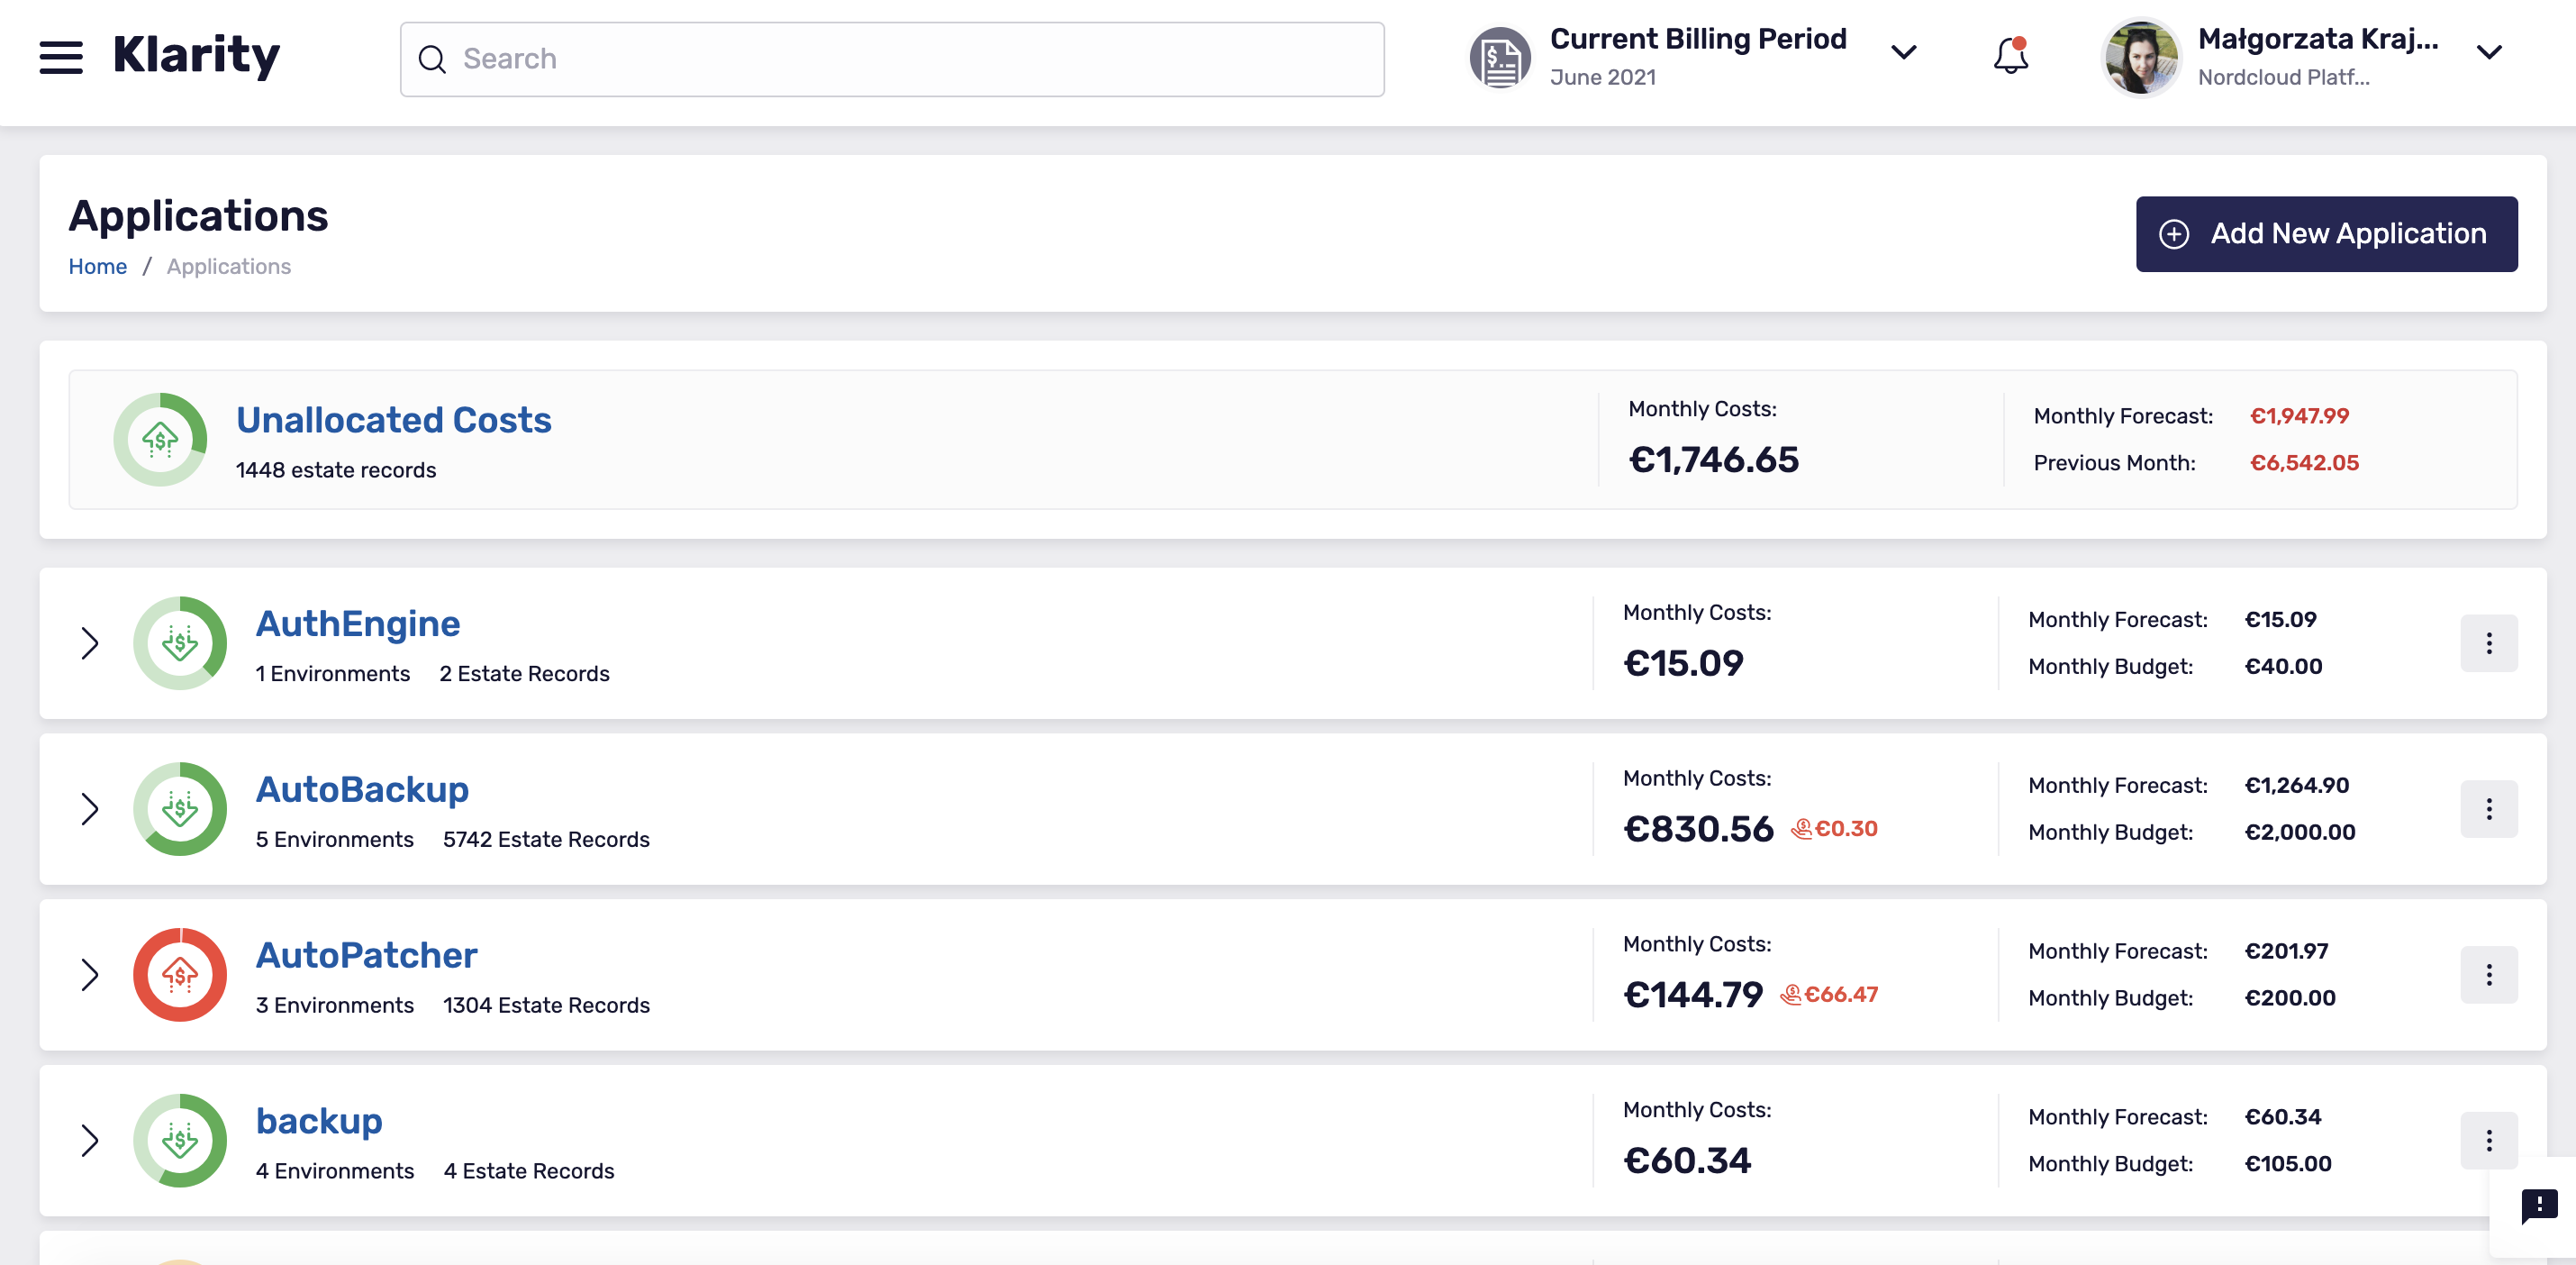
After onboarding some of your applications to Klarity, your applications will look like this example (by default, applications are sorted in alphabetical order):
Adding a new application
In Applications, add a new application by using the Add New Application button (top-right):
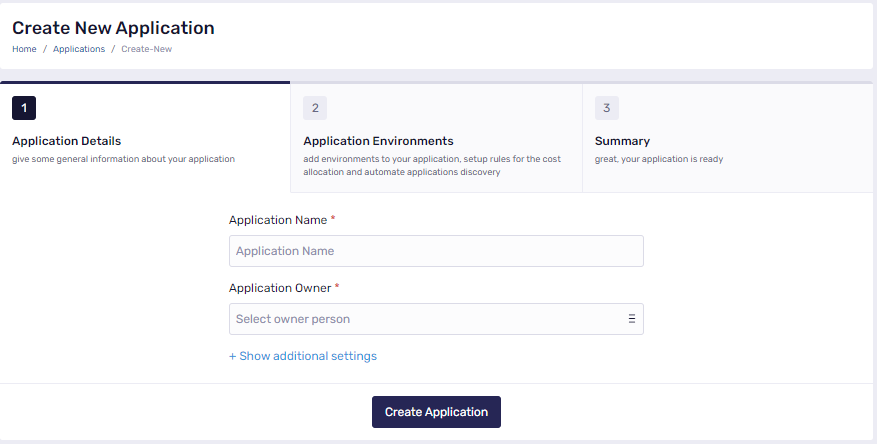
To add an application manually, complete the 3-stage in-app process.
In the first stage, you have to name a new application and select the application owner.
When you have completed details about your application, you will be able to create the environments within the application. Alternatively you can skip creating environments at this time. When you have completed the process of adding the new application, check that your application was added successfully to Klarity.
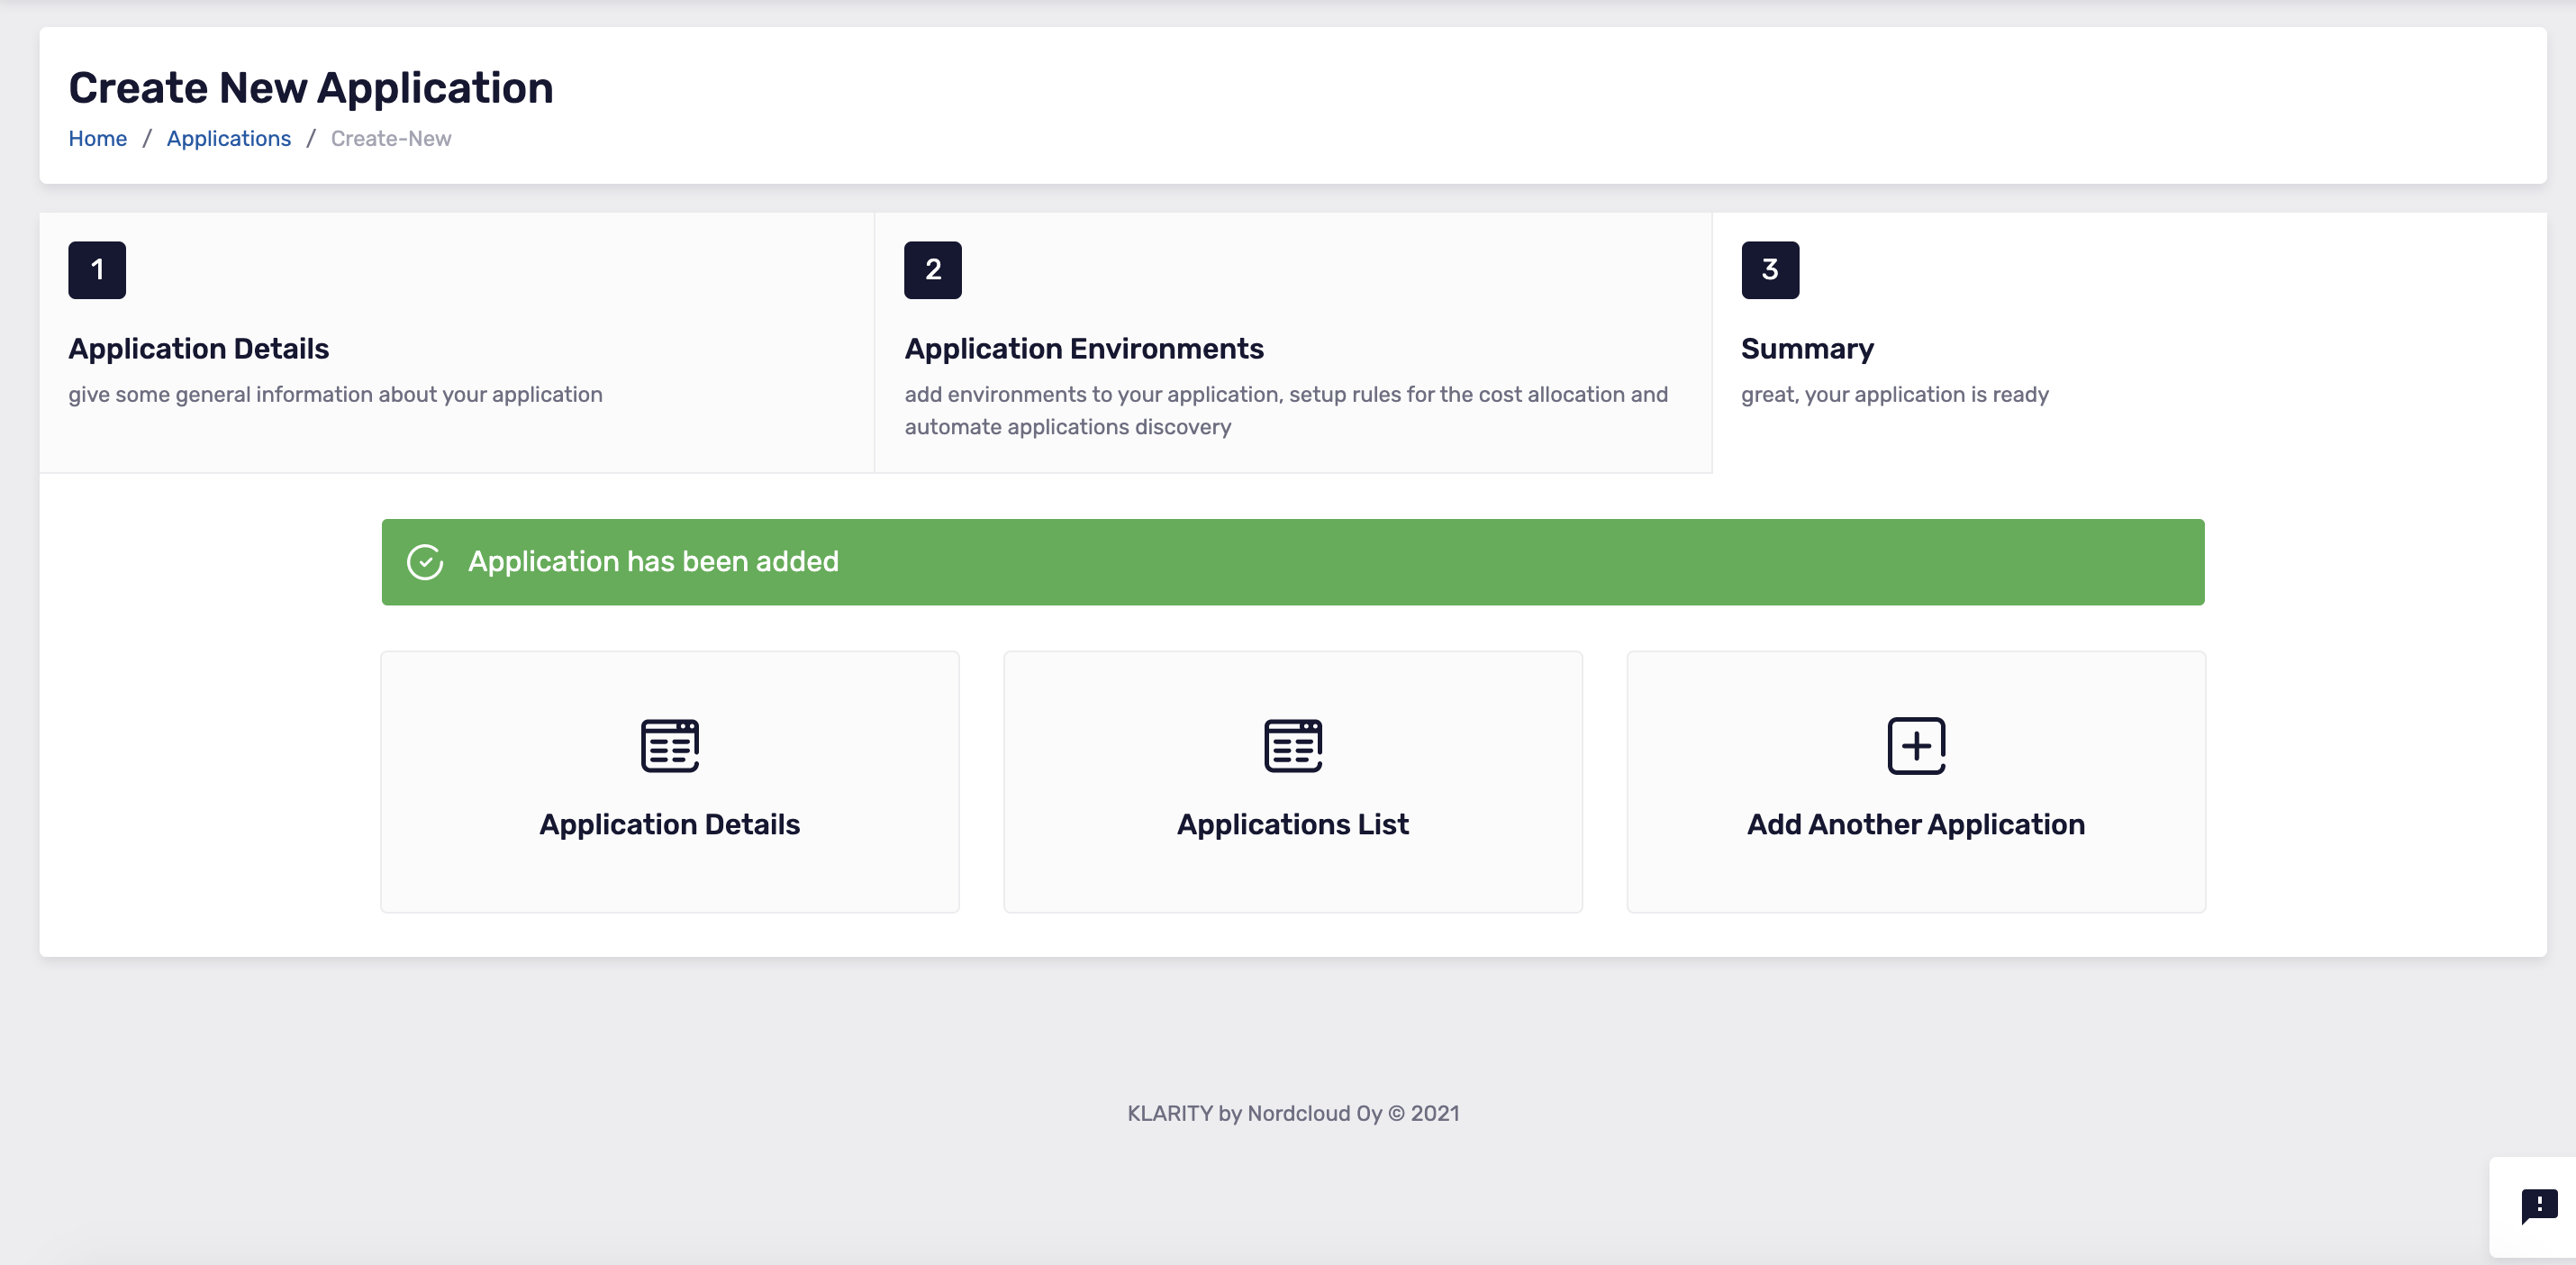
If the new application was added successfully, you can drill into the details of your new application, or add you can immediately add another application.
Application budget
Intro
In Klarity, you can easily manage and track your budget at the application level for the current, past, and upcoming years. Klarity gives you budget recommendations based on your past spending. You'll also see notifications when total environmental budgets are greater than the application budget. The budget feature is available in every application.
Creating a budget
To add a budget, go into the application detail view, where you need select one of two options:
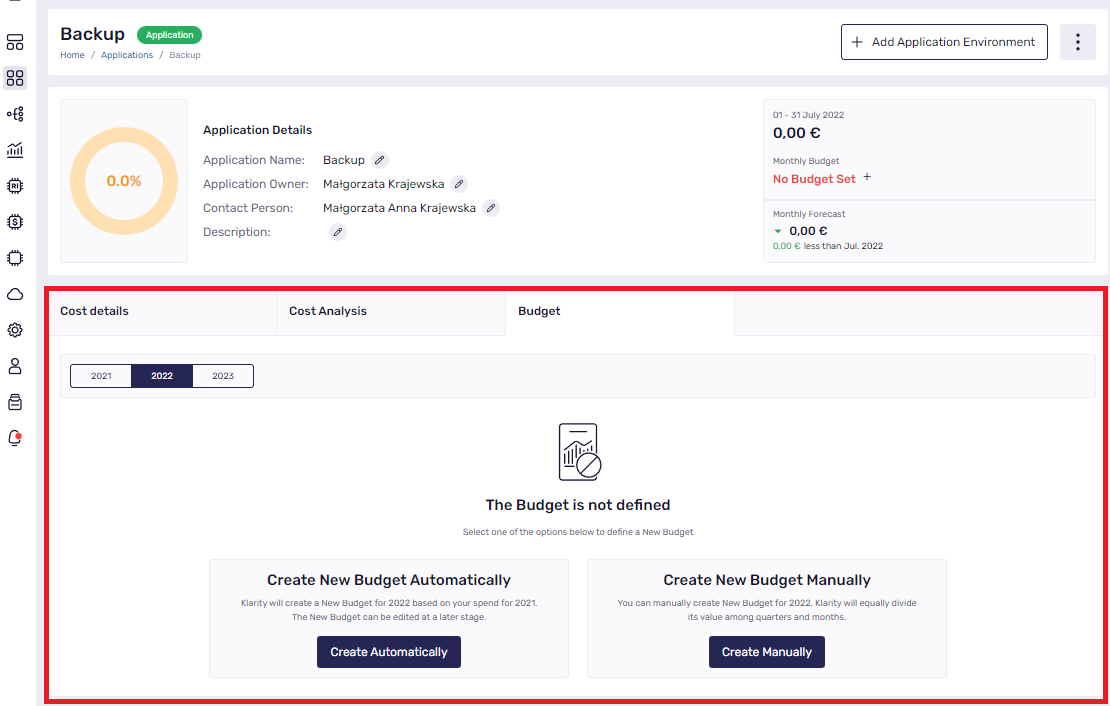
Create a Budget Manually: Enter the expected yearly Budget (the value will be divided equally into 12 months).
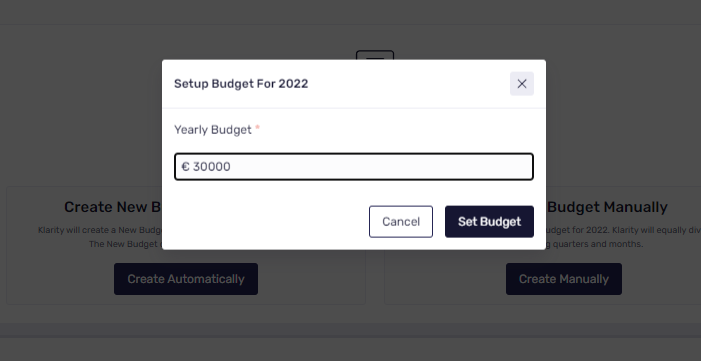
Create Budget Automatically: There are several ways Klarity calculates budgets automatically.
- The values of your budget will be created based on the costs available in Klarity for the current year. If you don't have values for the whole year (as the year is not over yet), a linear forecast will be used to fill in the missing months and make a new budget.
- For the previous year: a. Suppose Klarity has data for the entire year. In that case, the previous monthly spend values become the new monthly budget values. b. You have partly billing data (e.g. for the second half of the previous year) and would like to create a new budget. Klarity will use the values from the year's second half to fill in the missing months using an arithmetic mean.
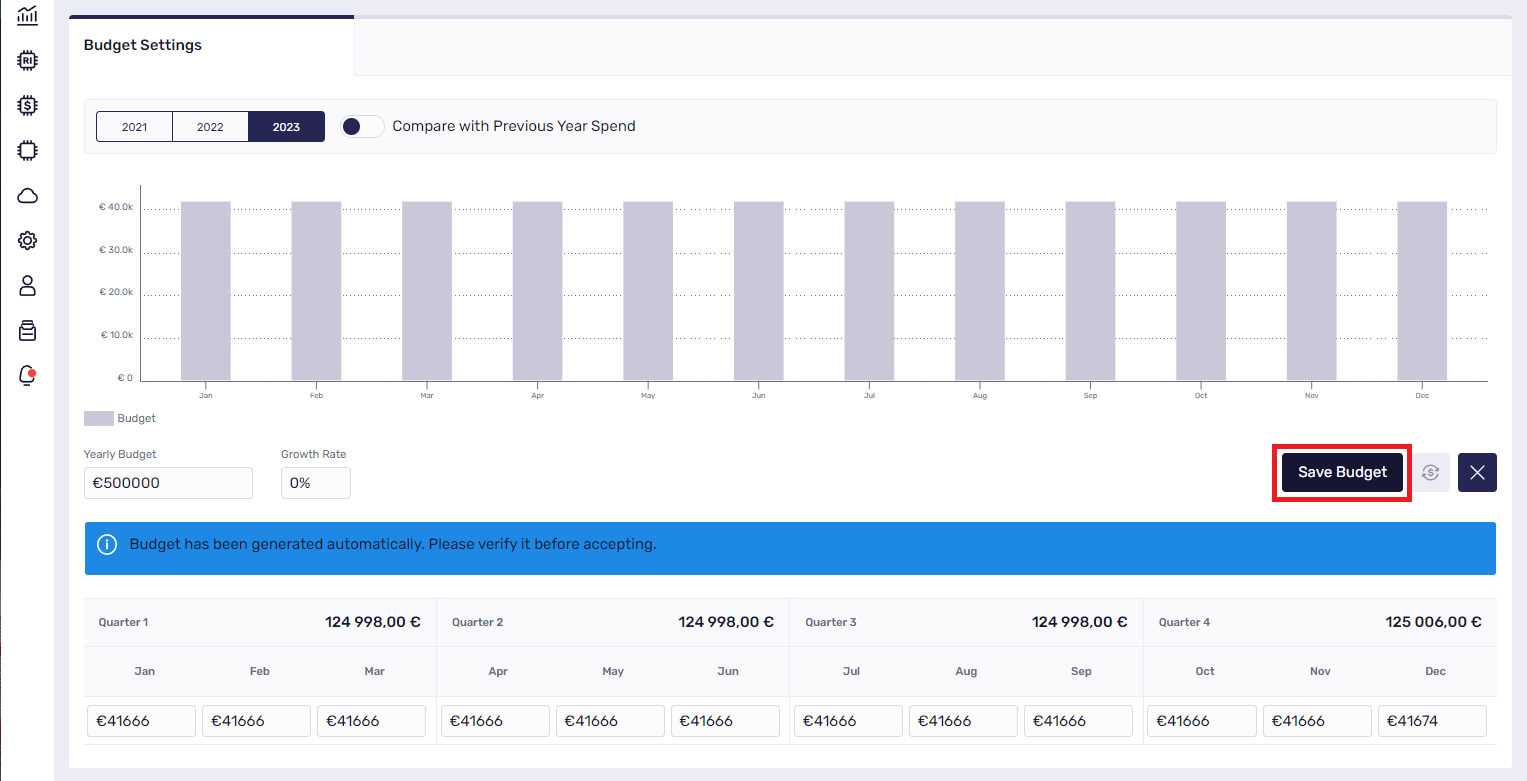
Note: - After generating the budget, it is necessary to verify it (it is possible to modify it), and then approve it.
Edit budget
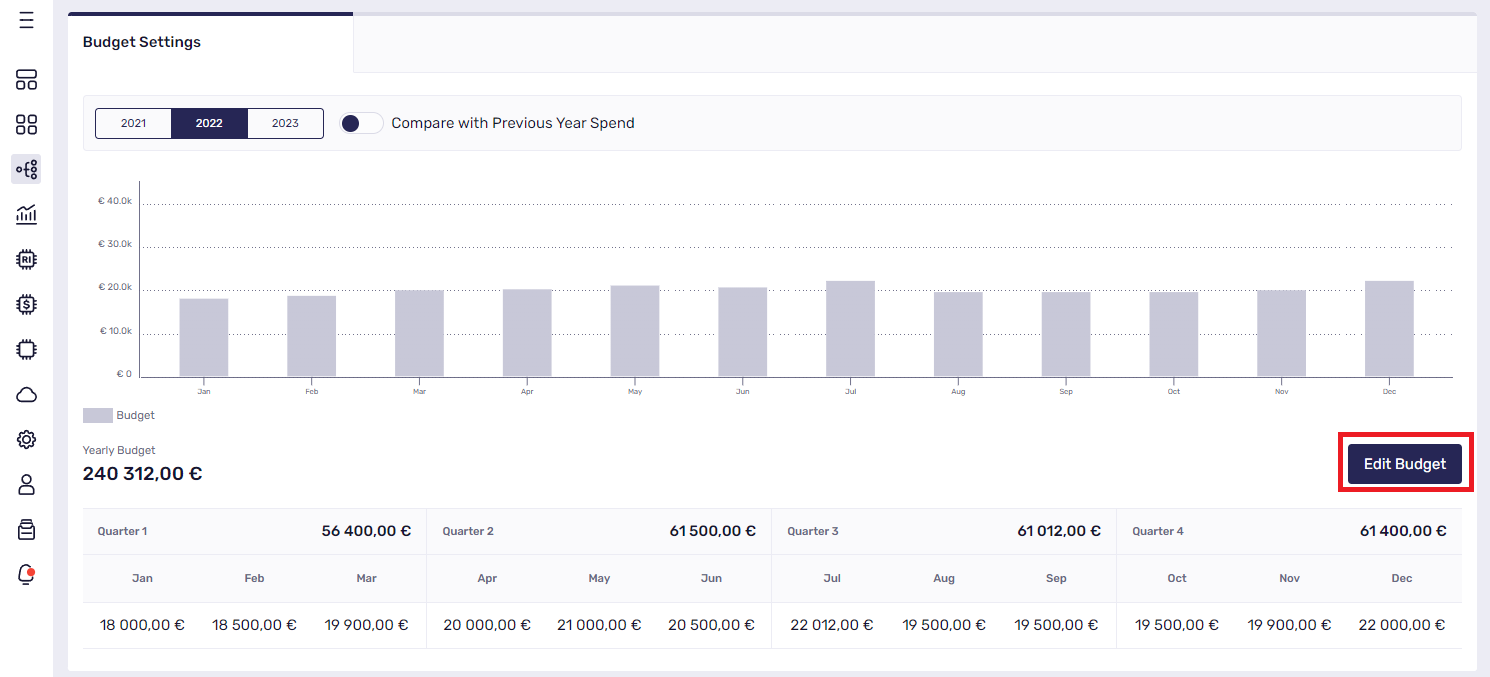
The editing feature is available for each added budget. To enter the budget editing mode, click Edit Budget, and then you can modify it.
Yearly Budget- It is possible to modify the yearly budget after editing, which will proportionally change all values of the monthly budgets (for the selected year).
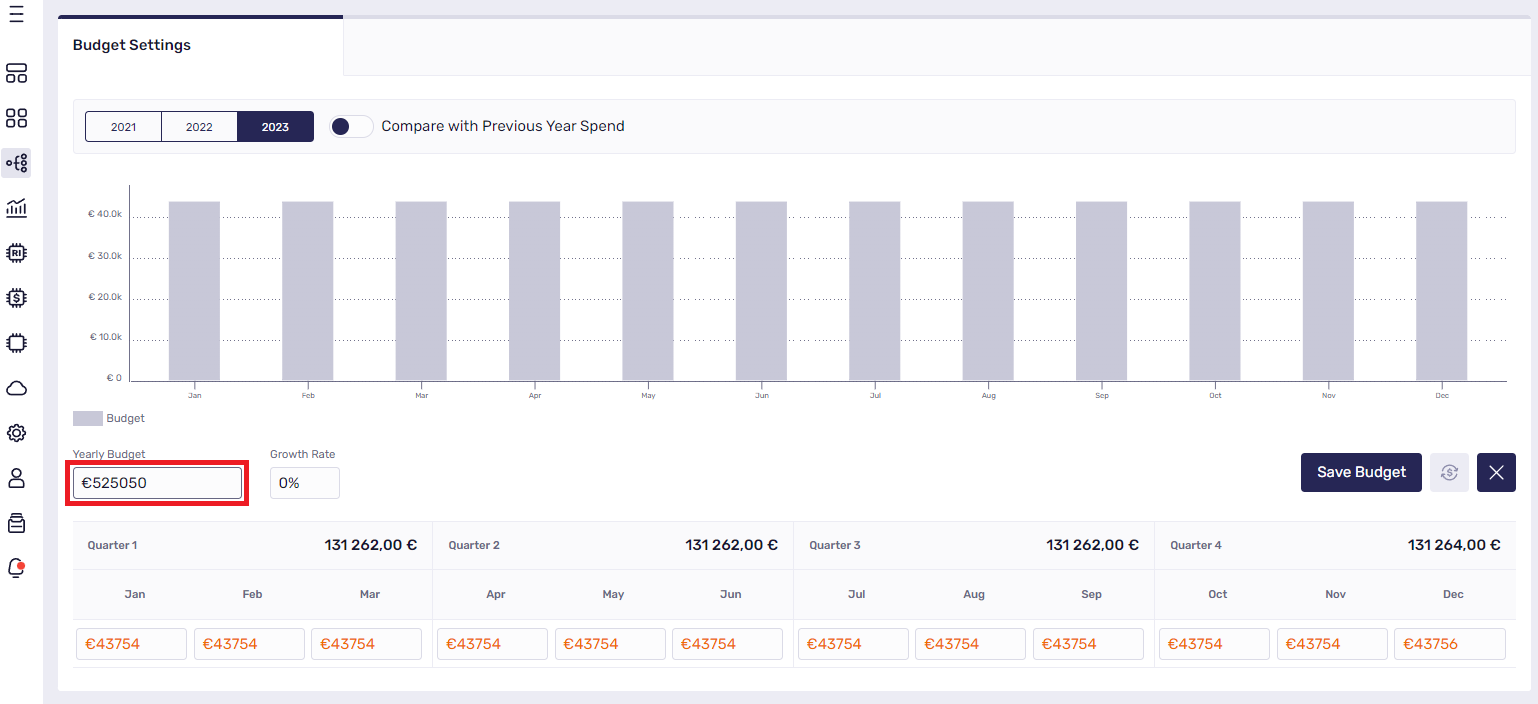
Growth Rate- You can increase and decrease your budget by a certain percentage. For example, if your company decides to increase its budget by 20%, enter 20% in the growth rate, and vice-versa -20% will decrease the budget by 20%. You'll see the yearly budget changed by the growth rate. Then click on apply to Months, which will update the monthly budget values.
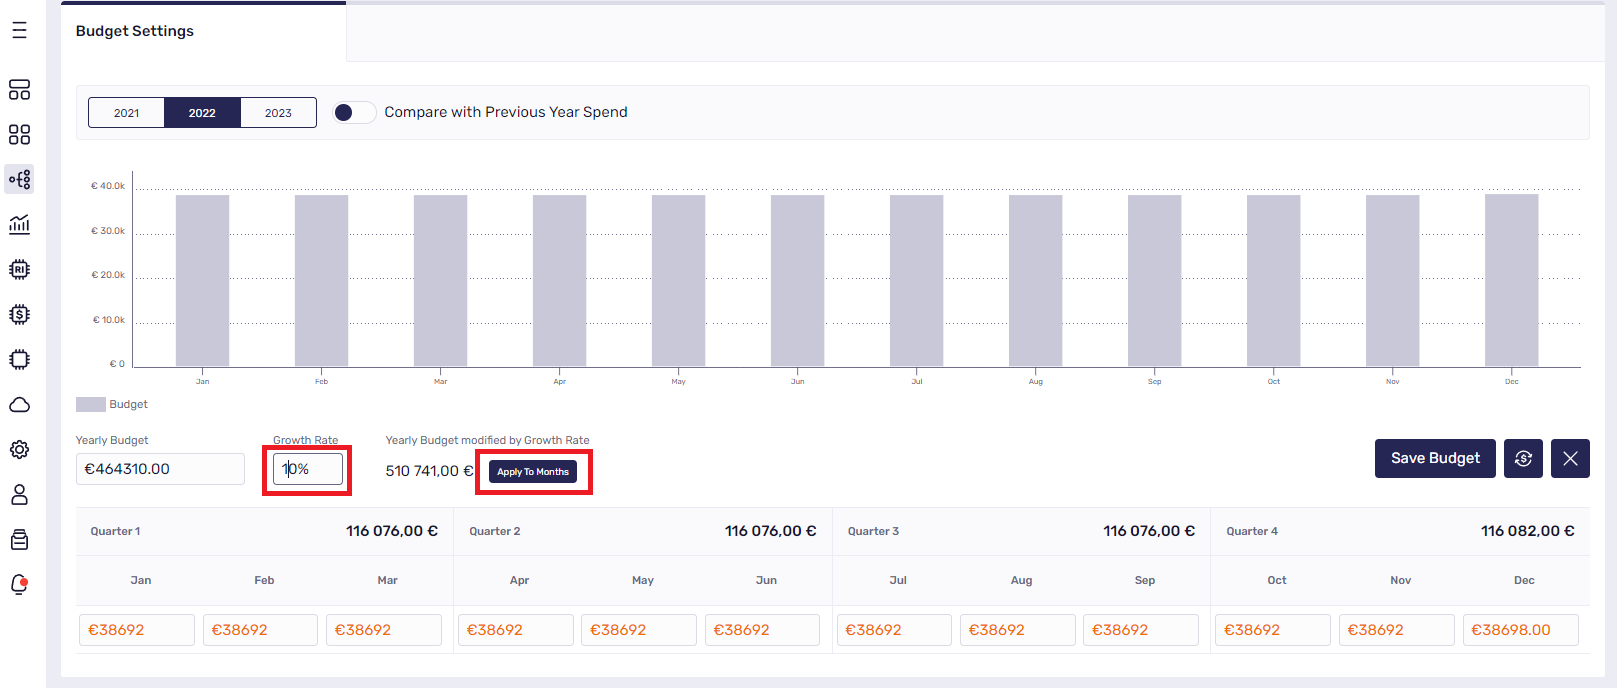
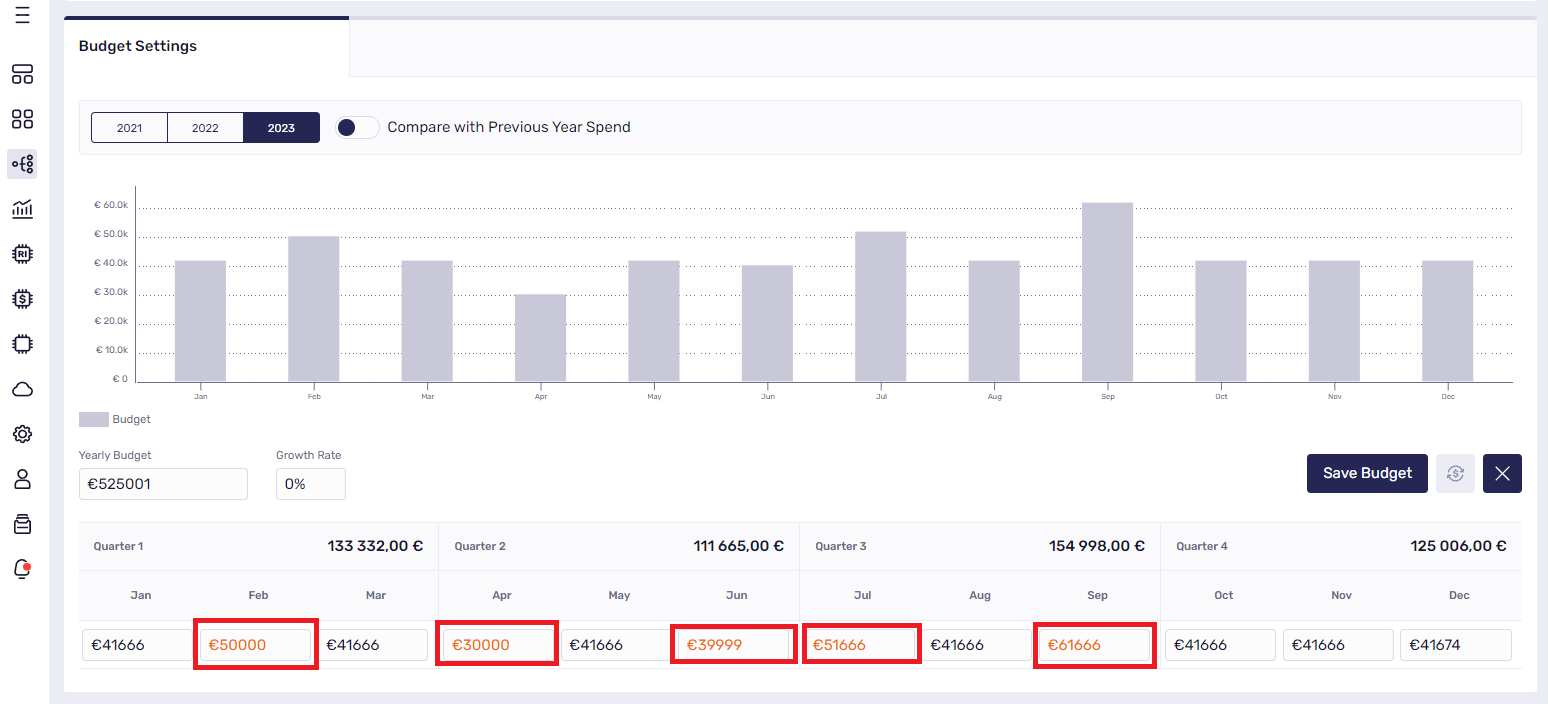
Edit monthly budgets individually- In edit mode, you can modify the monthly budgets, and the quarterly total will be updated automatically.
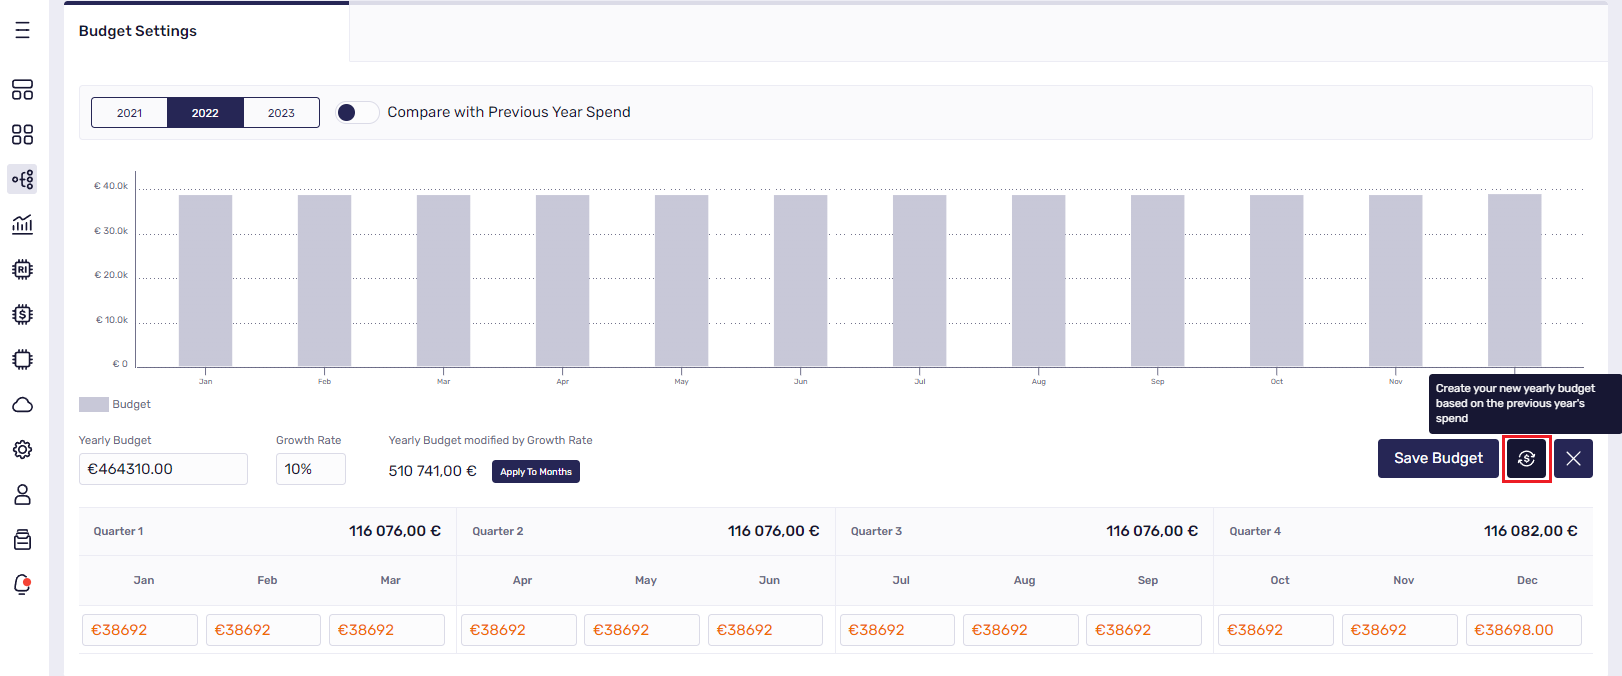
Generate a new budget- create your new yearly budget based on the previous year’s spend. This works the same way asCreate Budget Automatically
Saving the modified budget- To save the modified budget, click on the Save budget button. Then verify the change in the yearly budget before and after the change, and if it is correct, click Save to save the new budget.

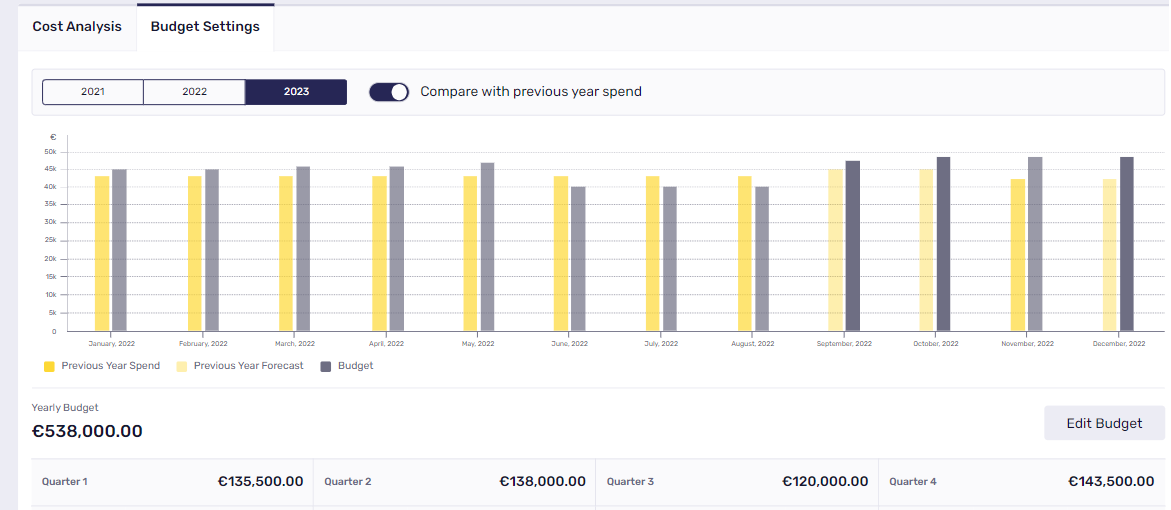
View budget- When it comes to seeing your budgets, Klarity gives you a few options. For previous, current, and future years' you can see the monthly budget values and compare them to last year's spending. In the future year view, when you select "Compare with Previous Year Spend," you will see some of the month's spending as a forecast.
Removing an application
Restrictions
- A user cannot remove an application in the previous billing period.
- A user cannot remove the default application.
- A user cannot remove an application with attached environments (remove environment first).
- To remove an application, go to the application details page.
- Click on the
three-dotbutton (located on the top-right corner), and chooseDelete Application.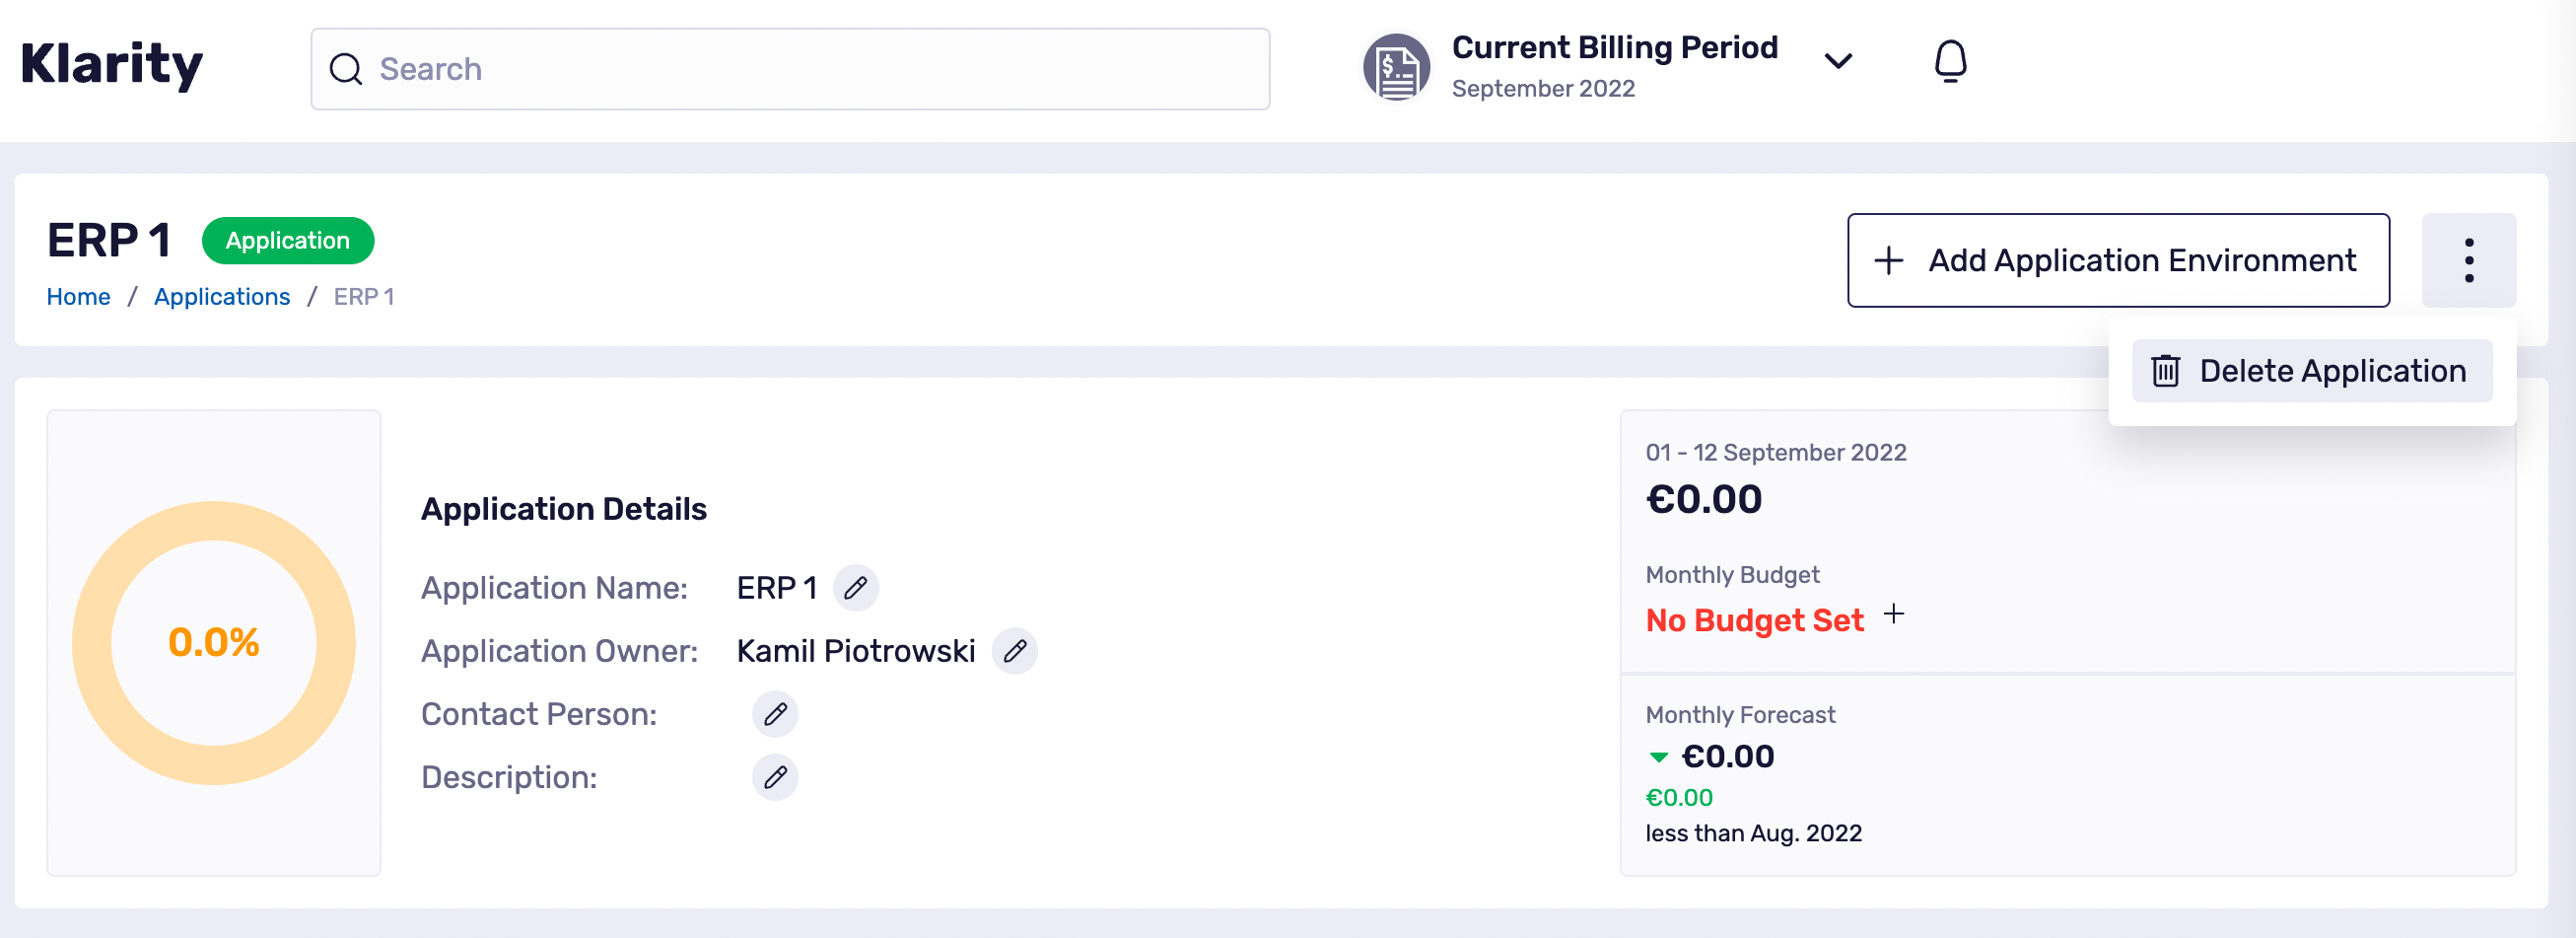
Environments
Adding a new environment
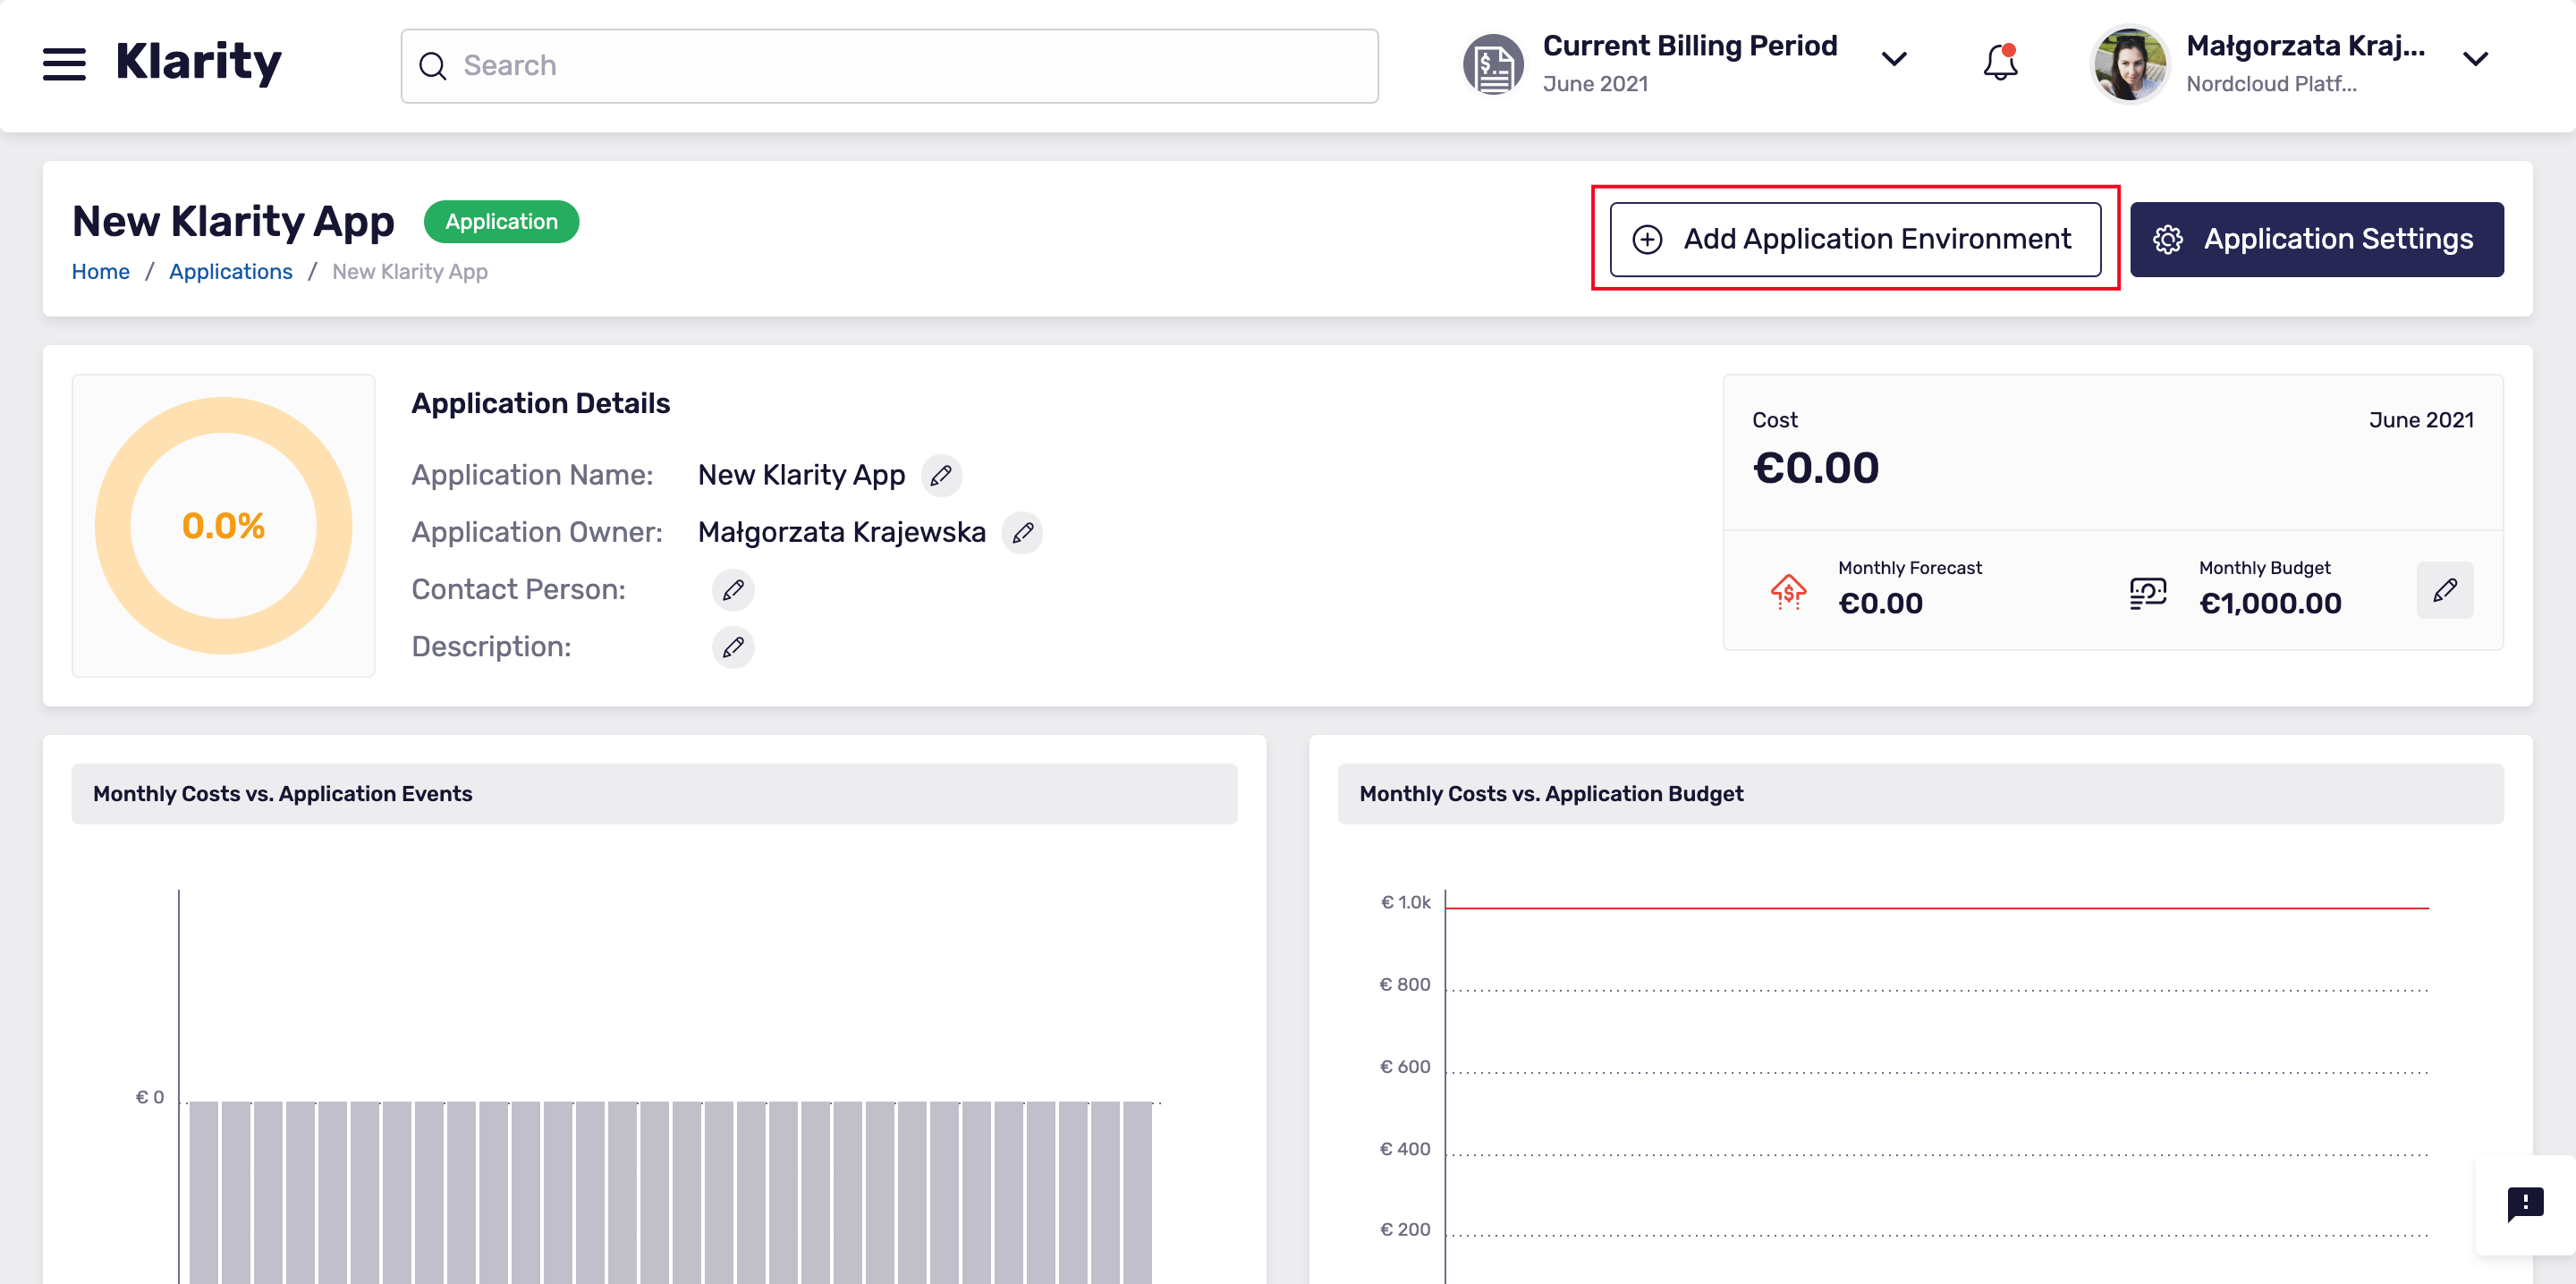
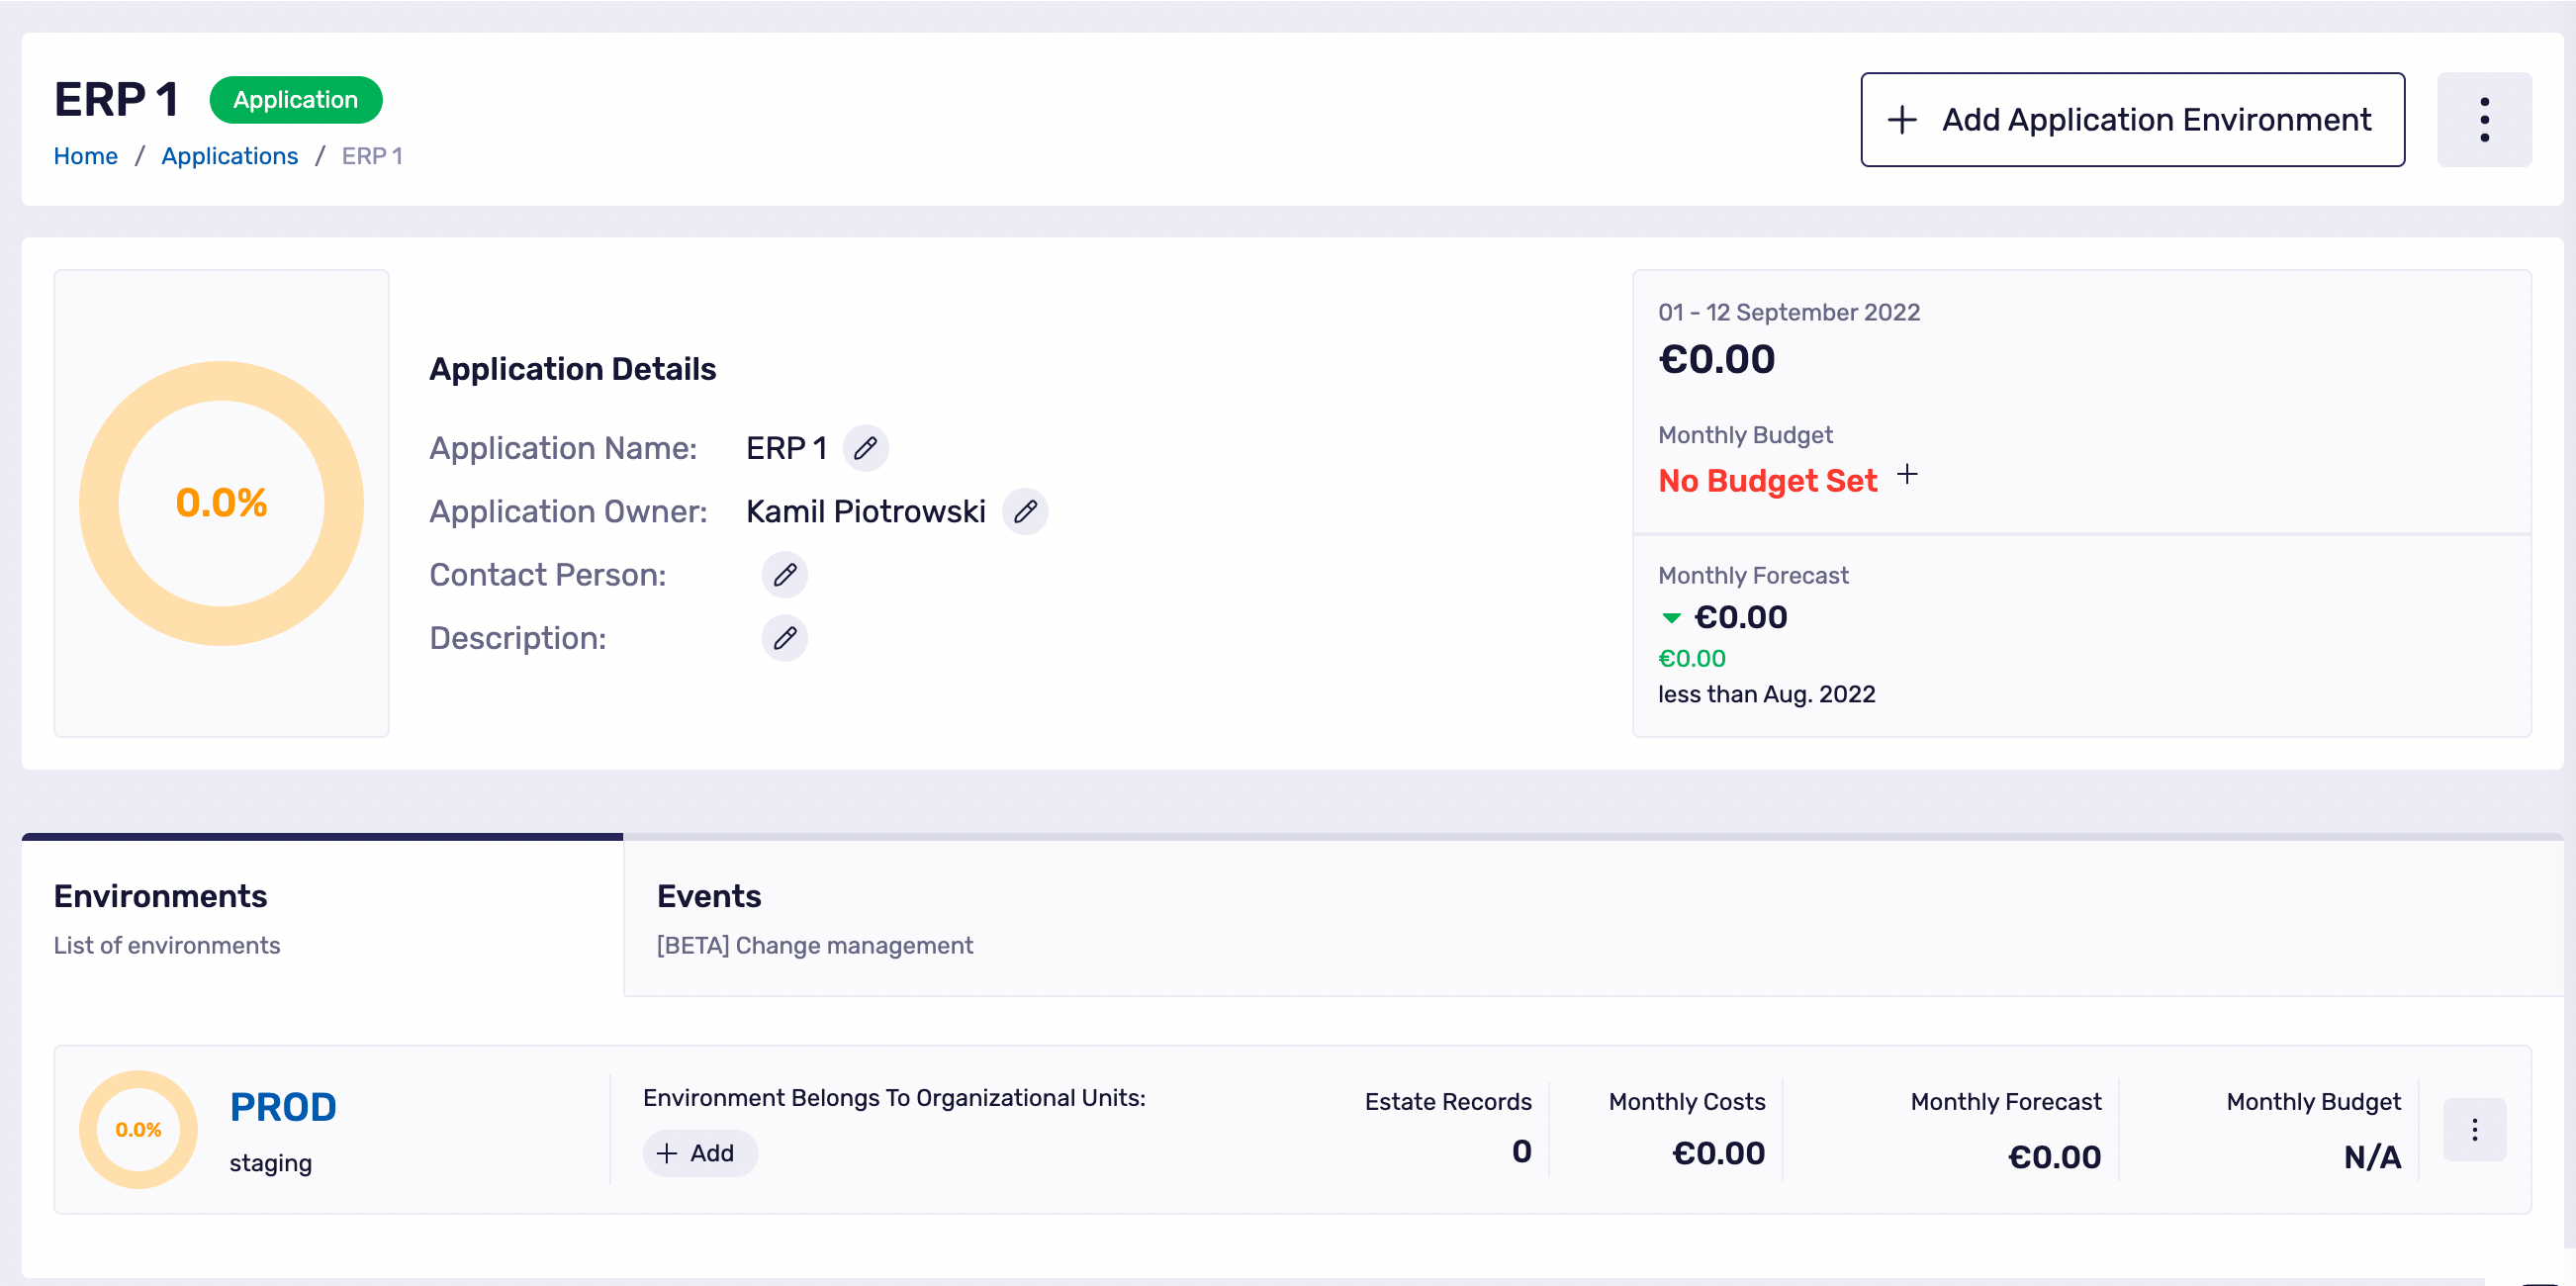
In Klarity, each application can have any number of environments, for example, production, staging, development, etc. You can start adding environments to applications immediately after adding a new application, or you can add an environment to an application that you created in the past. To add an environment, go to the application details view, and click the Add application Environment button:
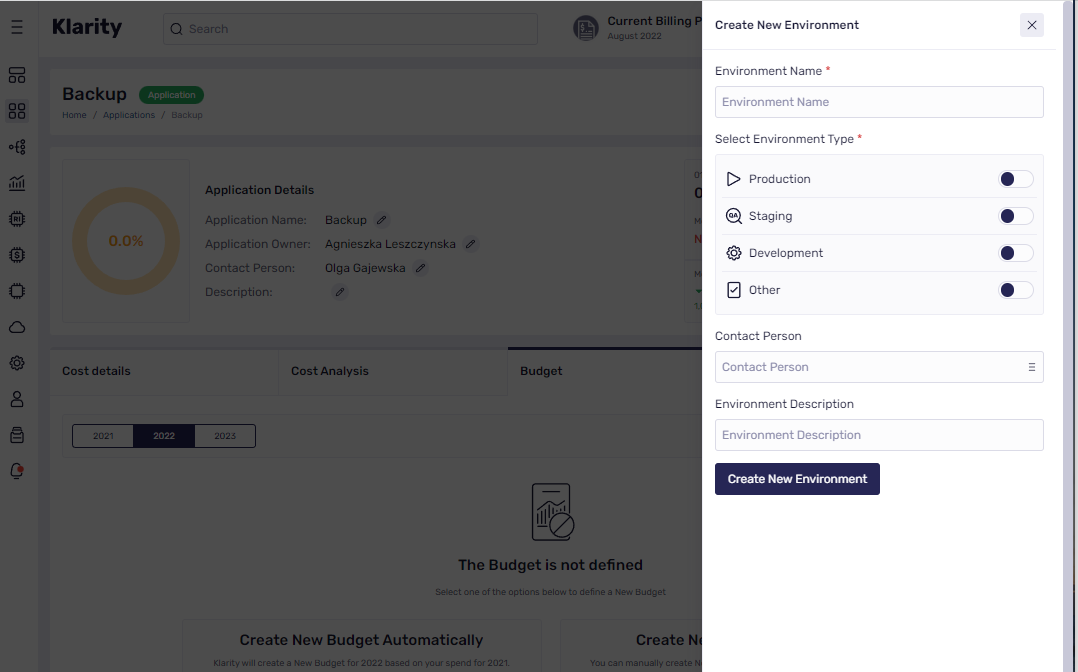
In Create New Environment, define the name, type and other information about your environment:
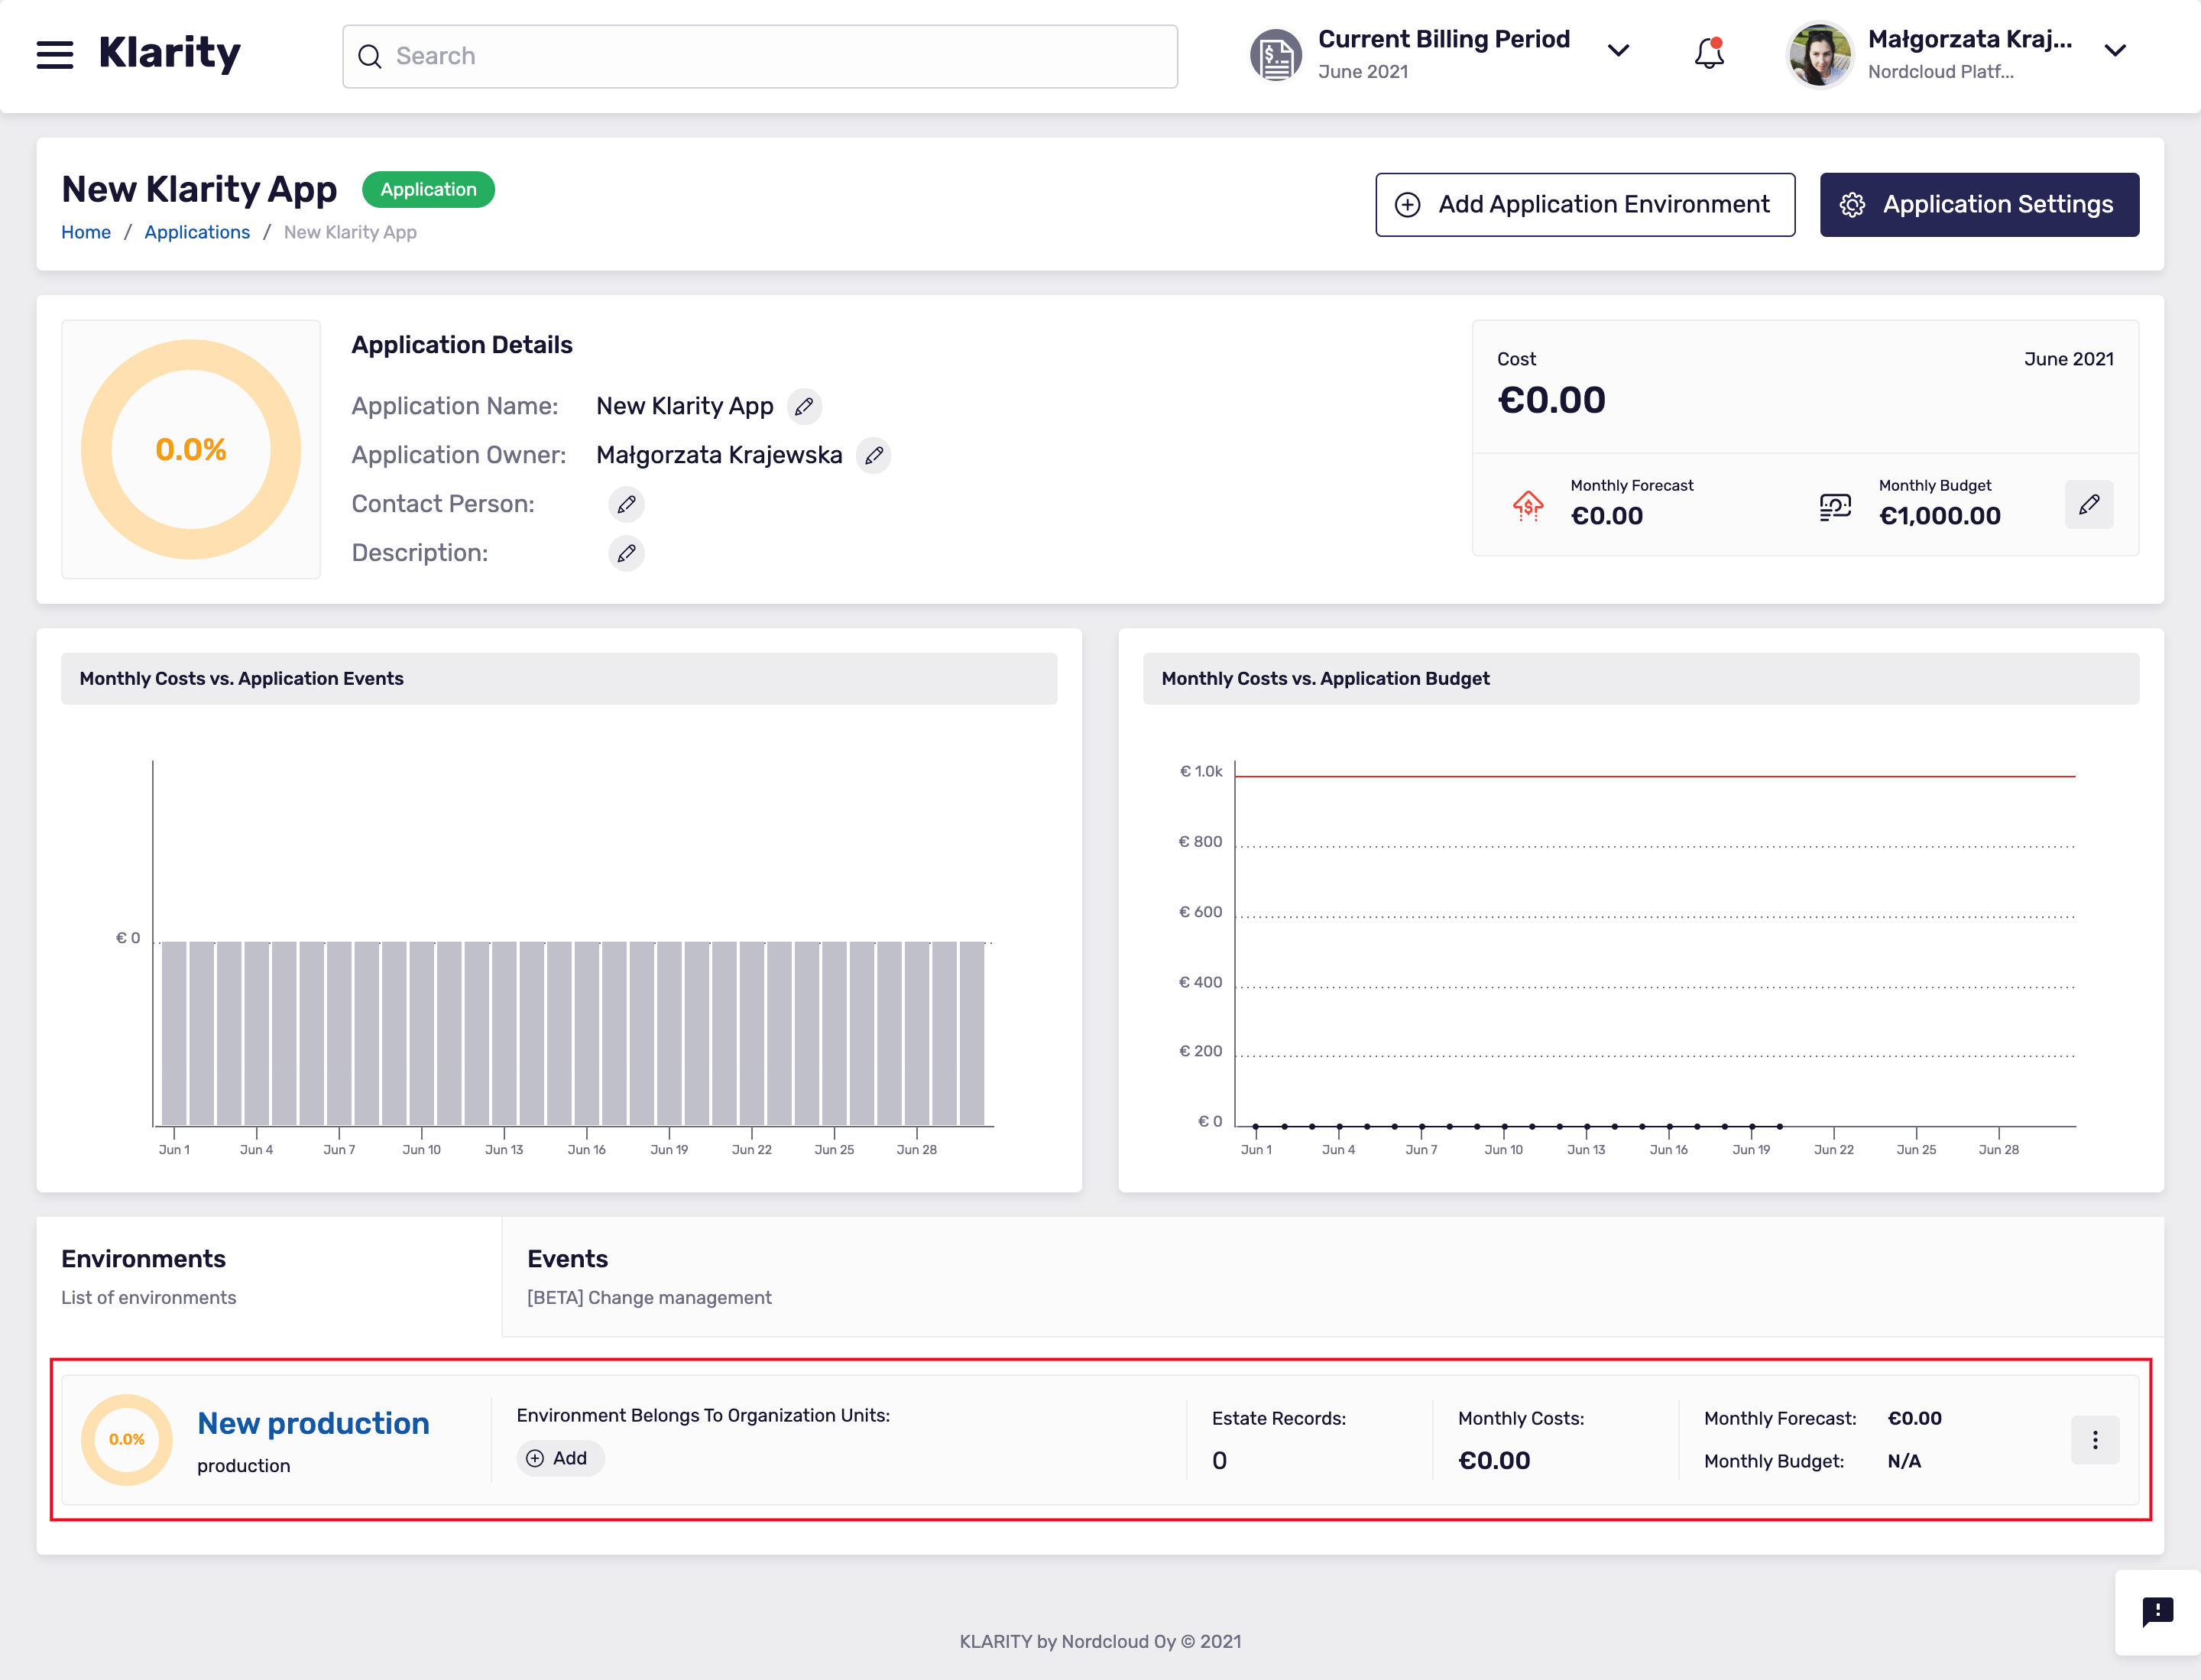
After adding all the correct data correct, the newly created environment appears in your application details view:
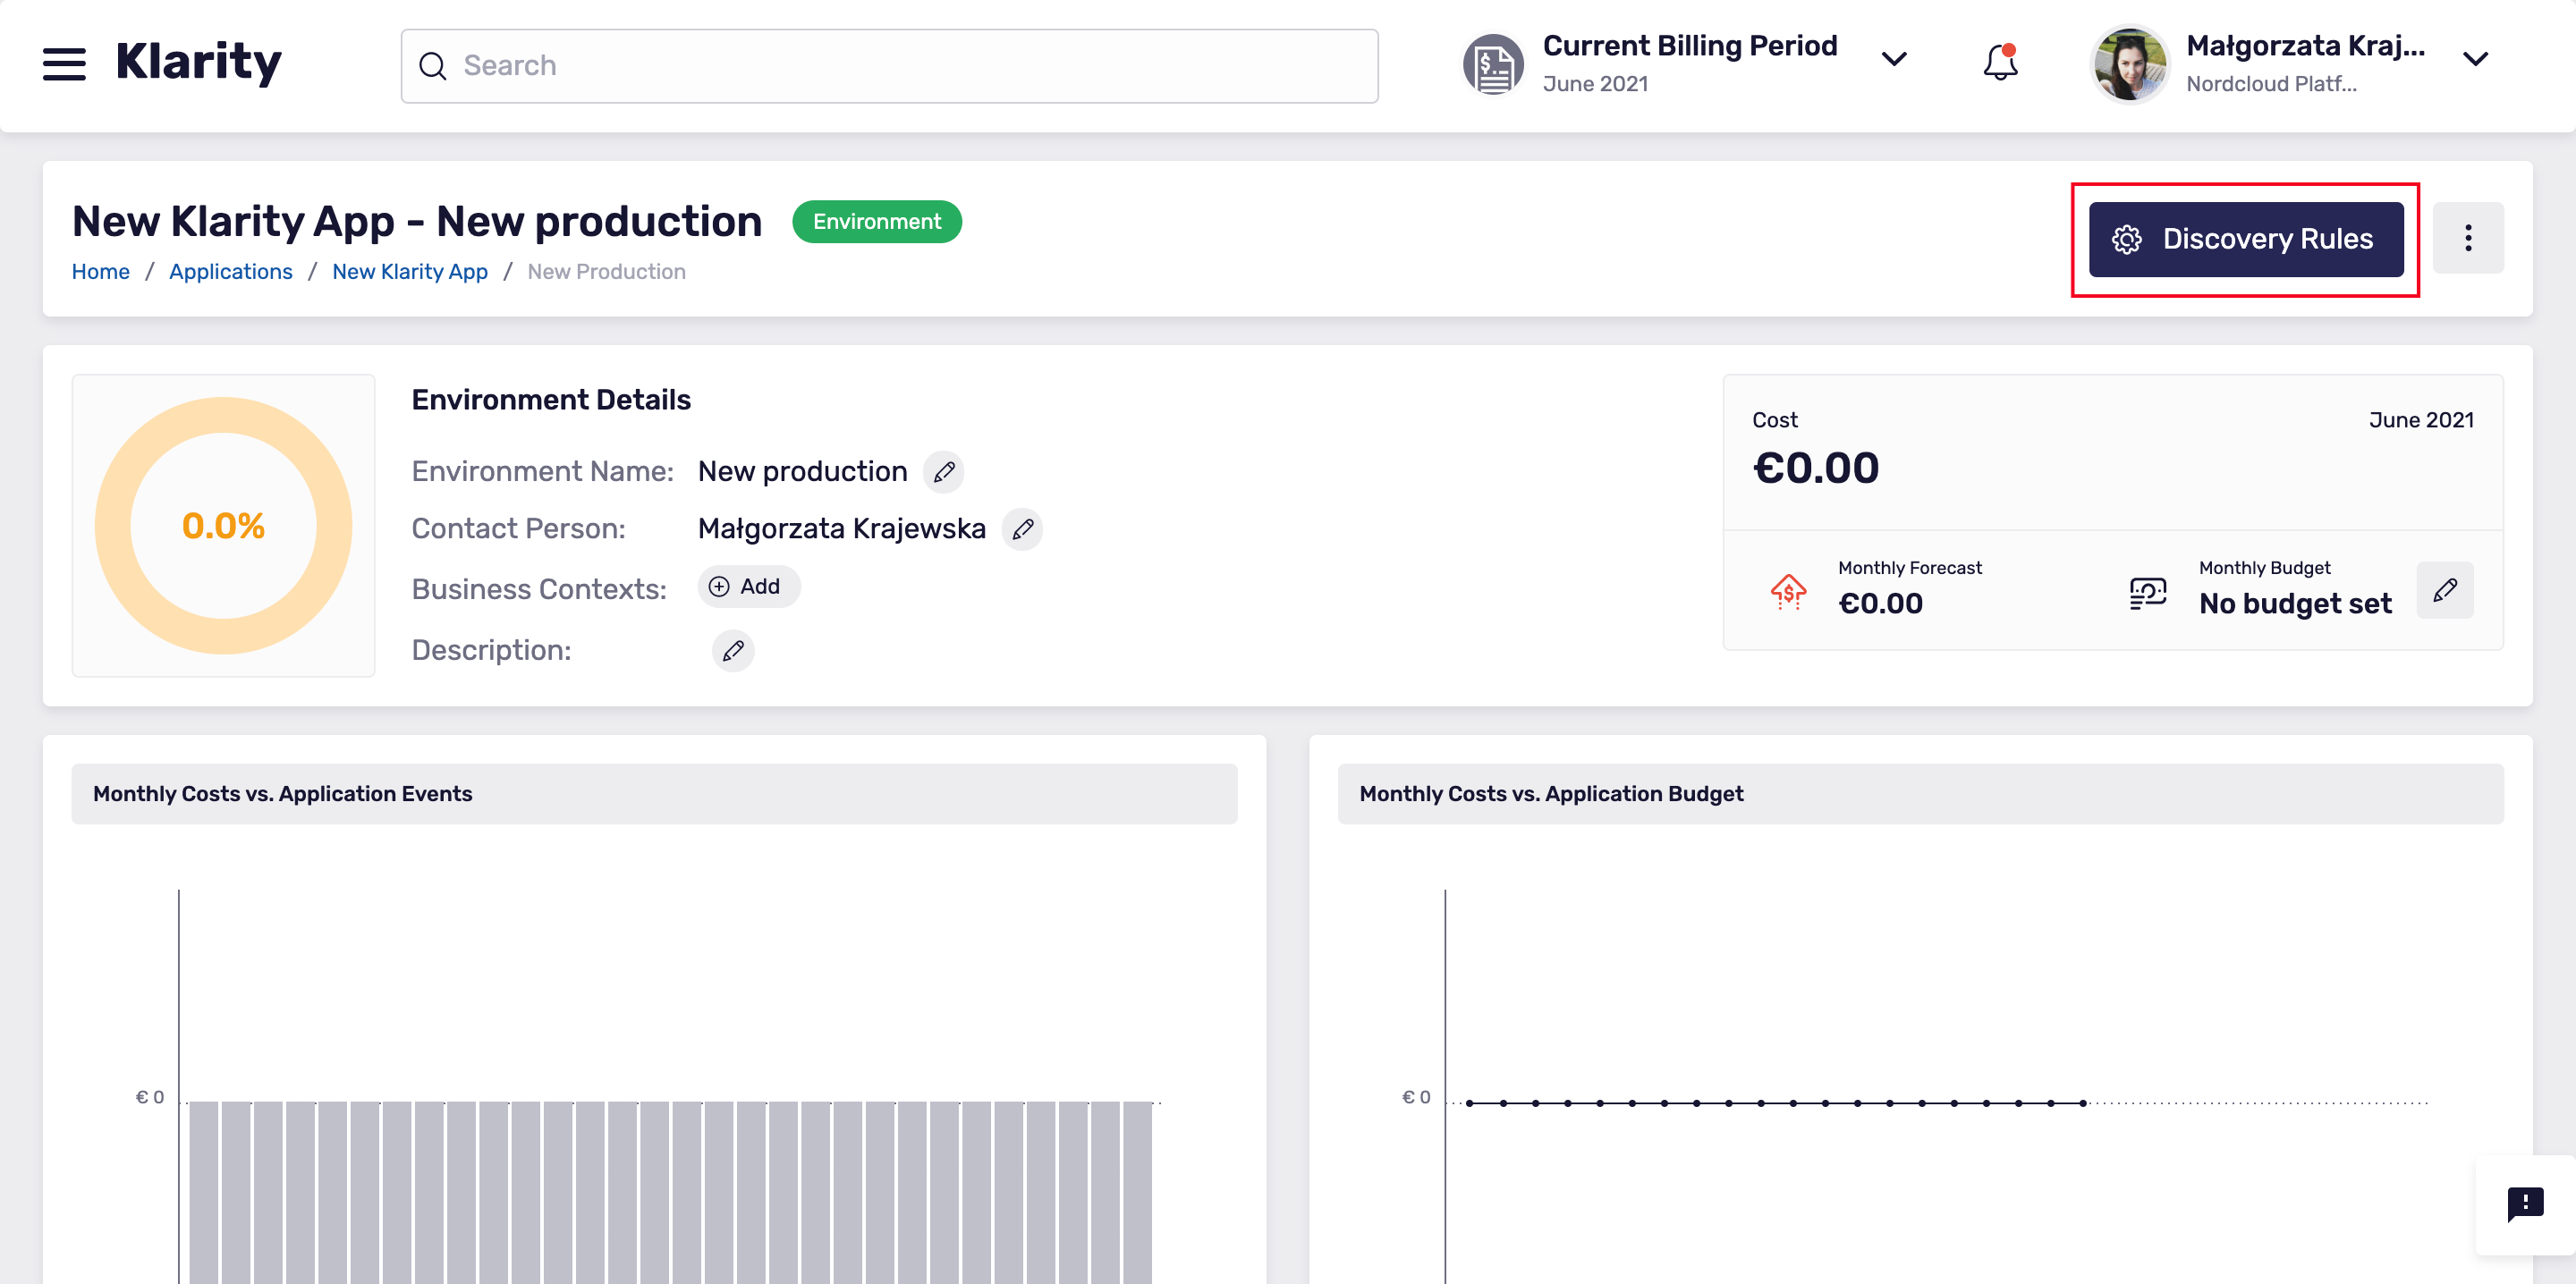
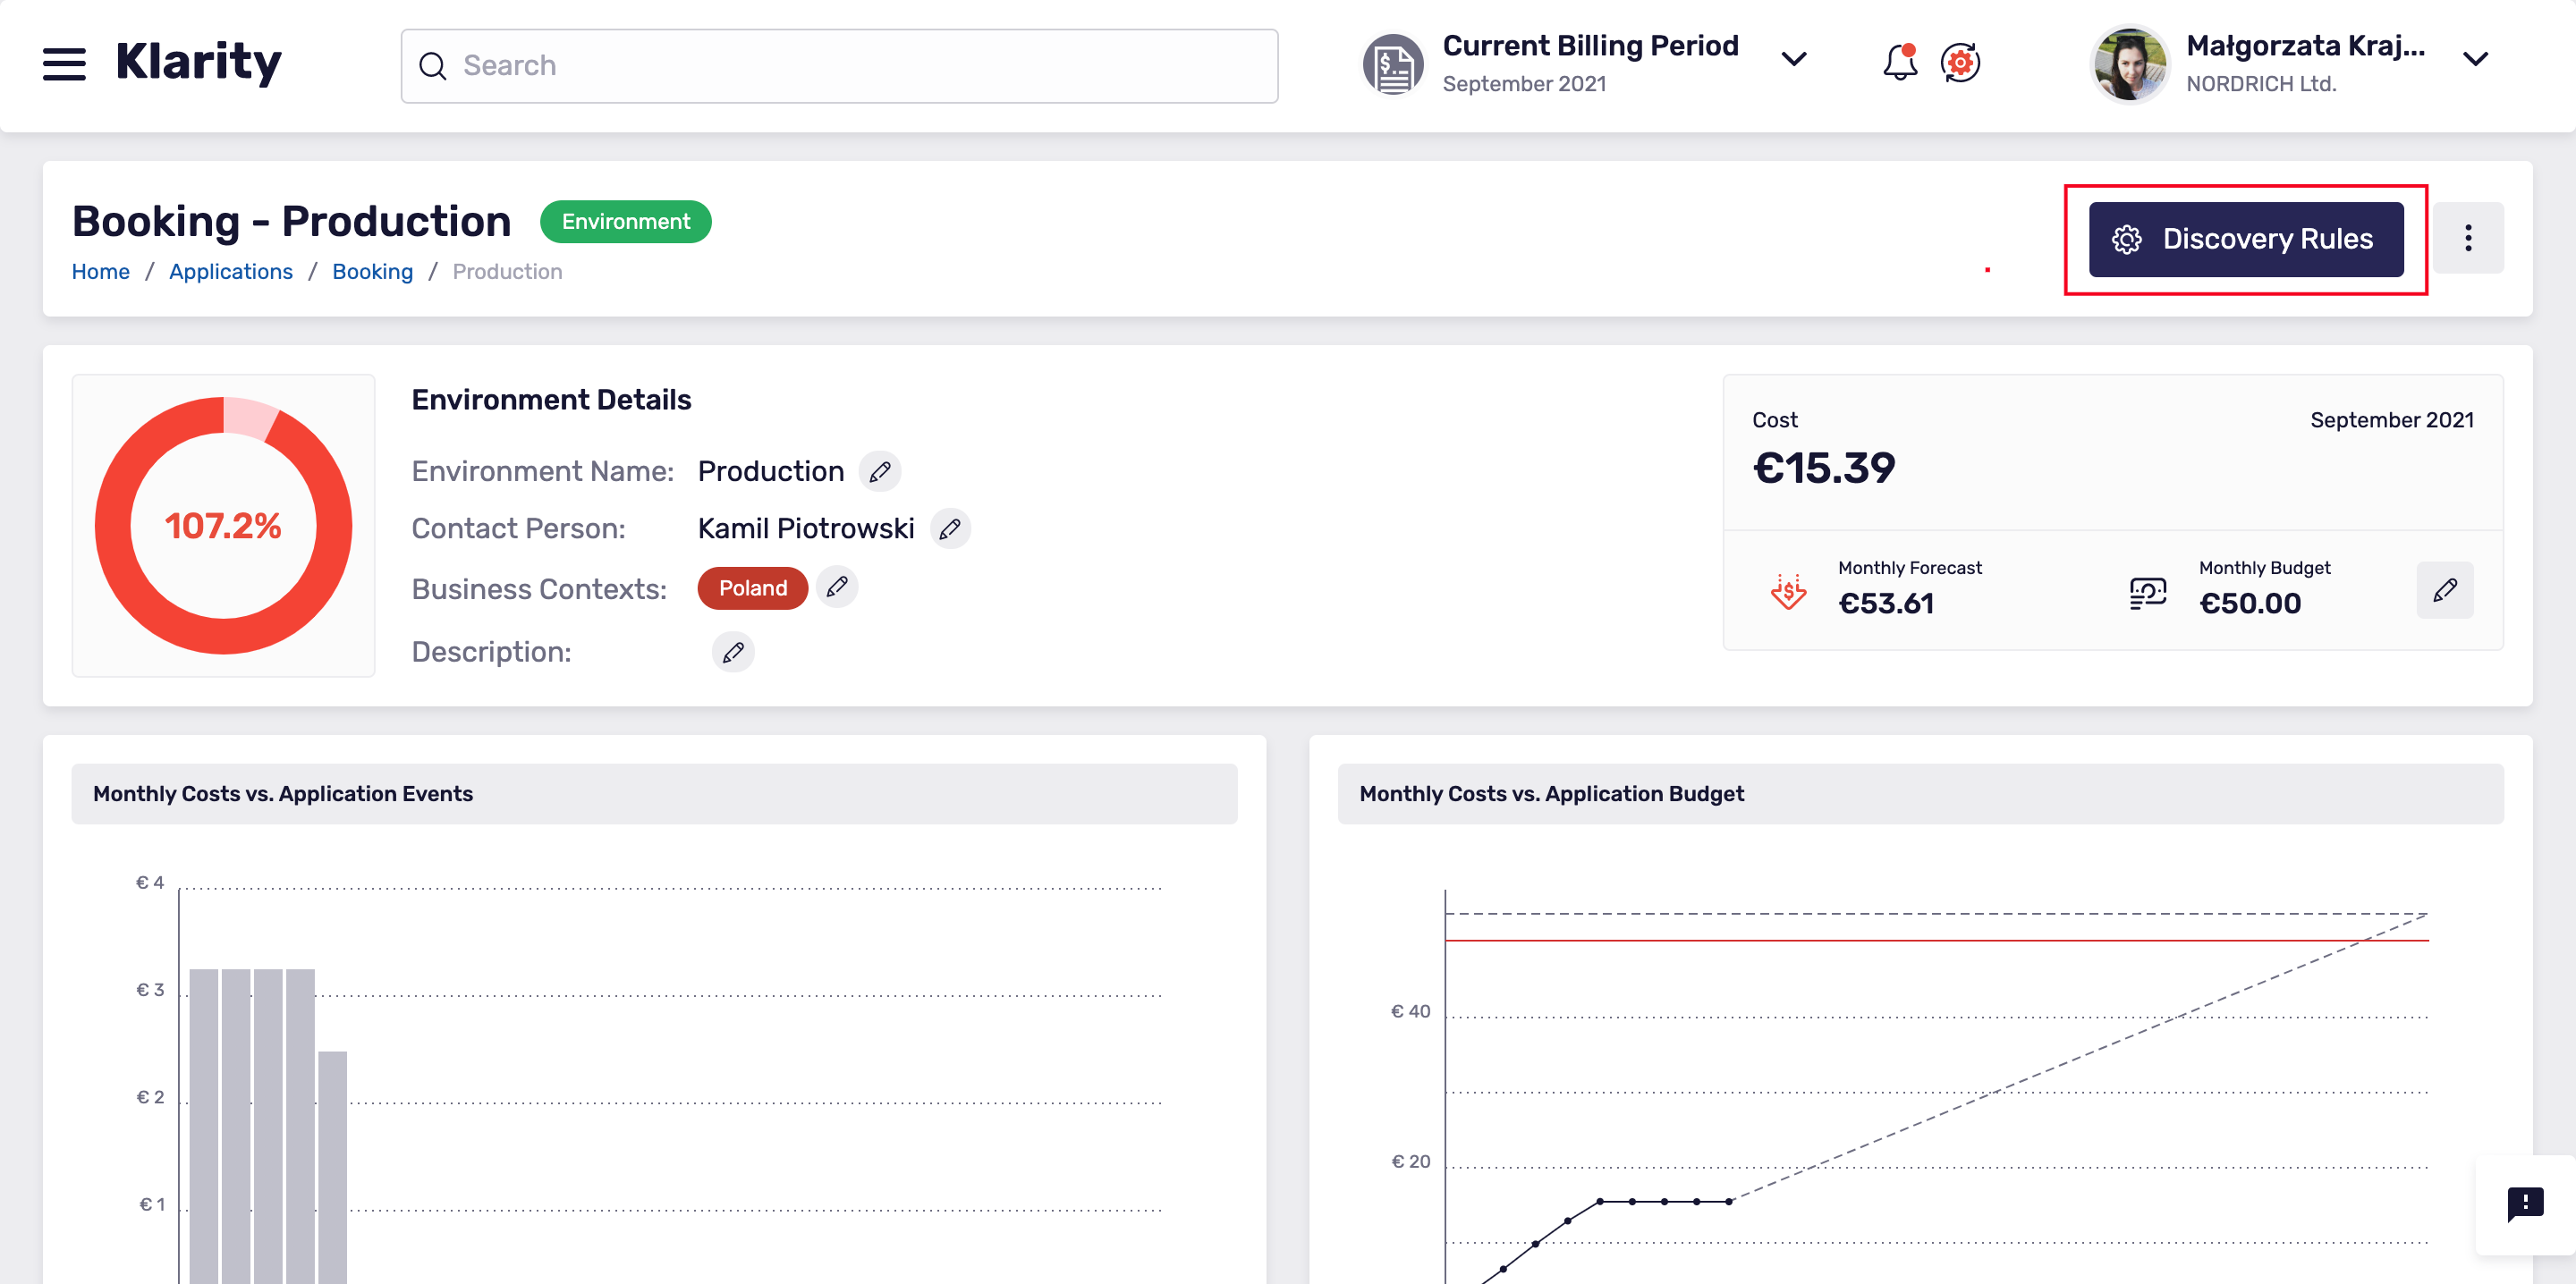
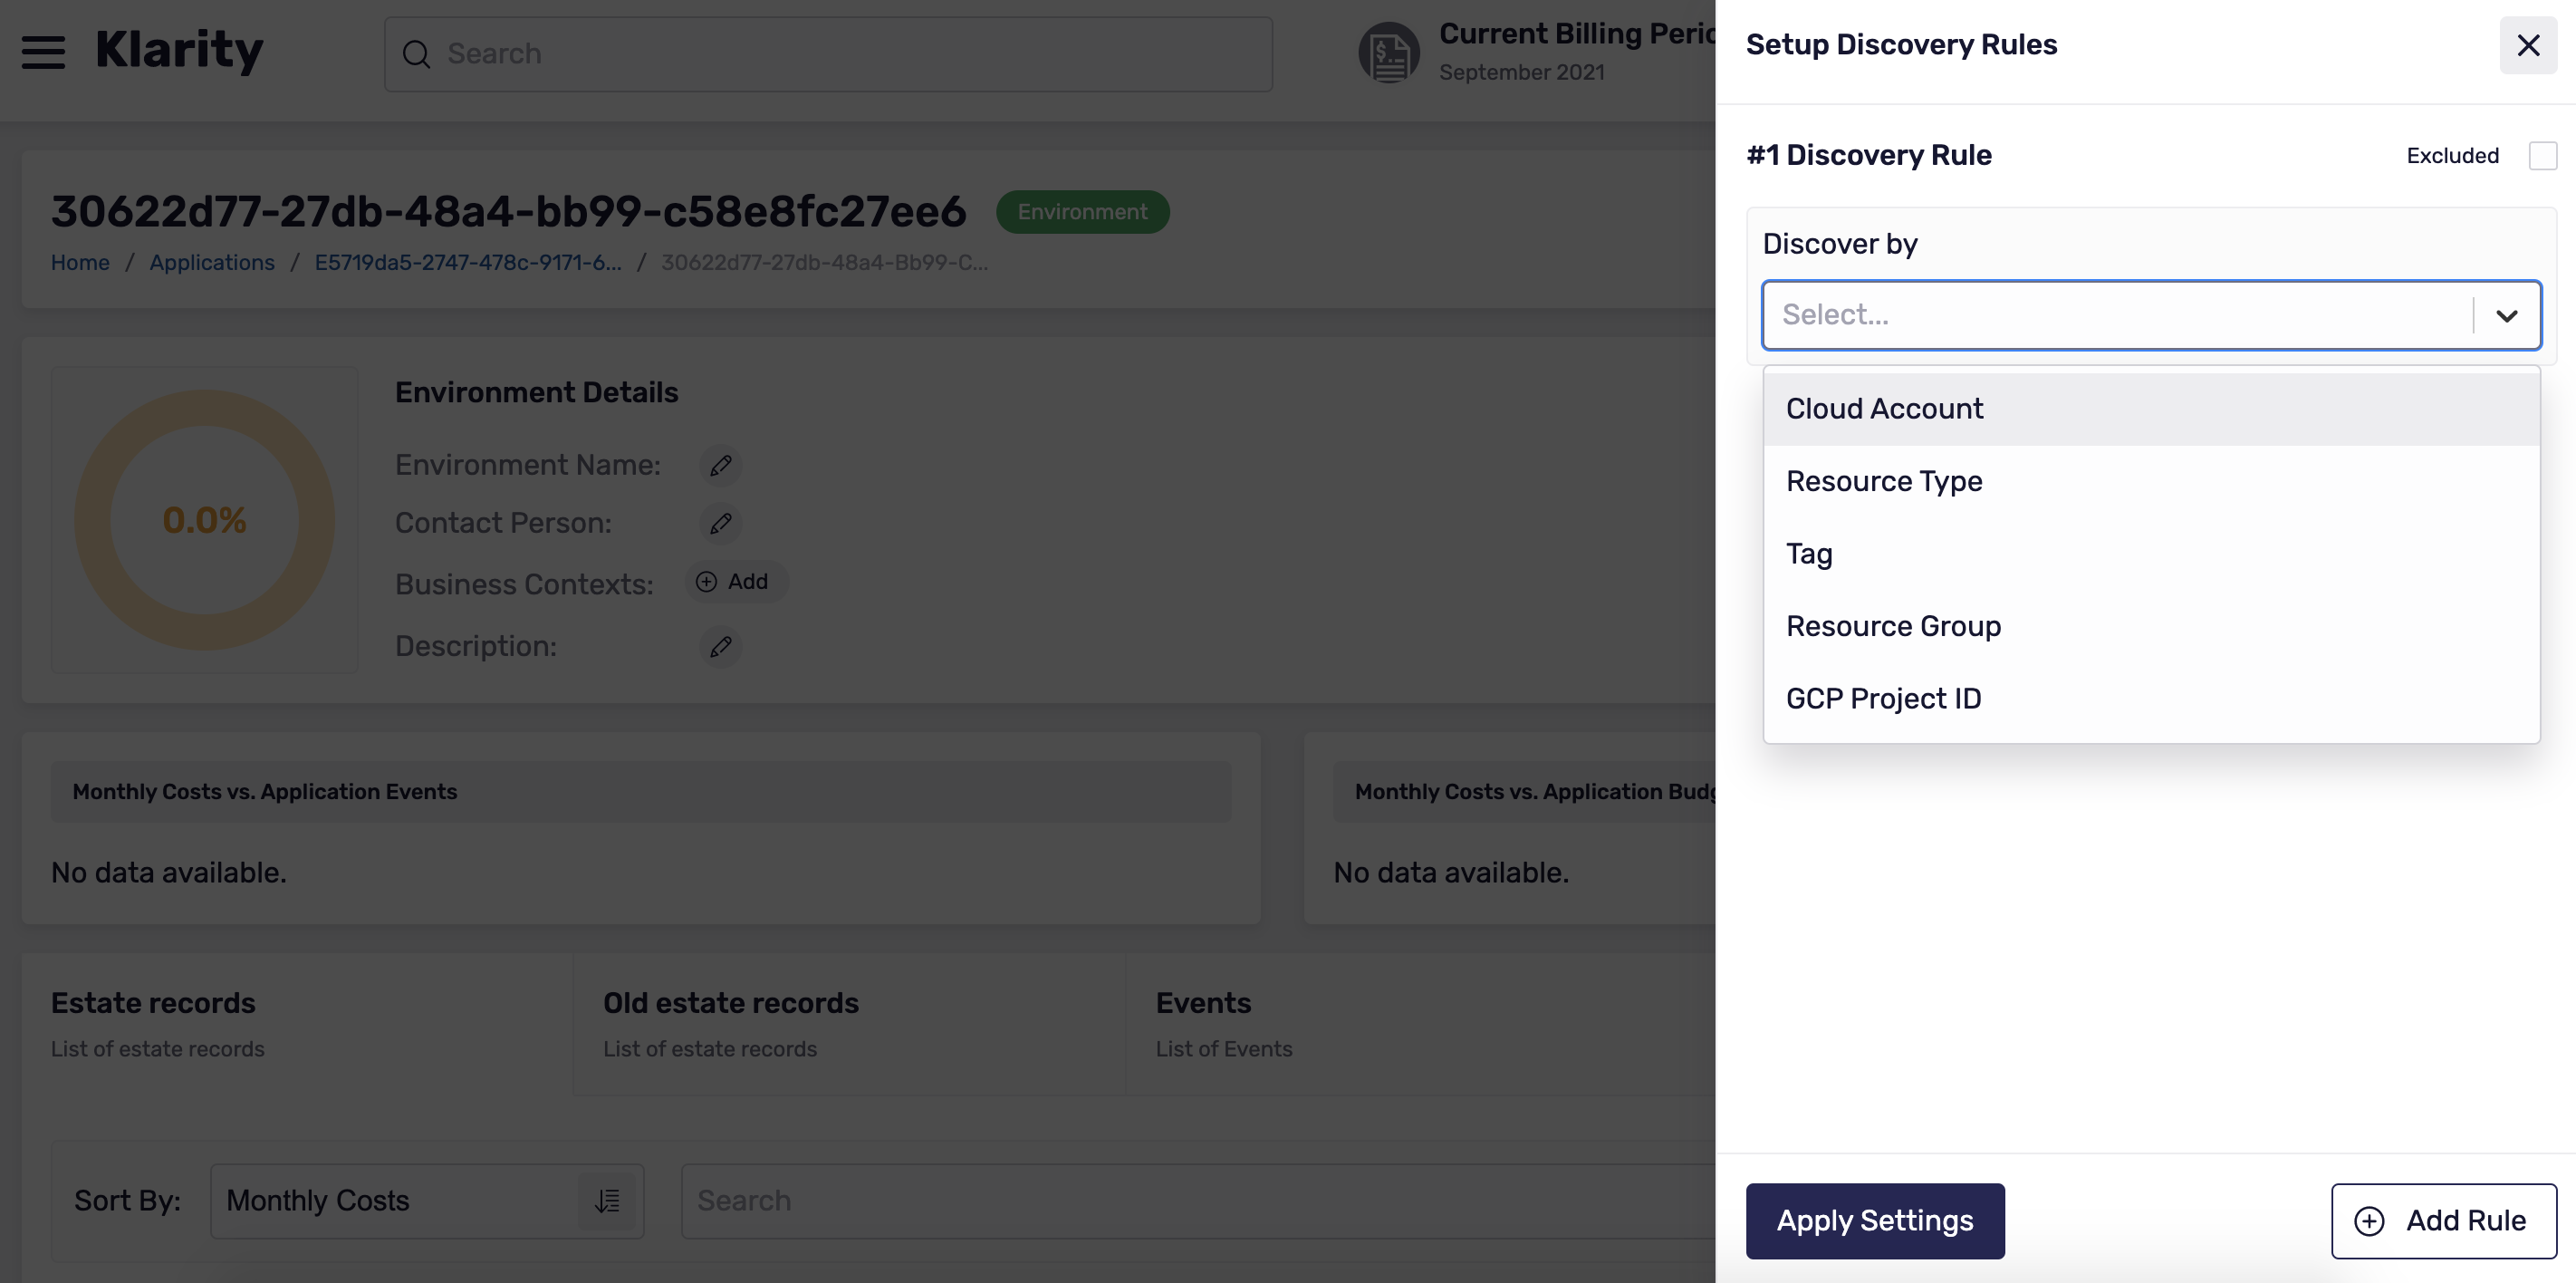
You can go now to the details of the new environment (which right now is empty), and assign your resources (Estate records) there, in accordance with their intended use. Define which resources (Estate records) should be assigned within your environment by clicking the Discovery Rules button:
Environment discovery rules
In your Discovery Rules, you define which resources are assigned to a particular environment.
You set up the discovery rules on the environment level, which means that all resources that match the defined rules are automatically assigned to this environment. Those rules are responsible for automatically discovering what should be in this particular environment.
During the scanning process, in the first place, Klarity tries to match discovery rules on the environment level but, if the system finds no matches at this level, Klarity scans again using Mapping Rules at the global level.
In the Discovery rules builder, you can choose the rule type that meets your needs, and set up this rule for a particular environment:
Environment budget
Intro
In Klarity, you can easily manage and track your budget at the environments level for the current, past, and upcoming years. Klarity gives you budget recommendations based on your past spending. The budget feature is available in every environment.
Creating a budget
To add a budget, you need select one of two options:
Create a Budget Manually: Enter the expected yearly Budget (the value will be divided equally into 12 months).
Create Budget Automatically: There are several ways Klarity calculates budgets automatically.
- The values of your budget will be created based on the costs available in Klarity for the current year. If you don't have values for the whole year (as the year is not over yet), a linear forecast will be used to fill in the missing months and make a new budget.
- For the previous year: a. Suppose Klarity has data for the entire year. In that case, the previous monthly spend values become the new monthly budget values. b. You have partly billing data (e.g. for the second half of the previous year) and would like to create a new budget. Klarity will use the values from the year's second half to fill in the missing months using an arithmetic mean.
Note: - After generating the budget, it is necessary to verify it (it is possible to modify it), and then approve it.
Edit budget
The editing feature is available for each added budget. To enter the budget editing mode, click Edit Budget, and then you can modify it.
Yearly Budget- It is possible to modify the yearly budget after editing, which will proportionally change all values of the monthly budgets (for the selected year).
Growth Rate- You can increase and decrease your budget by a certain percentage. For example, if your company decides to increase its budget by 20%, enter 20% in the growth rate, and vice-versa -20% will decrease the budget by 20%. You'll see the yearly budget changed by the growth rate. Then click on apply to Months, which will update the monthly budget values.
Edit monthly budgets individually- In edit mode, you can modify the monthly budgets, and the quarterly total will be updated automatically.
Generate a new budget- create your new yearly budget based on the previous year’s spend. This works the same way asCreate Budget Automatically
Saving the modified budget- To save the modified budget, click on the Save budget button. Then verify the change in the yearly budget before and after the change, and if it is correct, click Save to save the new budget.
View budget- When it comes to seeing your budgets, Klarity gives you a few options. For previous, current, and future years' you can see the monthly budget values and compare them to last year's spending. In the future year view, when you select "Compare with Previous Year Spend," you will see some of the month's spending as a forecast.
Removing an environment
Restrictions
- A user cannot remove an environment in the previous billing period.
- A user cannot remove the default environment in default application.
- A user cannot remove an environment which contains estate records.
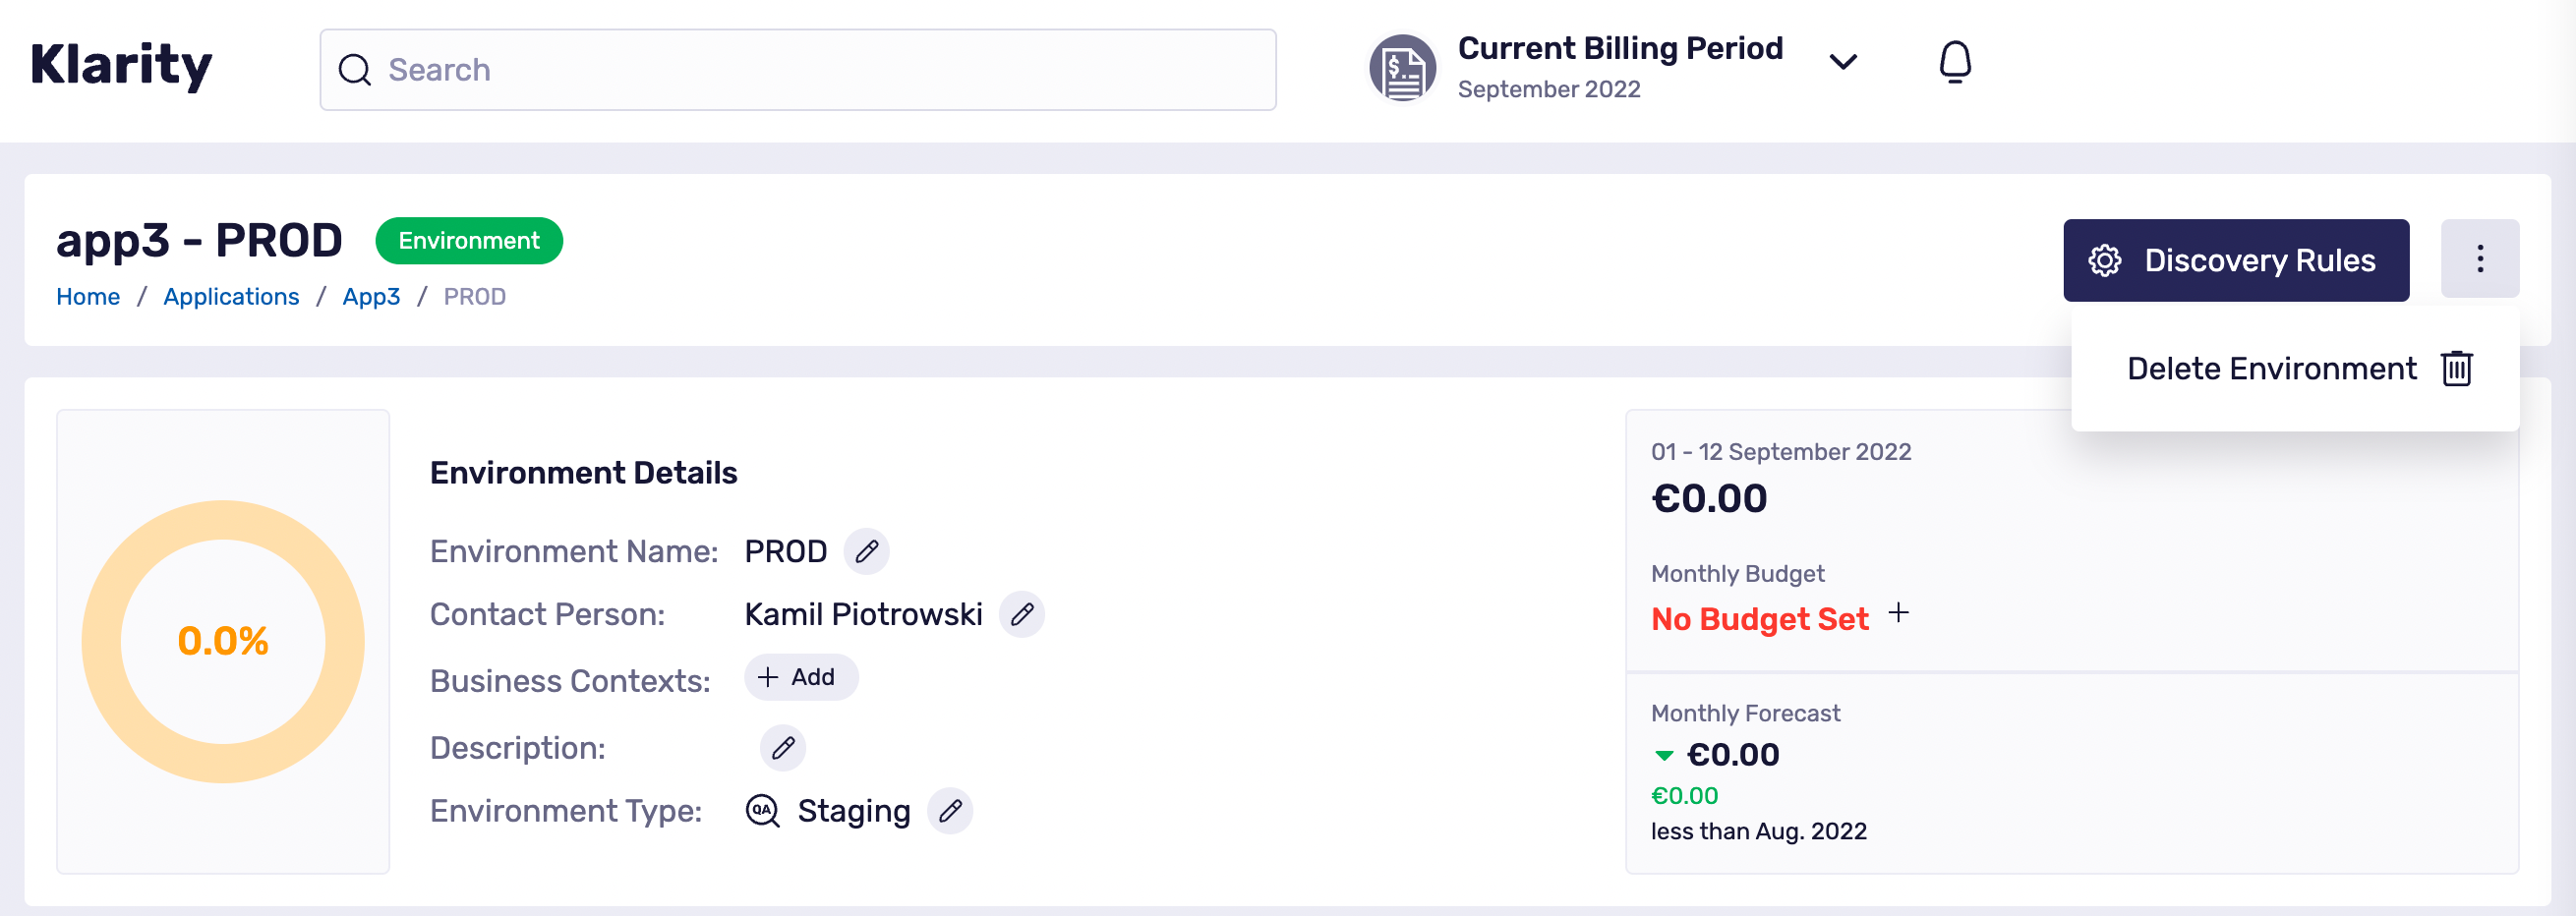
- To remove an environment, go to the application details page.
- To see the list of environments, scroll down to the bottom, then click on the environment you want to remove.
- In the environment details page, click on the
three-dotbutton (located on the top-right corner), and chooseDelete Environment.