Page Sections
Creating a budget is easy. Staying within that budget, not so much
Setting up a workflow helps departments and lines of business stay within the allocated budget. In addition, this alerts budget owners when the projected spending exceeds their budget.
Consider setting additional workflows that send alerts when overall spending is nearing budget limits. It can help departments track their actual spending compared to the allocated budget and avoid unpleasant surprises at the end of the quarter or year.
On the left menu, click on the Settings tab, then click Workflows. At the bottom, you will see your list of active and inactive workflows.
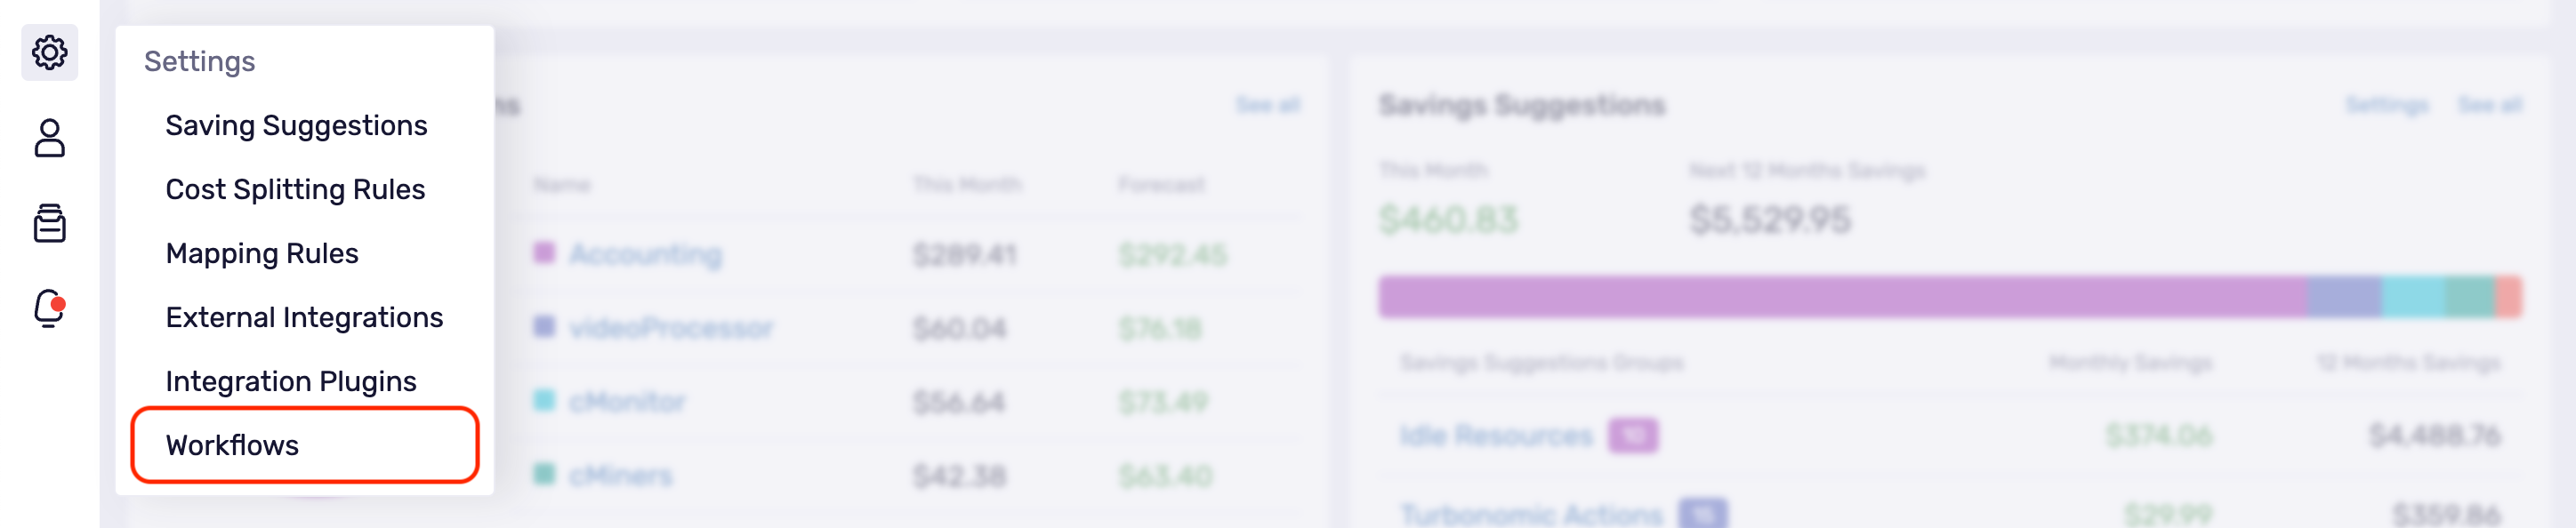
Click Add new Workflow in the top right corner.

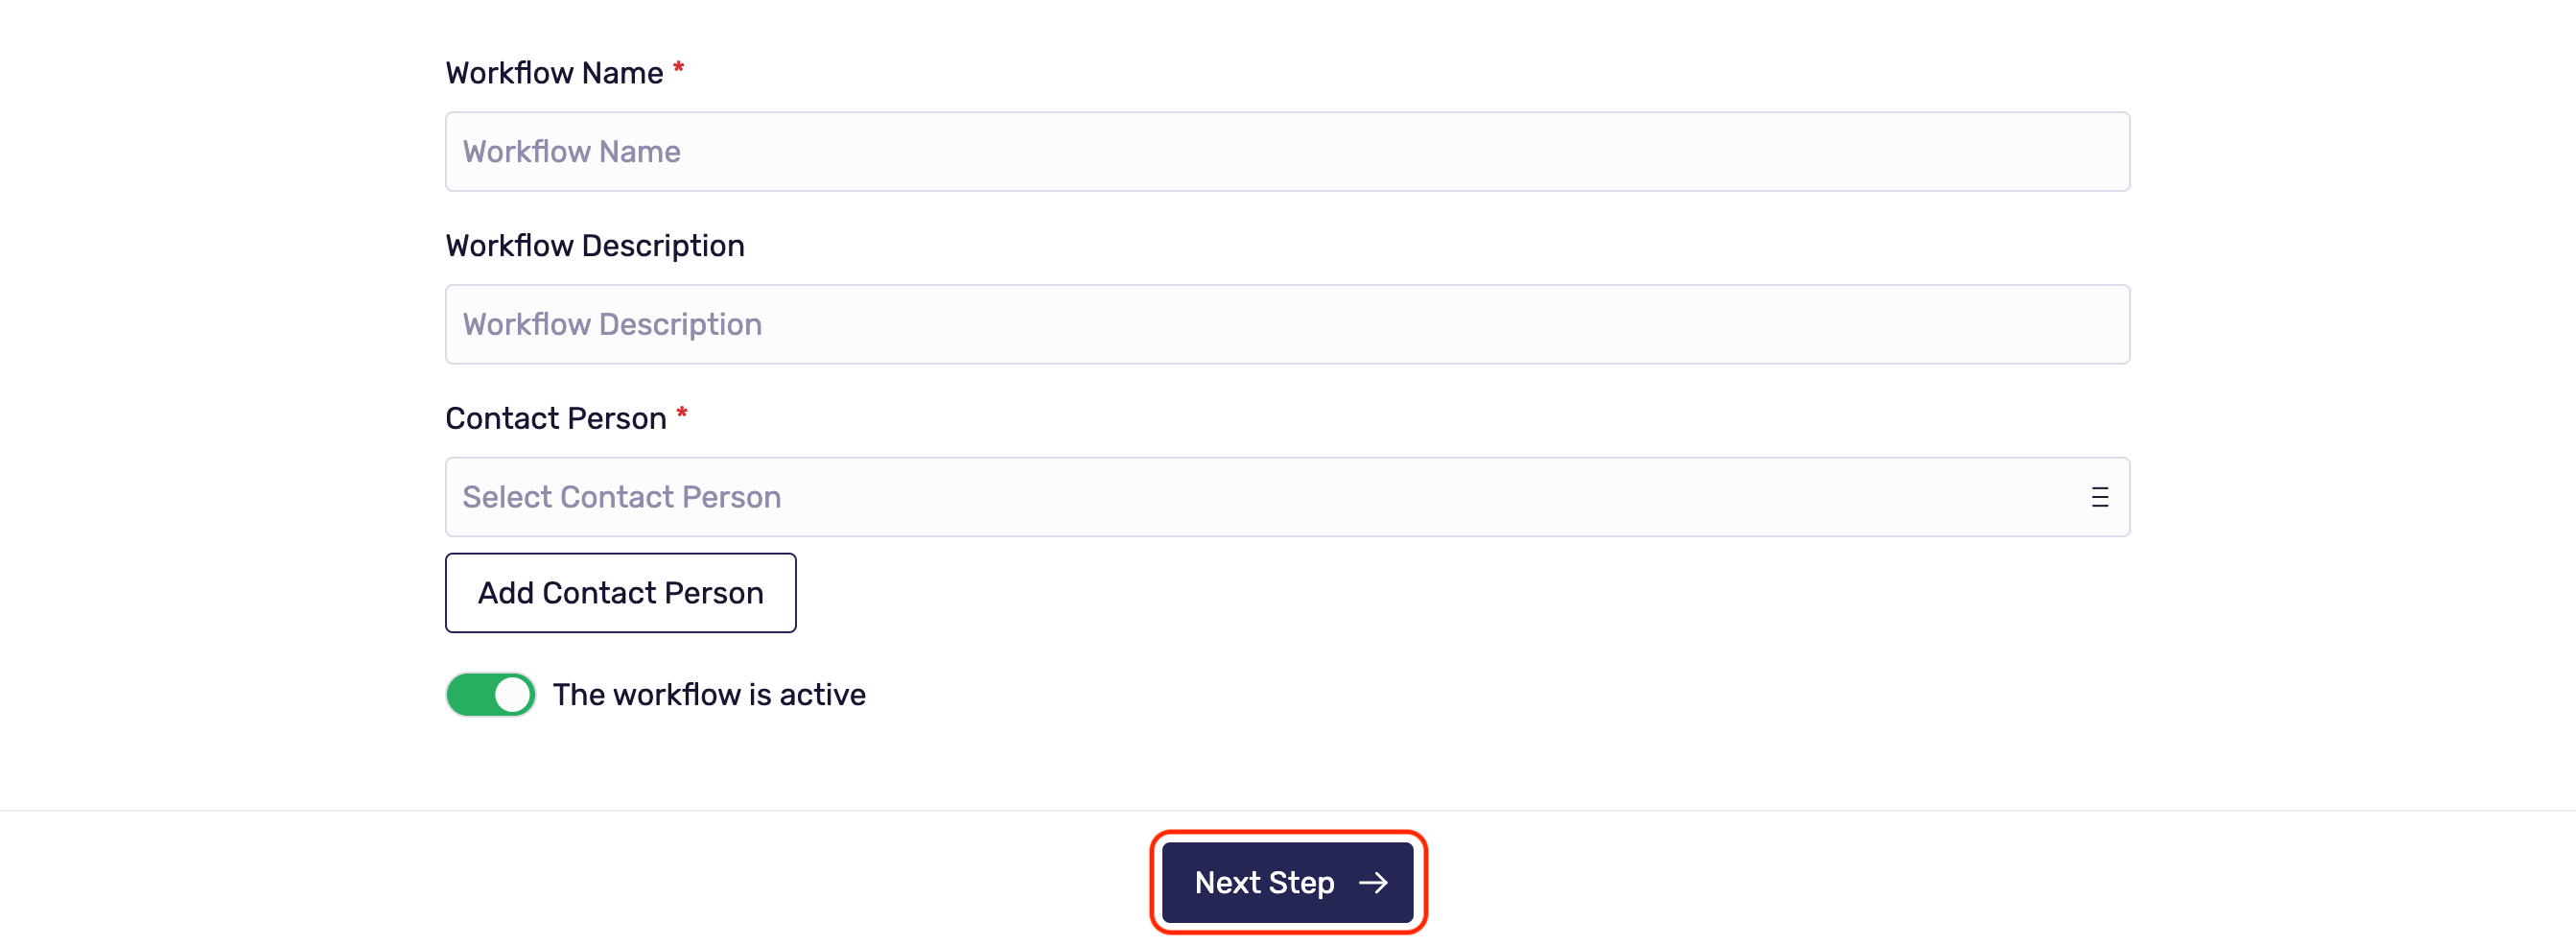
Type the workflow name and description, and select or add a contact person.
By default, the toggle is always active. If you want to manually activate the workflow later, click the toggle to deactivate it. Then click Next Step.
Workflow Triggers
You can wait for Klarity to trigger your workflow or set your own. There are two triggers you can choose from:
- Scan Completed: Klarity scans your cloud every 24 hours. After scanning, the workflow will start.
- Scheduler: This is a manual method of creating your own scheduler. Here you can choose the starting date and the execution time and set it to run once or repeat it; If repeating, you will need to add an end date.
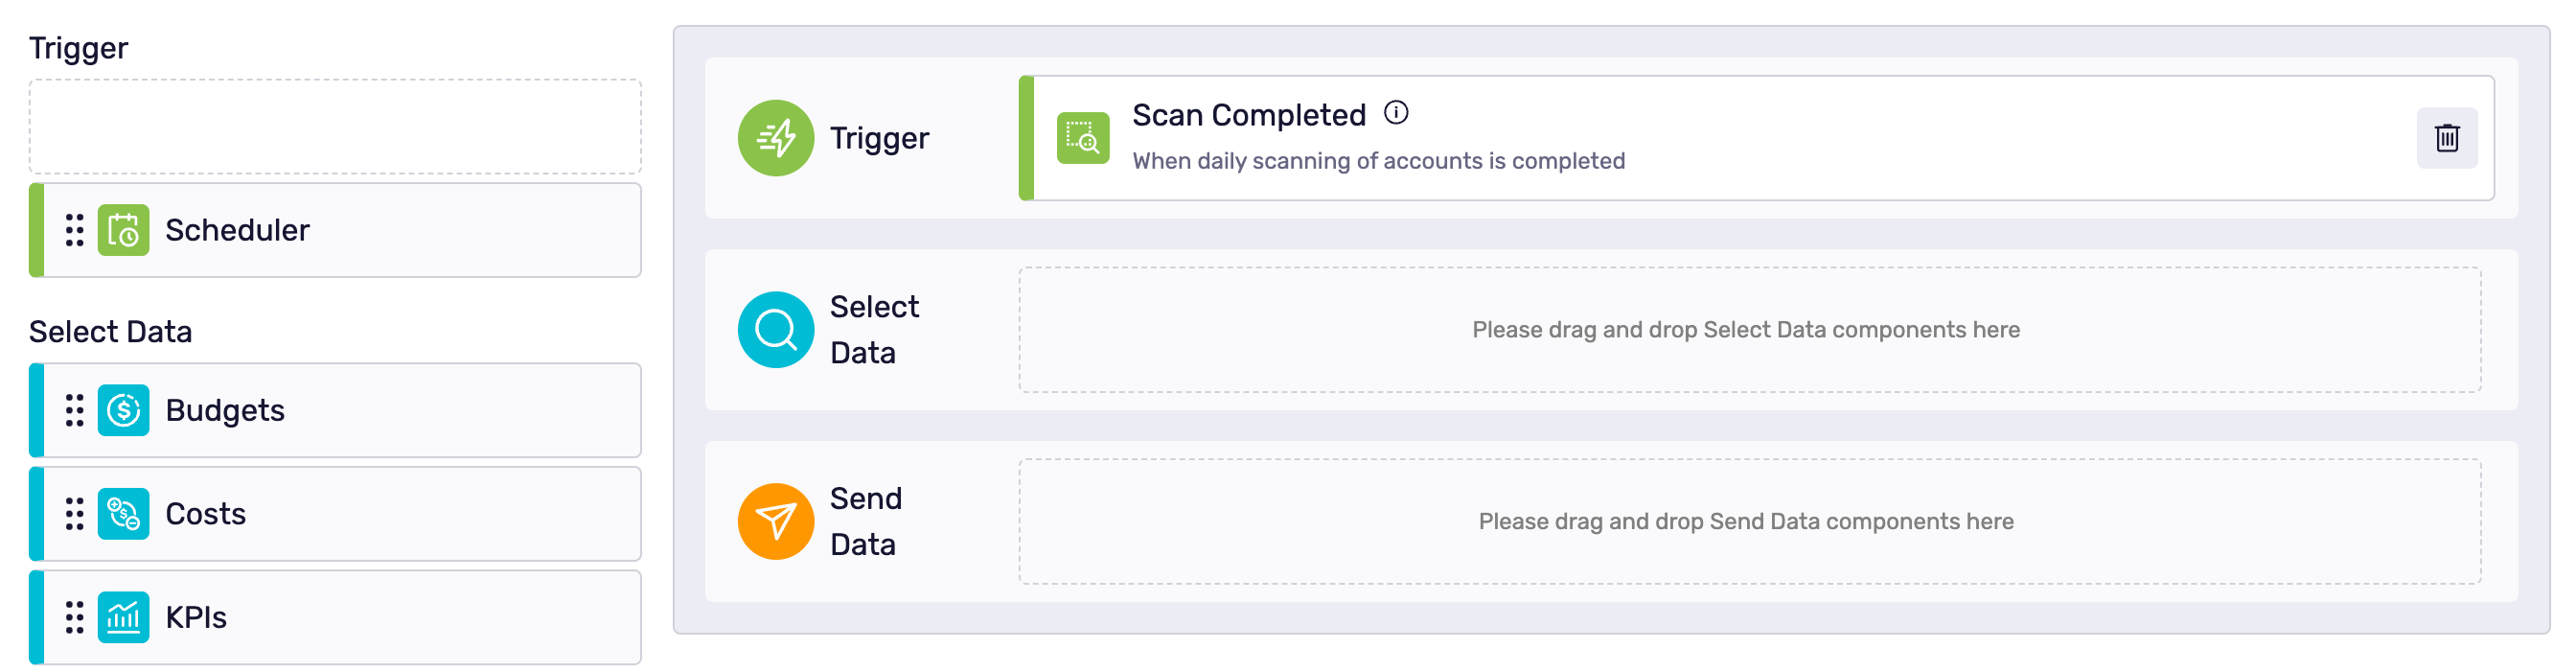
Select Data
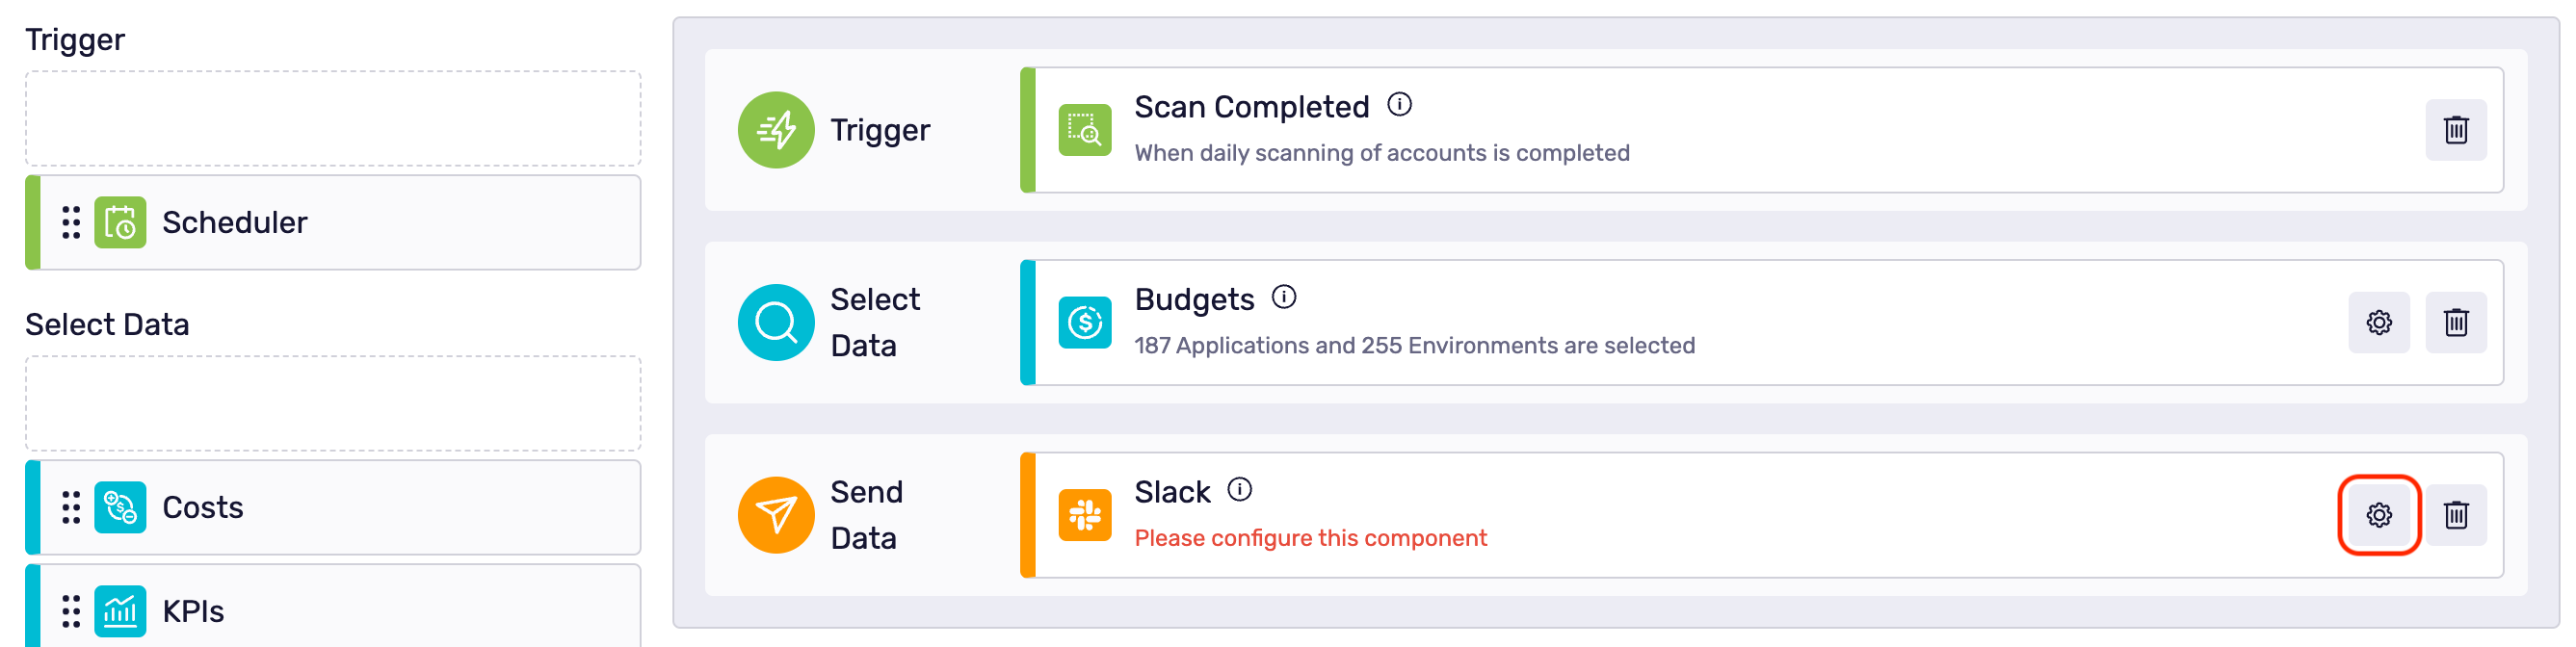
First, click and drag Budgets to the Select Data window and click the gear icon.

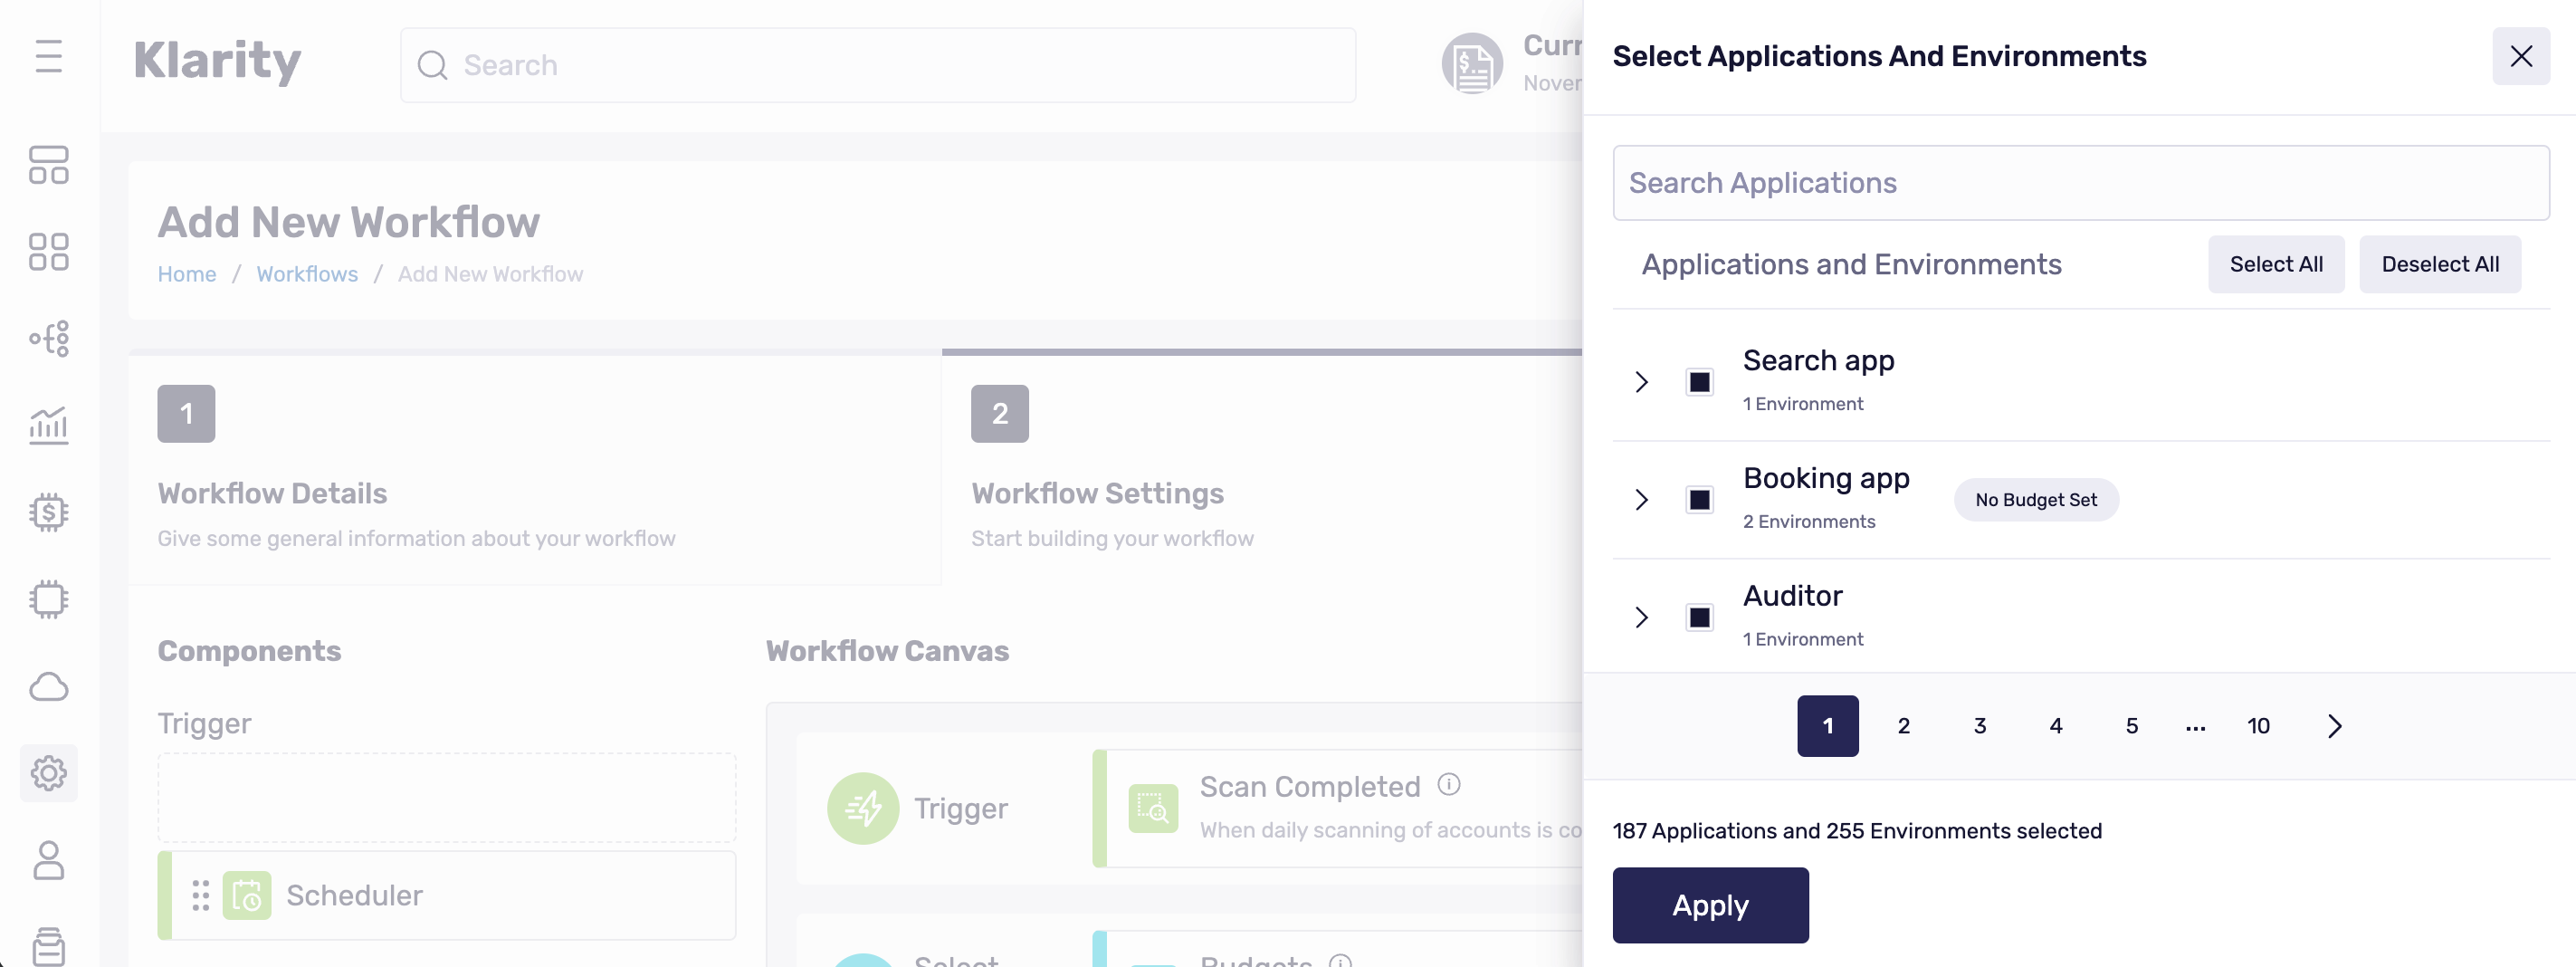
Click on Select all to choose all the applications or select the applications individually. When selecting applications, it will also include environments automatically.
Next, choose the organizational units. Again, you can click Select all or choose them individually.
Send Data
Send Data Email
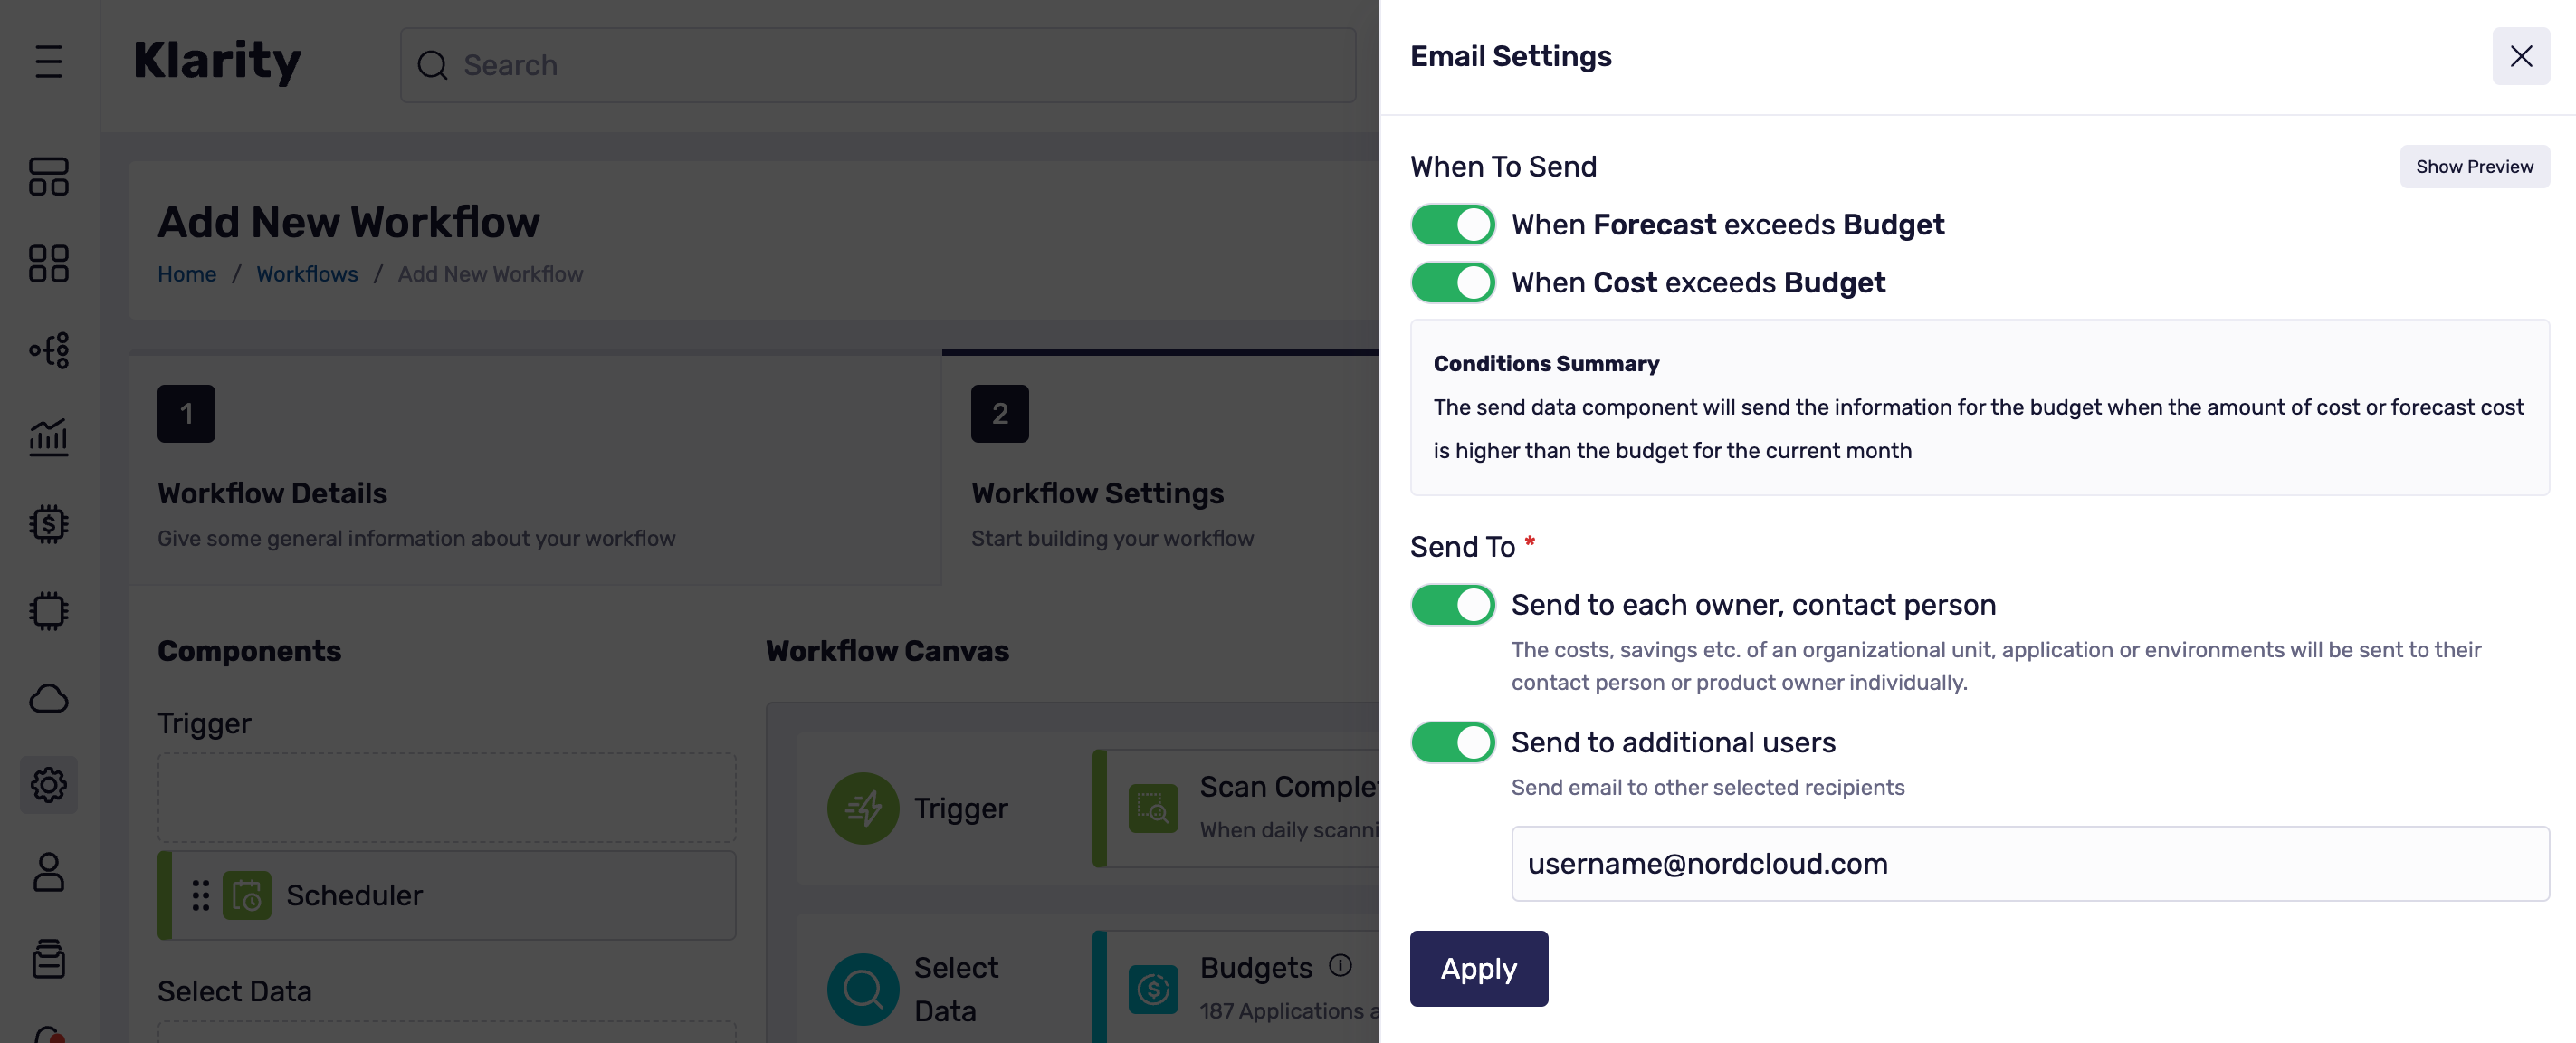
If you want the budget notifications to be sent via email, click and drag Email to the Send Data window and click the gear icon.
![]()
The first option is When to Send. Select your options by clicking the toggle. You have the following options:
- When Forecast exceeds Budget.
- When Cost exceeds Budget.
- Both
Next, choose who to Send to. Choose from the following:
- Send to each owner and contact person: The email will be sent to the application, environment, or organizational units' owners.
- Send to additional users: Type the other recipients in the text box below.
Then, click Apply to save the changes.
Finally, click Add Workflow, and you're done.
Send Data ServiceNow
If you want to create a ServiceNow ticket, click and drag ServiceNow to the Send Data window and click the gear icon.
![]()
First, you must enter your ServiceNow account details:
- URL: The full path to the Rest API endpoint can create a new object in the ServiceNow instance. E.g.:
https://dev12345.service-now.com/api/now/table/incident - Username: The username used to authenticate to the ServiceNow instance.
- Password: Password used to authenticate to the ServiceNow instance.
- URL: The full path to the Rest API endpoint can create a new object in the ServiceNow instance. E.g.:
Short Description: This is a field for a
short descriptionof the ticket (character limit of 160).When to Send: Select your options by clicking the toggle. The default message will be added to the ServiceNow
descriptionfield. You have the following options:- When Forecast exceeds Budget
- When Cost exceeds Budget
- Both
Additional Fields: (Optional) - list of custom ServiceNow
keyand customvaluefields. You can use[text_markers].They will be replaced with the real values during workflow executions in each field.Then, click Apply to save the changes.

Finally, click Add Workflow, and you're done.
Send Data Slack
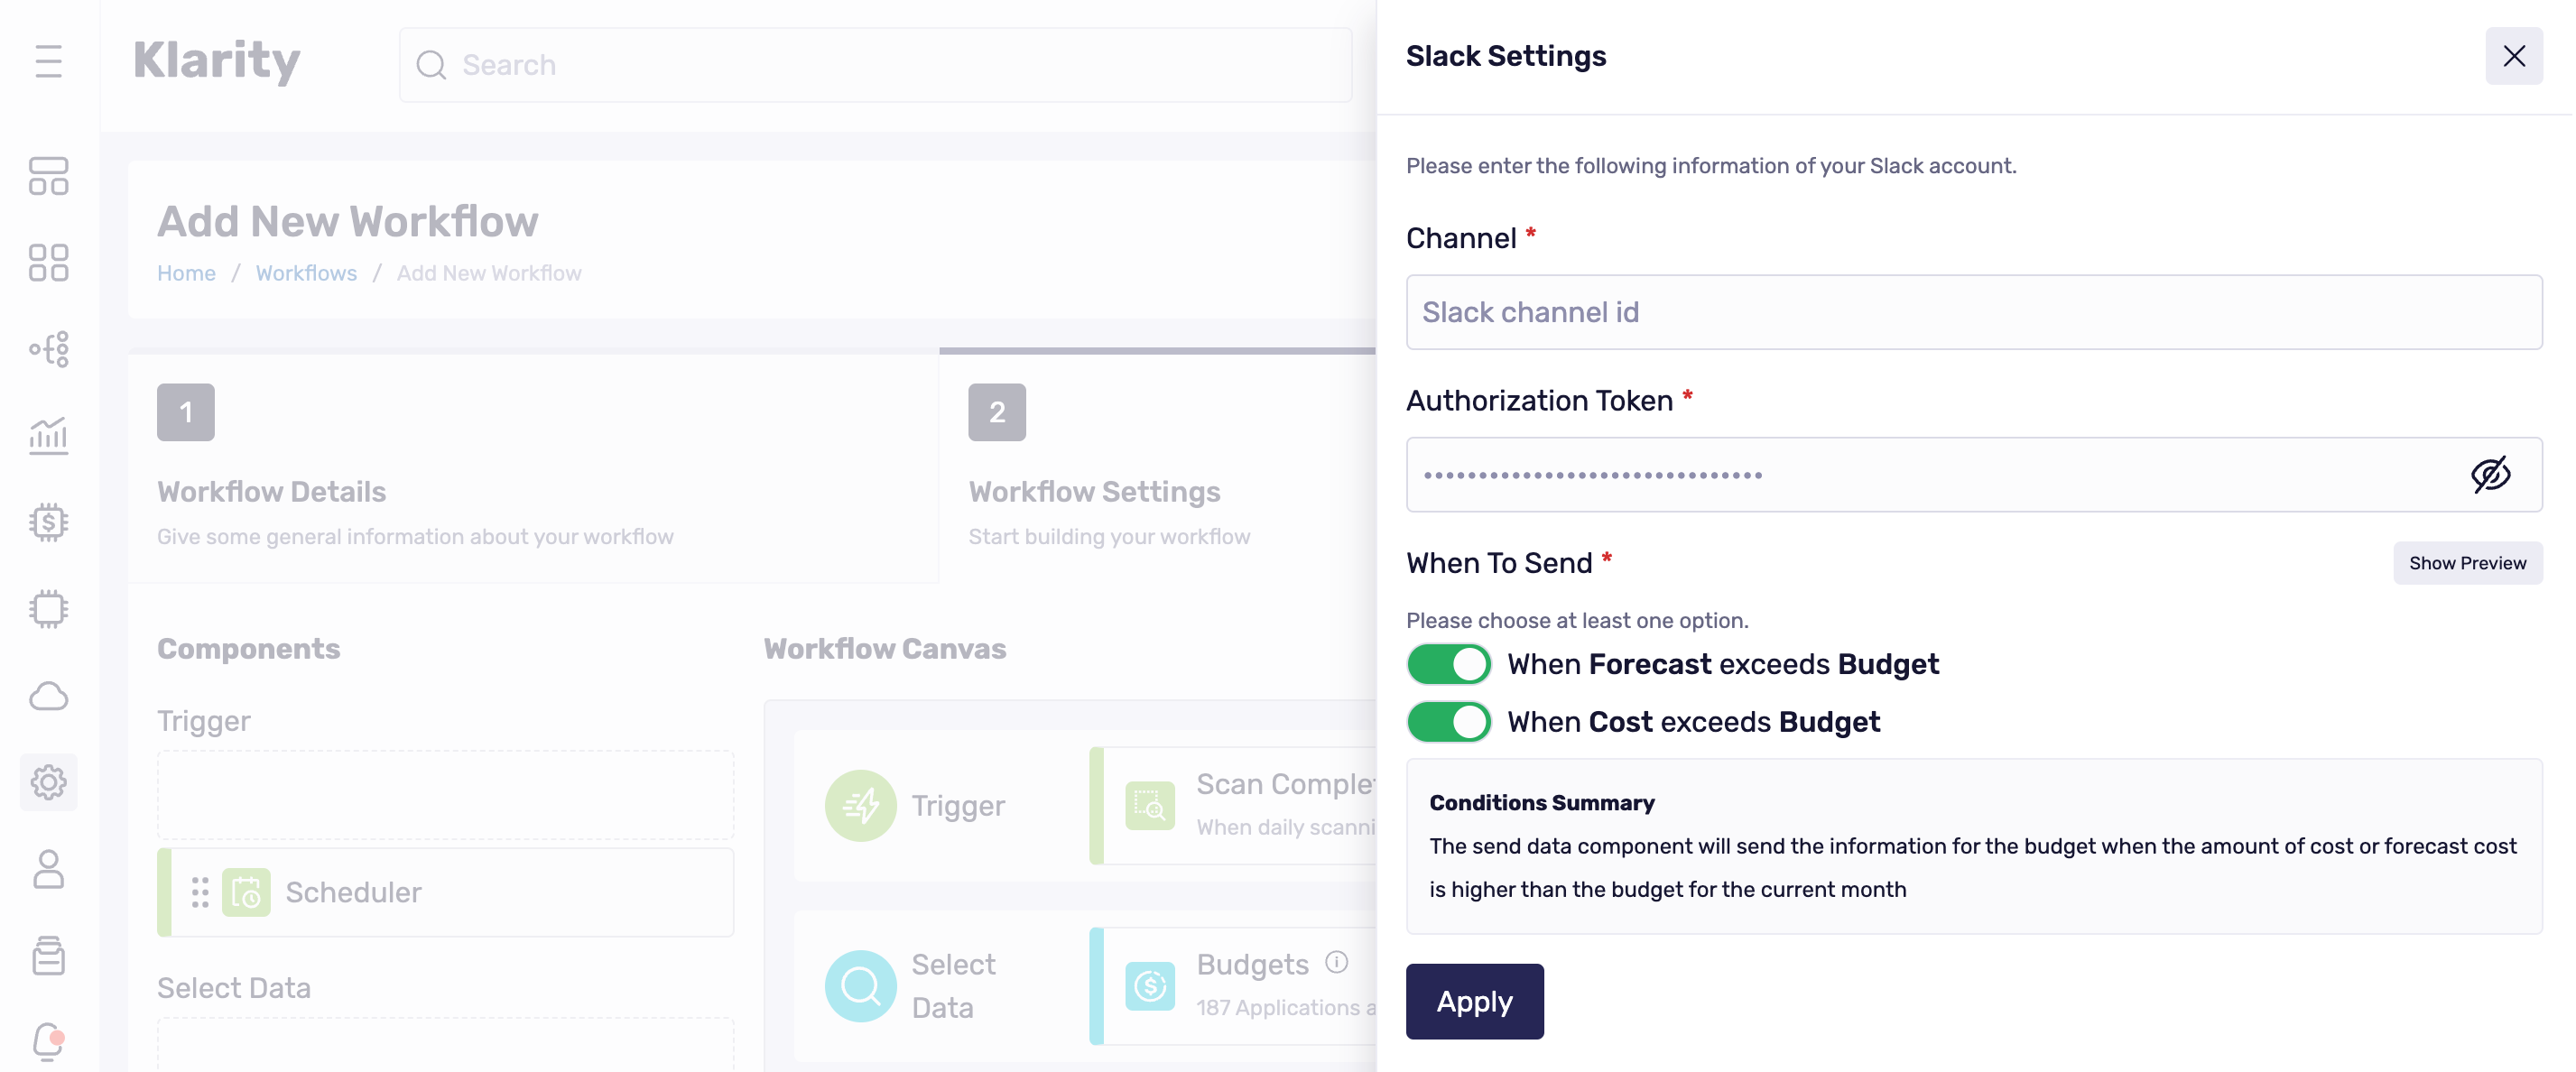
If you want the budget notifications to be sent via Slack, click and drag Slack to the Send Data window and click the gear icon.
First, you must enter your Slack account details.
- Token: Authentication tokens where the messages will be sent.
- Channel: The Slack channel where the message will be sent.
When to Send: Select your options by clicking the toggle.
- When Forecast exceeds Budget
- When Cost exceeds Budget
- Both
Then click Apply to save the changes.
Finally, click Add Workflow, and you're done.