Page Sections
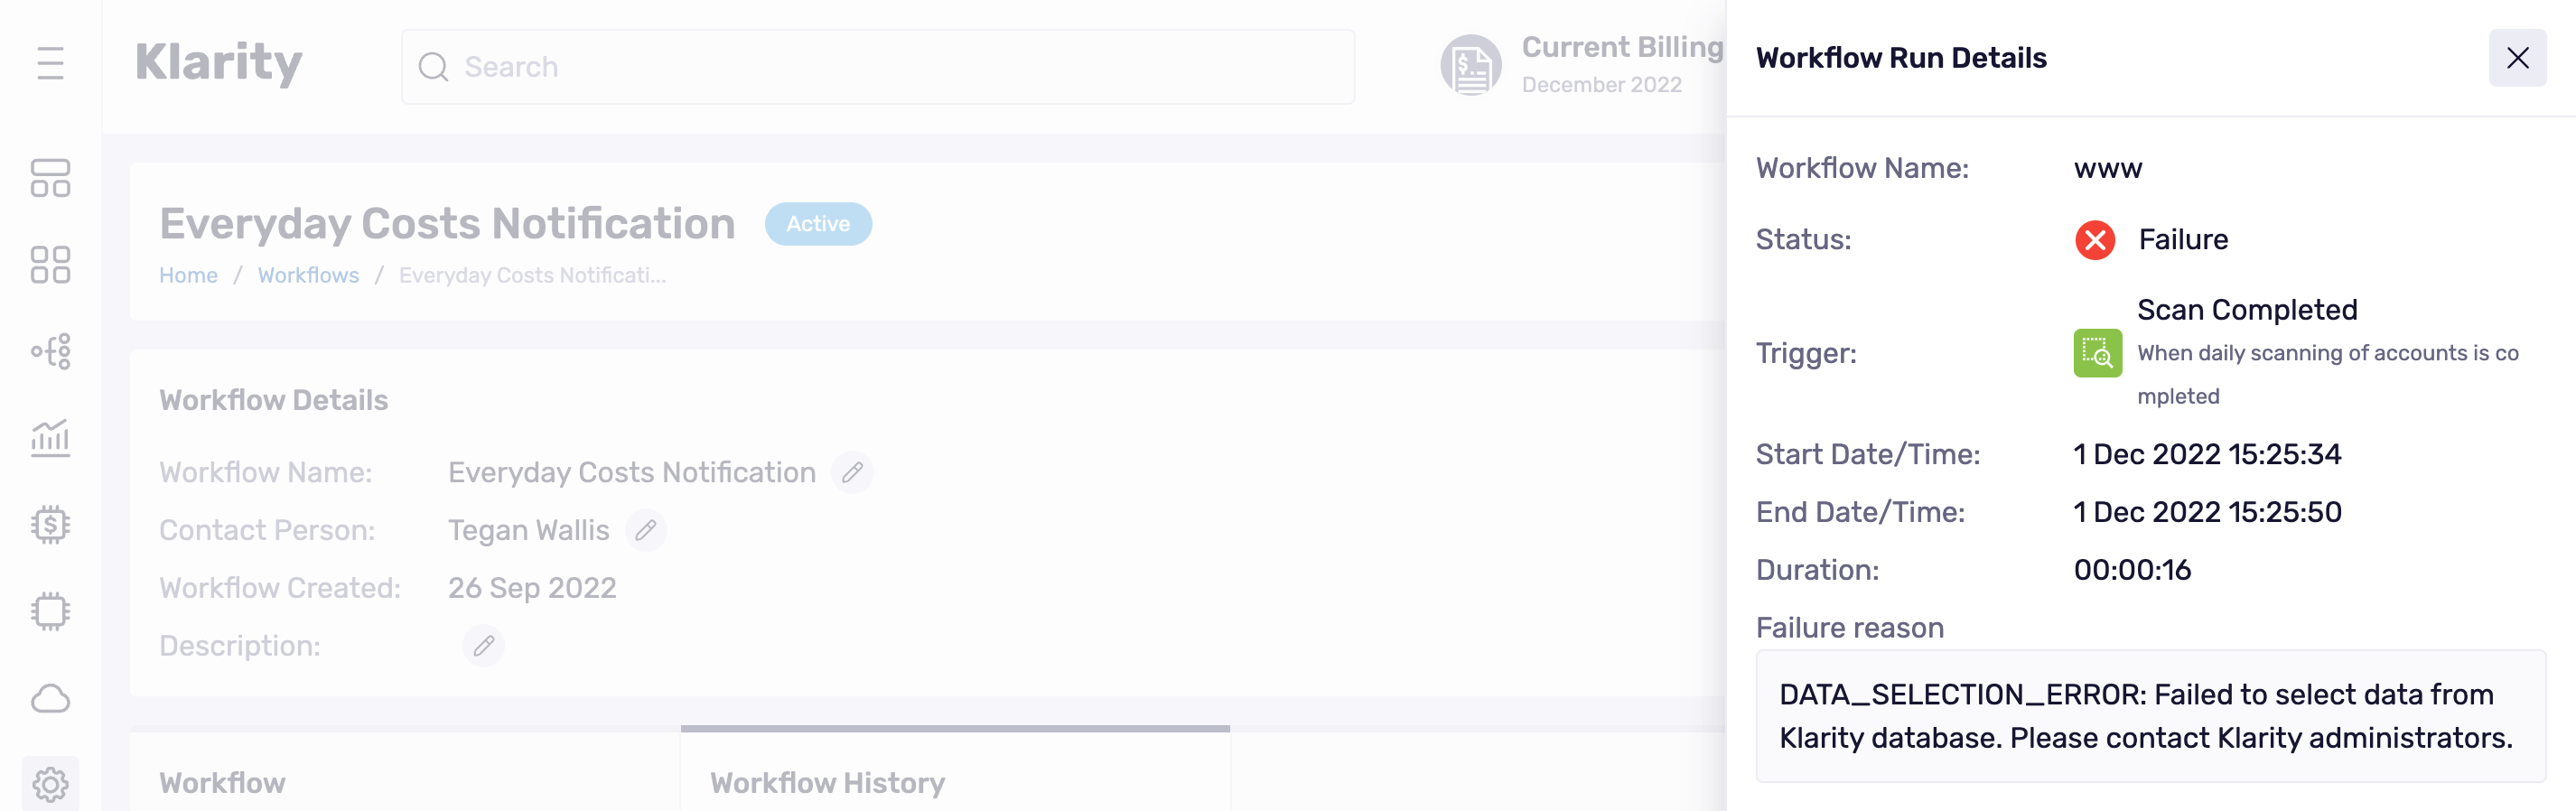
Below is the individual workflow details page. The first part is the details about the workflow. You can edit the workflow name, contact person, and description by clicking the pencil icon. It also shows the date the workflow was created.

Workflow Configuration
The next part concerns the actual workflow you are viewing under the Workflow tab:
- It tells you the selected trigger, data, and send data method.
- You can view more detailed information about the workflow by clicking on the eye icon on the right.
- You can edit the workflow by clicking Edit Workflow.

Workflow History
You can also view the history of all the created workflows under Workflow History. You can filter which workflows you want to view by clicking on Filter by. Below that, you will see the workflow list; it has the following headings:
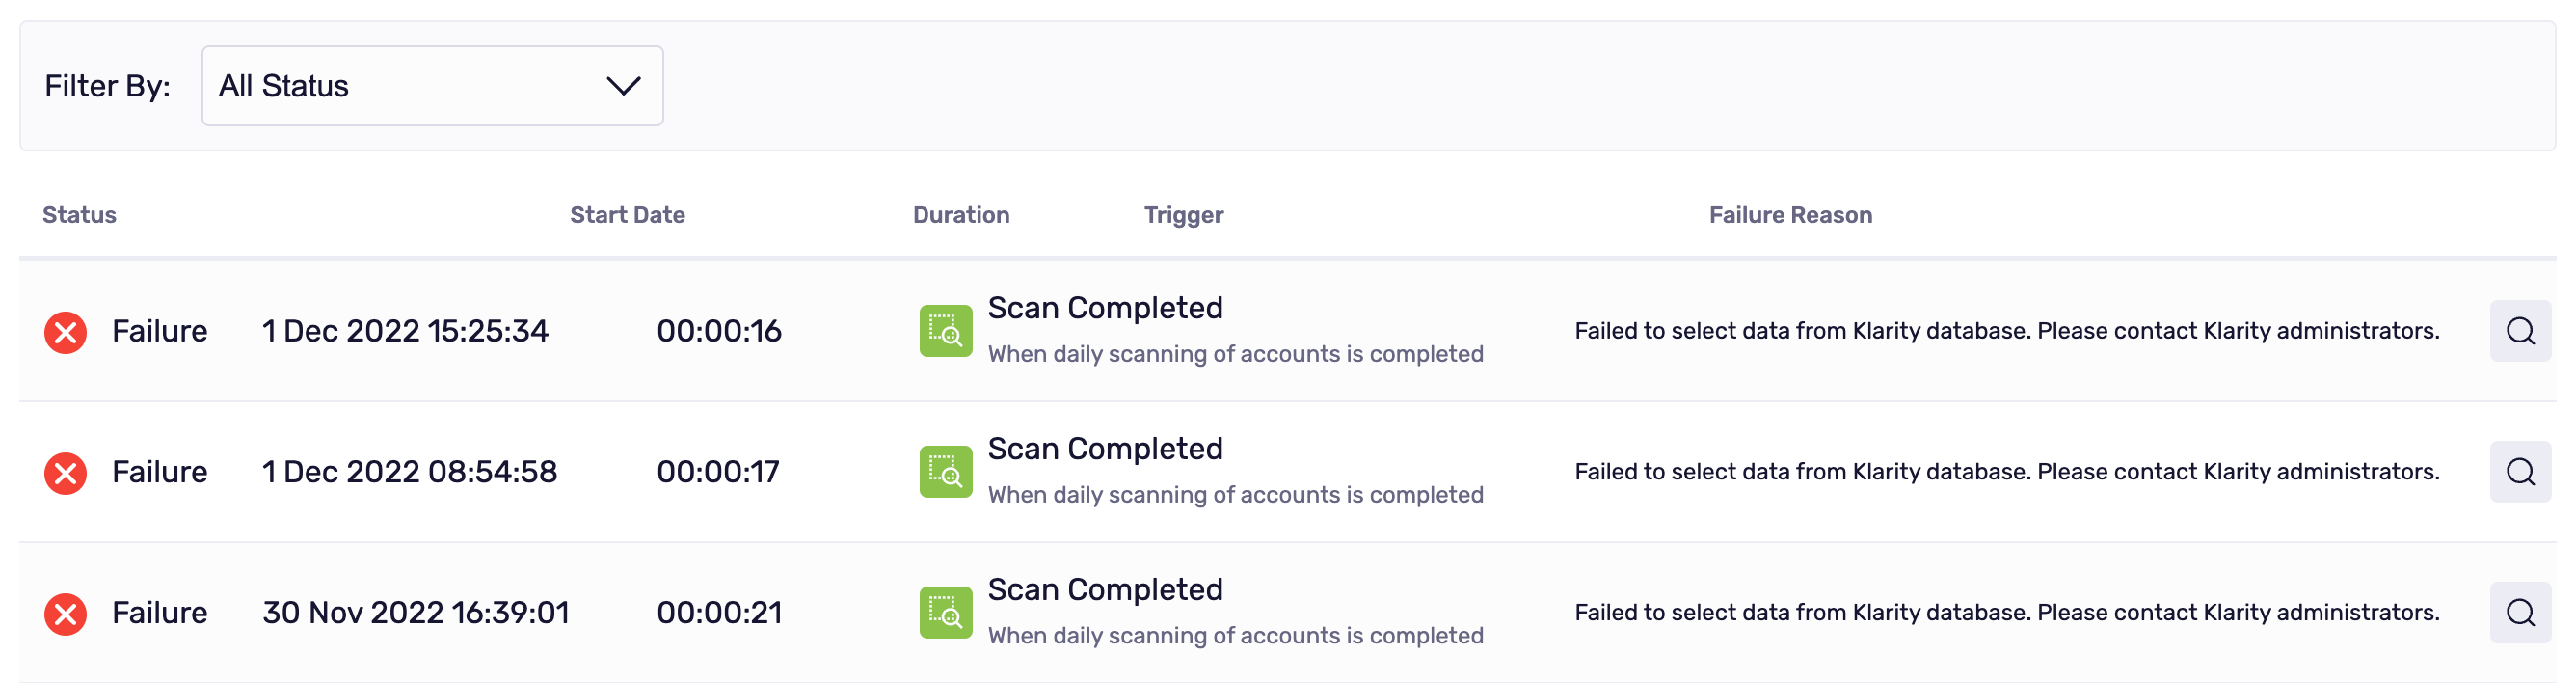
- Status: This shows whether the workflow successfully collected data and sent it to the appropriate people.
- Start Date: This tells you when the workflow was triggered.
- Duration: This shows how long it took Klarity to perform the task.
- Trigger: This tells you the selected trigger method.
- Failure Reason: If the workflow has failed, this will tell you the reason for the failure.
Finally, on the right is a magnifying glass. By clicking it, you will have a detailed version of each workflow.
Workflow Use Cases
Workflows can be a powerful tool that can automate your everyday work and give you more visibility on your costs. Below you can find instructions on how to set up the most common use cases:
- Budget Notifications
- Cost Notifications
- KPI Notifications
- New Unallocated Resources
- Saving Suggestion Notifications
- New Anomaly Cost Notifications