Page Sections
Klarity lets you have unlimited workflows which you can create manually
Klarity gathers extensive data about your applications, environments, and organizational units. This lets you choose the data you are interested in for specific applications, environments, and organizational units.
On the left menu, click on the Settings tab, then click Workflows.
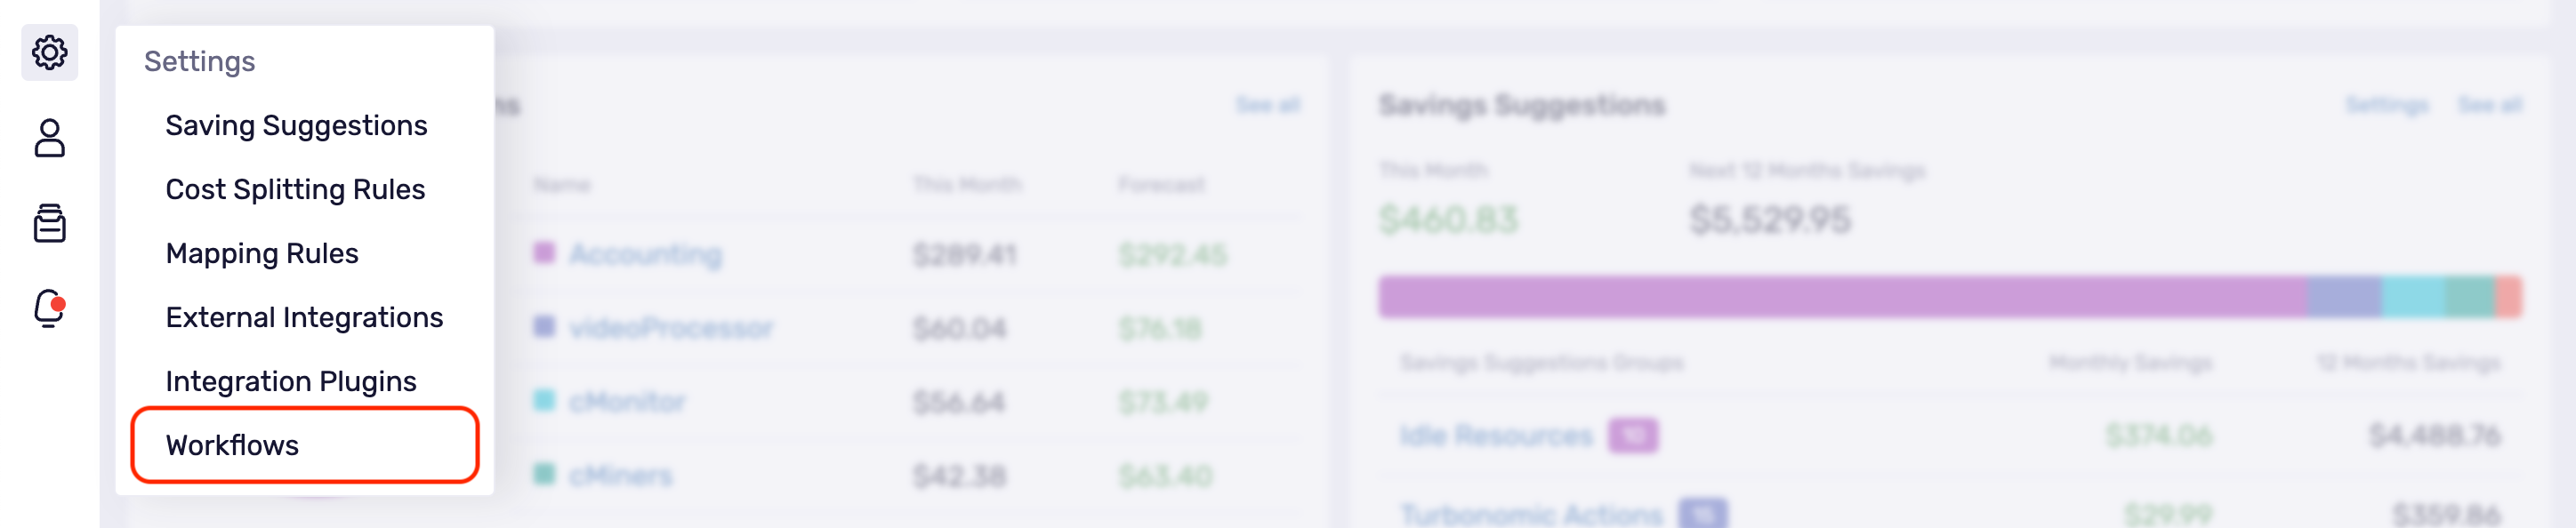
Click Add new Workflow in the top right corner.

Workflow Details
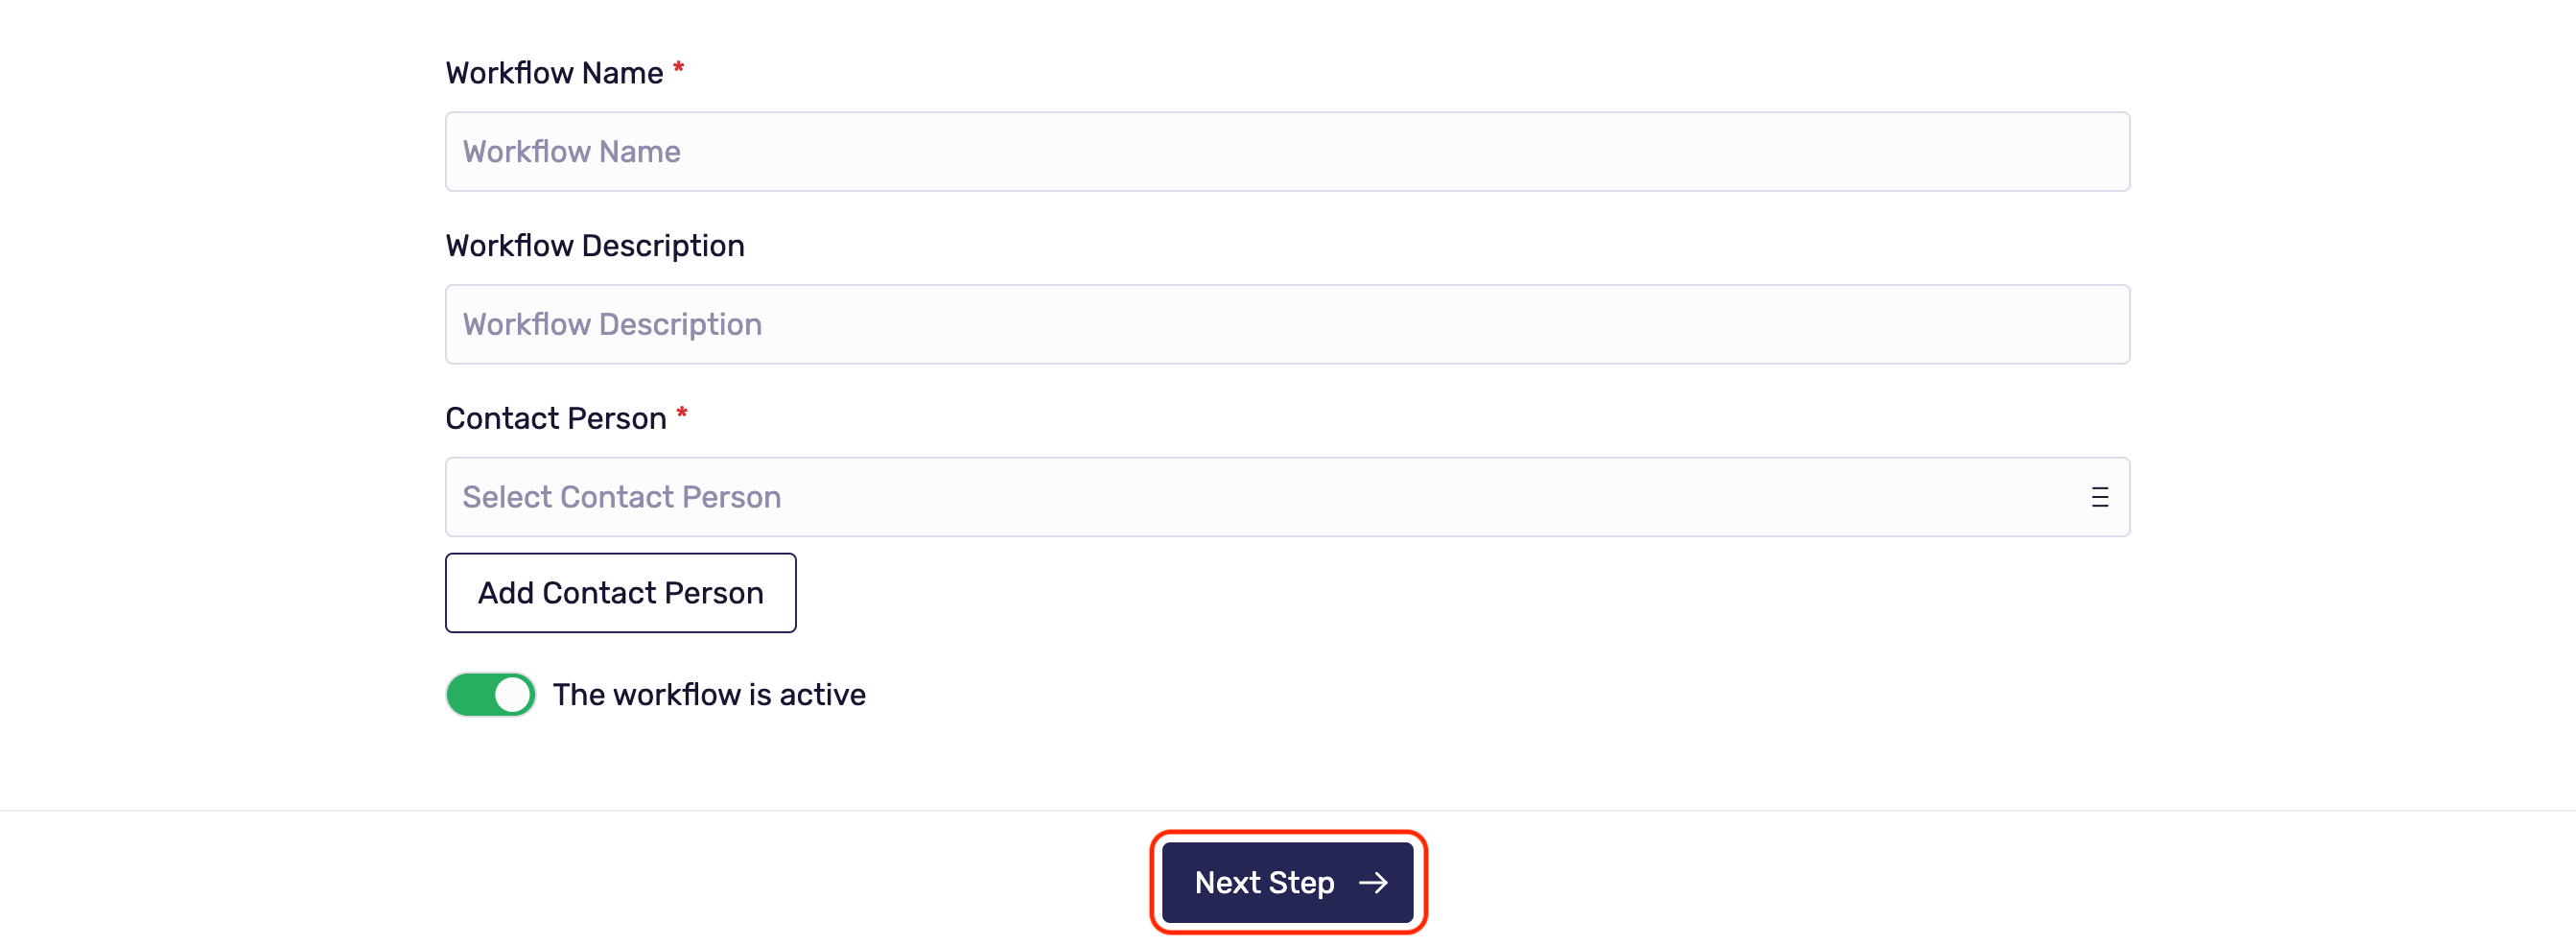
Type the workflow name and description, and select or add a contact person.
By default, the toggle is always active. If you want to manually activate the workflow later, click the toggle to deactivate it. Then click Next Step.
Workflow Settings
Workflow Settings is a simple tool that allows you to send data in various ways using a drag-and-drop feature. There are three main steps, and all three steps must be completed for the workflow to function correctly.
Workflow Triggers
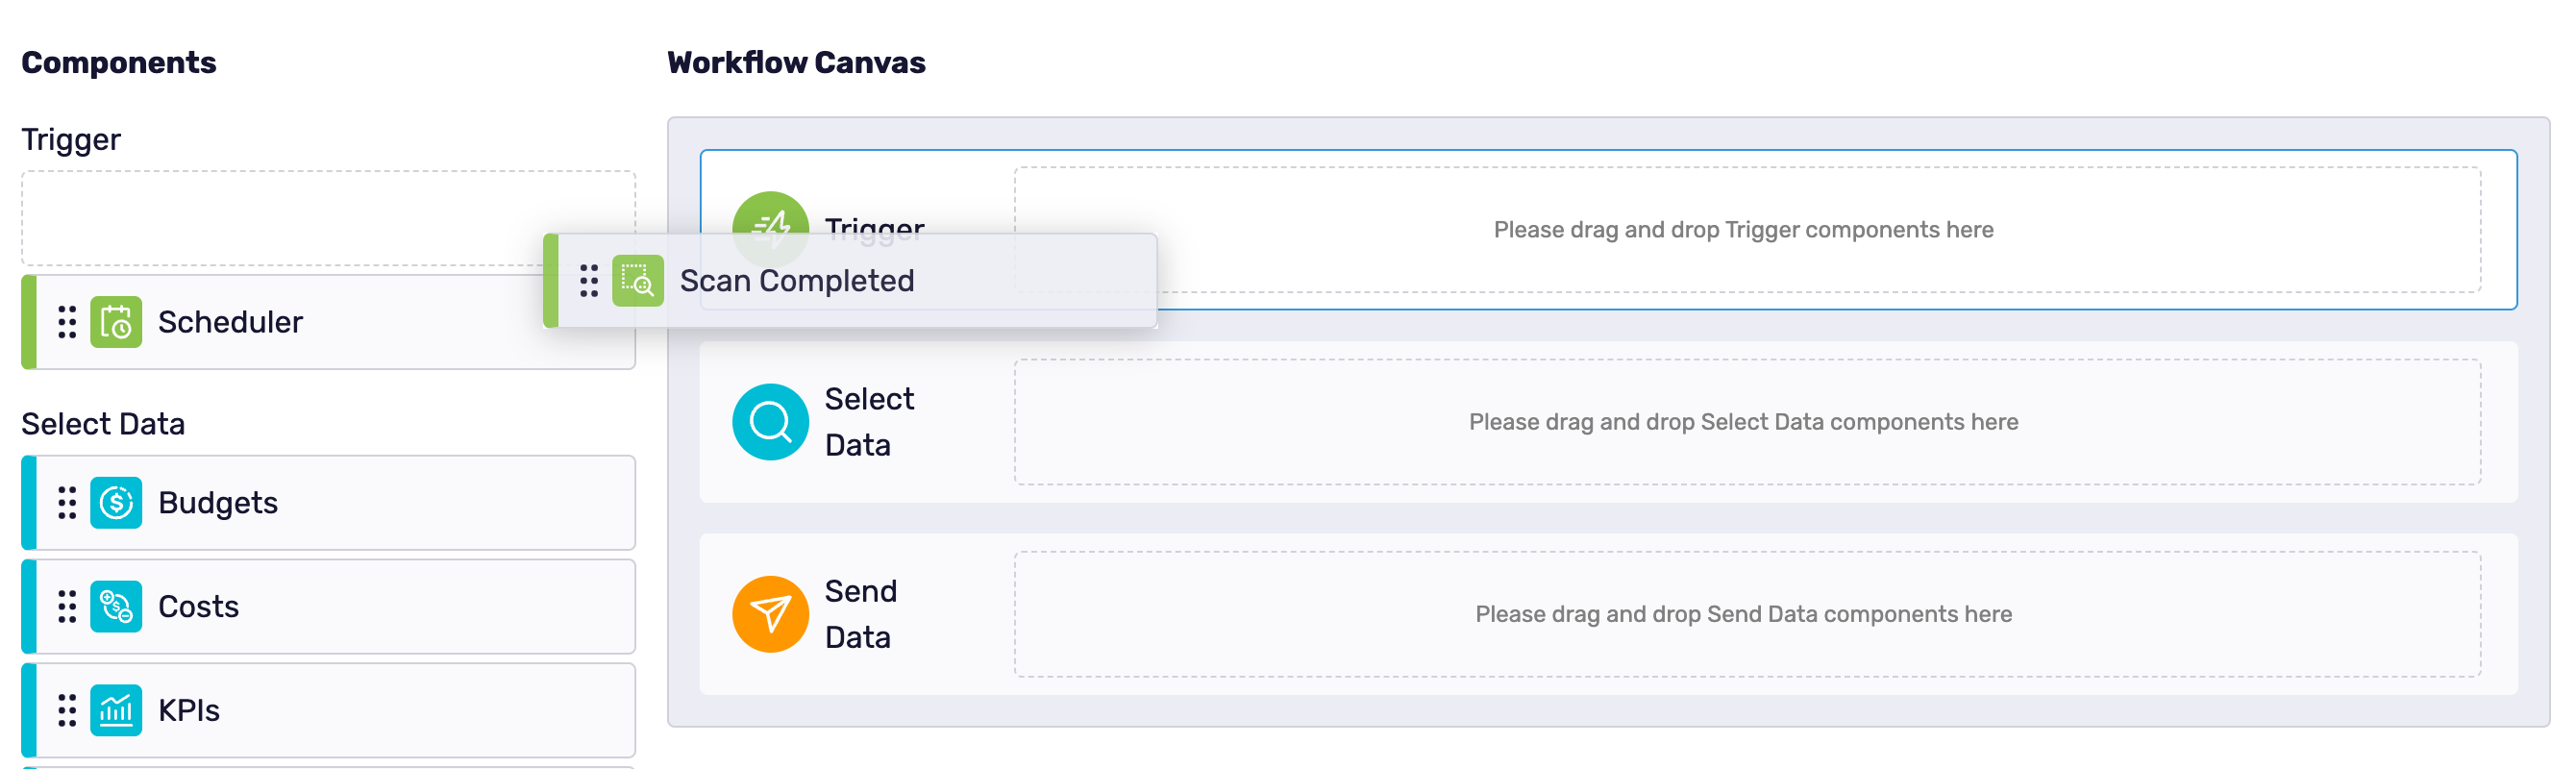
Firstly you need to decide how your workflow should start. You have two options:
- Scan Completed: This option automatically starts the workflow when Klarity scans your cloud every 24 hours.
- Scheduler: This option is customizable. By pressing the gear icon on the right, you can choose the starting date and the execution time and set it to run once or repeat it; If repeating, you will need to add an end date.
Once you have decided which trigger to use, drag and drop it to the Trigger field under Workflow Canvas.
Select Data
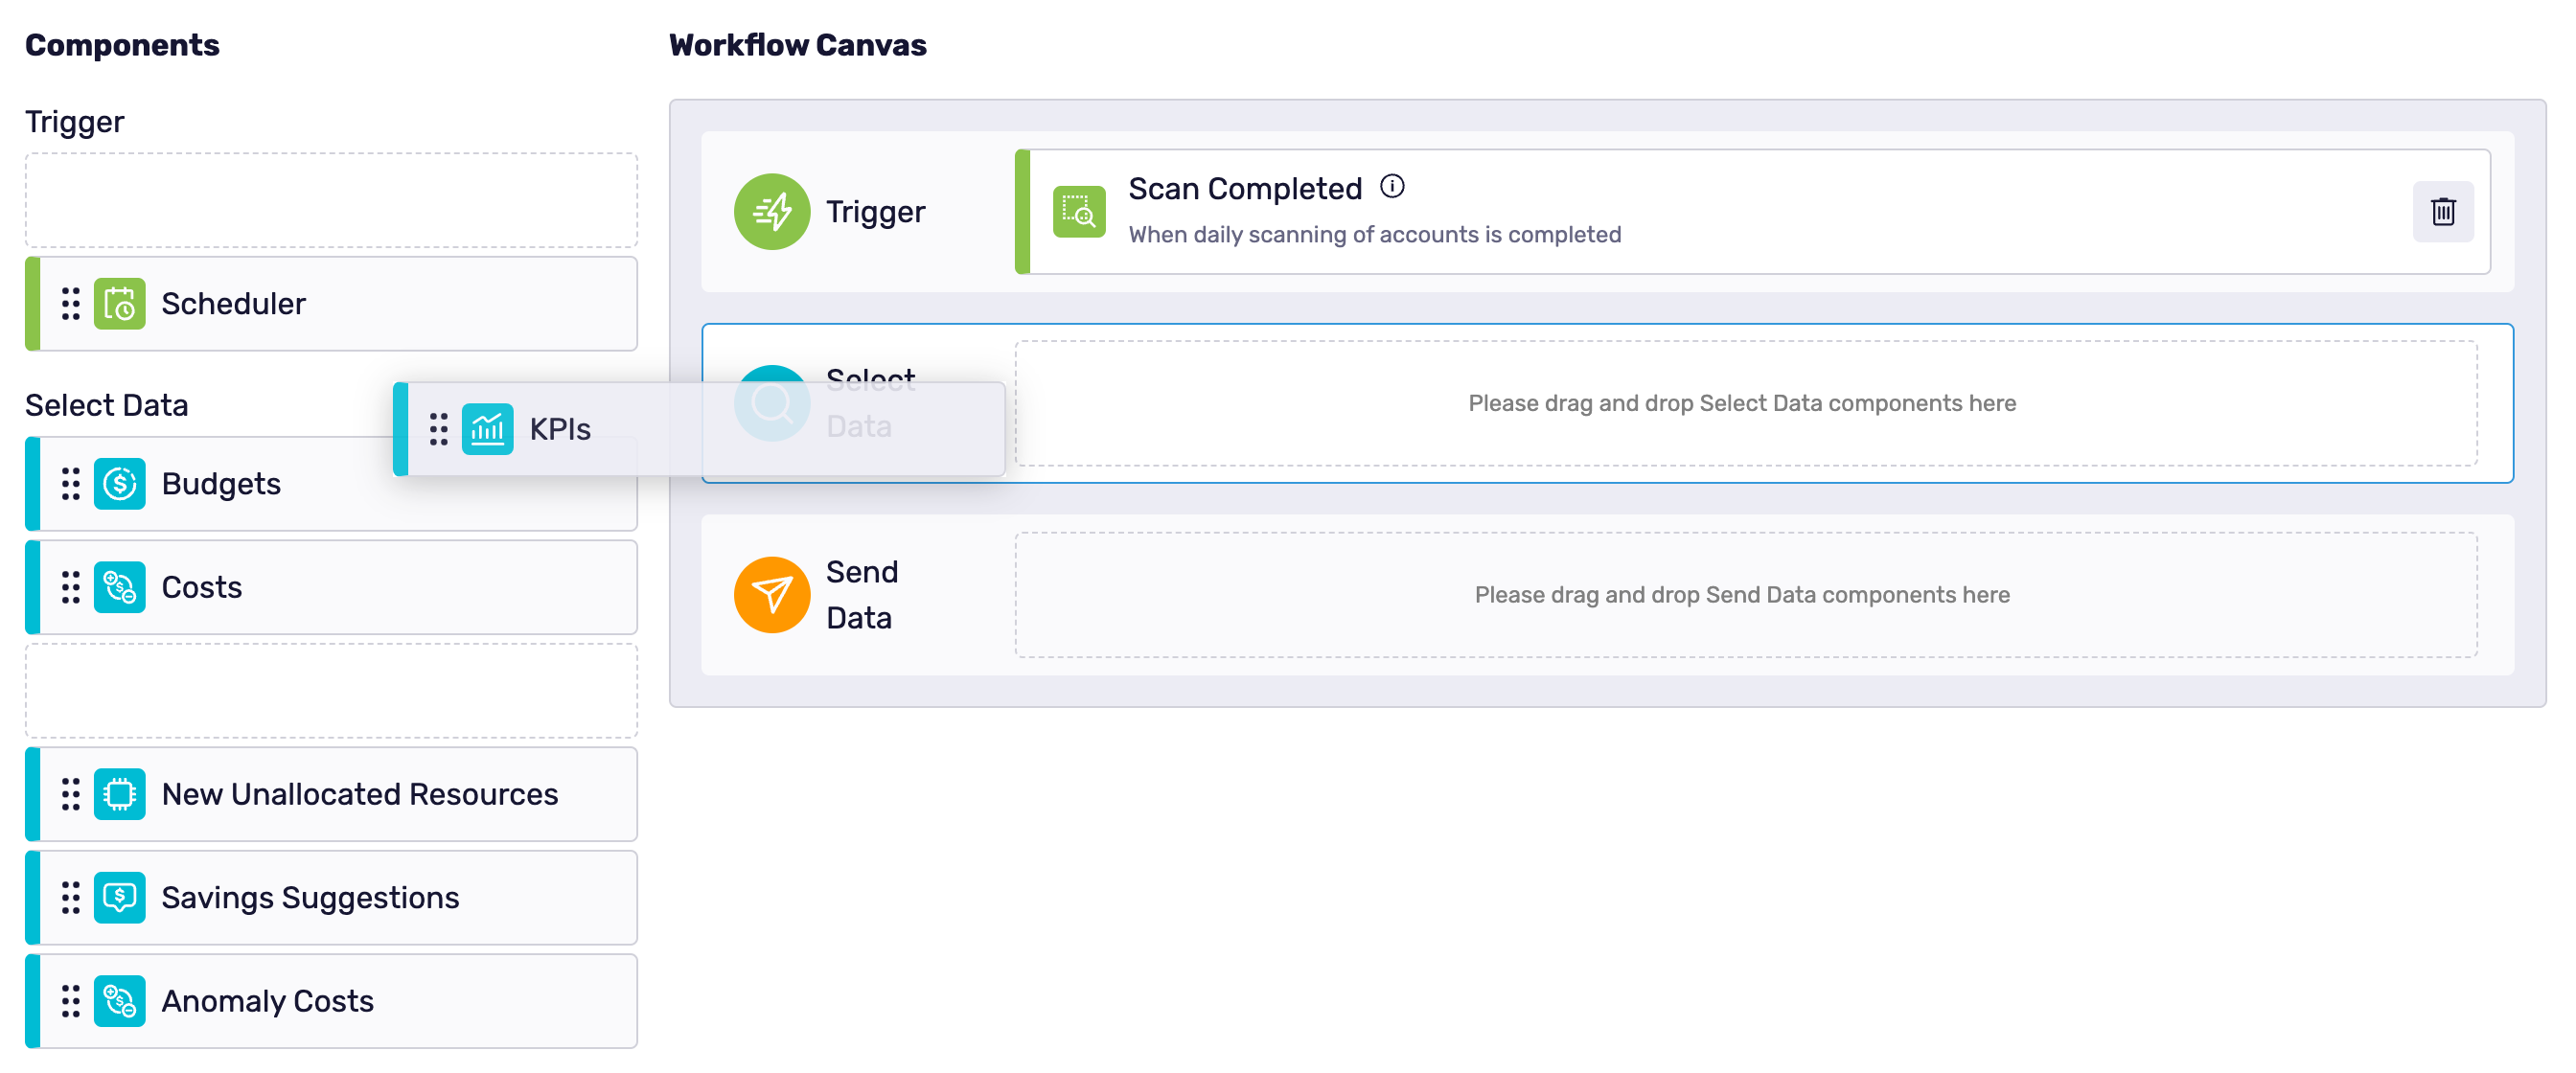
Select data provides several alternatives; depending on your requirements, it can collect sizable data about applications, environments, and organizational units. There are six possibilities available:
- Budgets: Klarity will collect all the budget information for the selected applications, environments, or organizational units.
- Costs: Klarity will collect all the cost information for the selected applications, environments, or organizational units.
- KPIs: Klarity will collect all the information about cost allocation, overall waste, and Non-Production Environments Shutdown Time KPIs for the selected business contexts.
- New Unallocated Resources: Klarity will collect information about new resources that were added to your cloud which are still unallocated.
- Savings Suggestions: Klarity will collect all the potential savings suggestions for the selected applications, environments, or organizational units.
- Anomaly Costs: Klarity will collect all the potential anomaly costs for the selected applications.
When you have decided which data to send, drag and drop it to the Select Data field under Workflow Canvas.
Click the gear icon on the right and select the appropriate data you want Klarity to collect, then click Apply.
Send Data
After you have decided which data to select. You will need to choose how to send the information. There are three options to choose from:
- Email: Choose this option if you want the data sent via email. Click the gear icon to configure the message and to whom it should be sent.
- ServiceNow: If you prefer ServiceNow, select this option to have the data sent to a ServiceNow account. Fill in the details and keys, and values.
- Slack: Like ServiceNow, choose this option if you want the data sent to a Slack account. Fill in the details, and you can even preview a predefined message.
Once you decide how to send the data, drag it into the Send Data field under Workflow Canvas.
Then click the gear icon on the right and make the appropriate configurations, then click Apply.
Finally, click Add Workflow, and you're done.

Workflow Use Cases
Workflows can be a powerful tool that can automate your everyday work and give you more visibility on your costs. Below you can find instructions on how to set up the most common use cases:
- Budget Notifications
- Cost Notifications
- KPI Notifications
- New Unallocated Resources
- Saving Suggestion Notifications
- New Anomaly Cost Notifications