Page Sections
The workflow for unallocated resources will assist you in tracking newly discovered unattached cloud resources
By keeping track of spending by cost center or business unit, each team can see how spending affects the total amount spent on the cloud. In addition, the company can see which teams are behind any changes in costs.
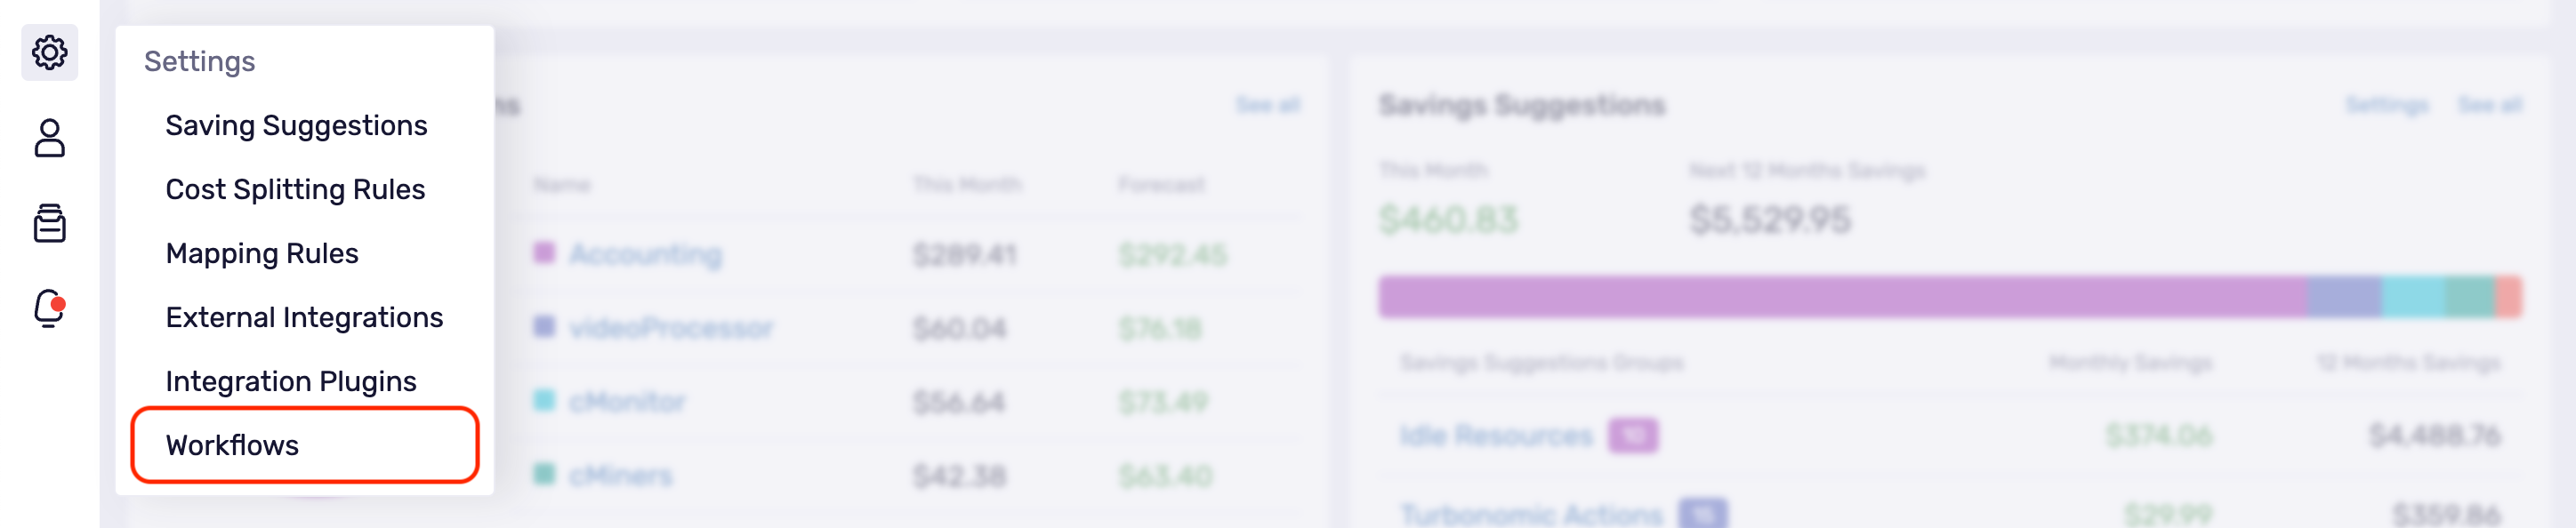
- On the left menu, click on the Settings tab, then click Workflows. At the bottom, you will see your list of active and inactive workflows.
Click Add new Workflow in the top right corner.

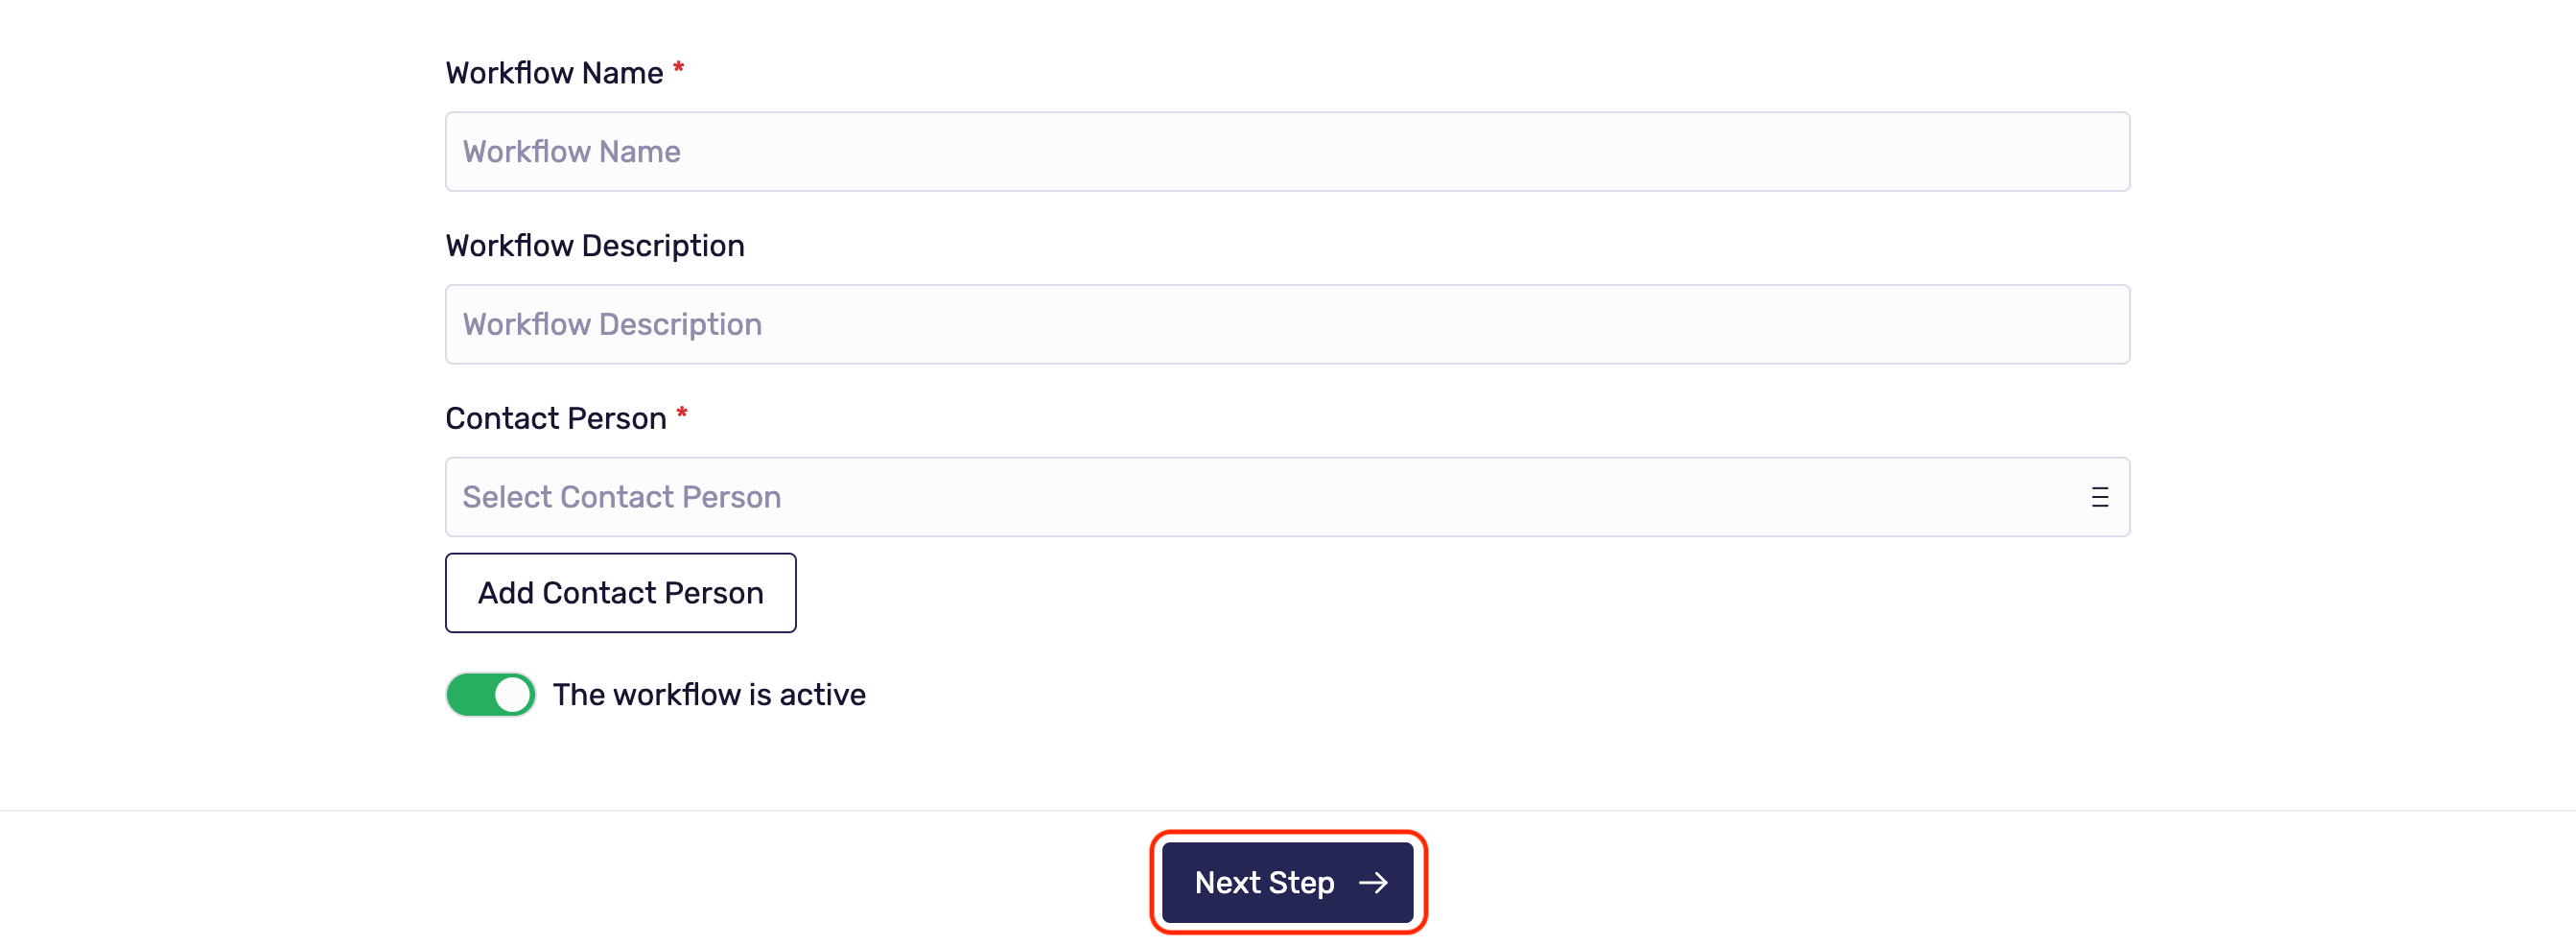
Type the workflow name and description, and select or add a contact person.
By default, the toggle is always active. If you want to manually activate the workflow later, click the toggle to deactivate it. Then click Next Step.
Workflow Triggers
You can wait for Klarity to trigger your workflow or set your own. There are two triggers you can choose from:
Scan Completed: Klarity scans your cloud every 24 hours. After scanning, the workflow will start.
Scheduler: This is a manual method of creating your own scheduler. Here you can choose the starting date and the execution time and set it to run once or repeat it; If repeating, you will need to add an end date.
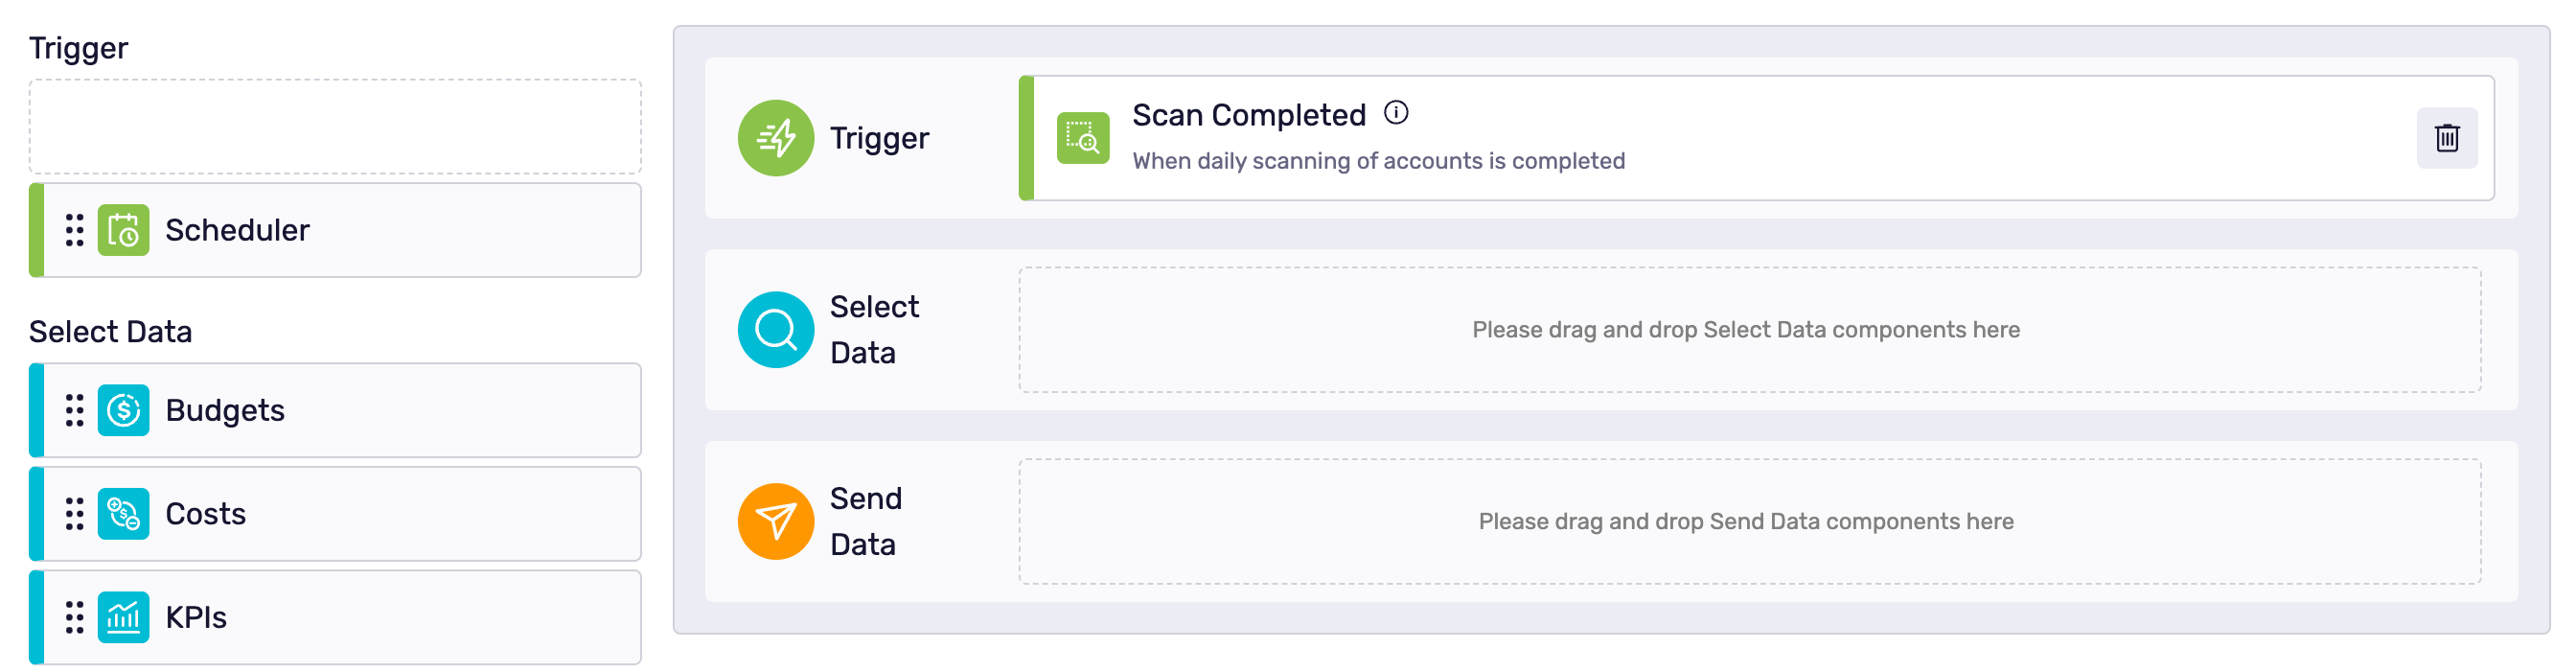
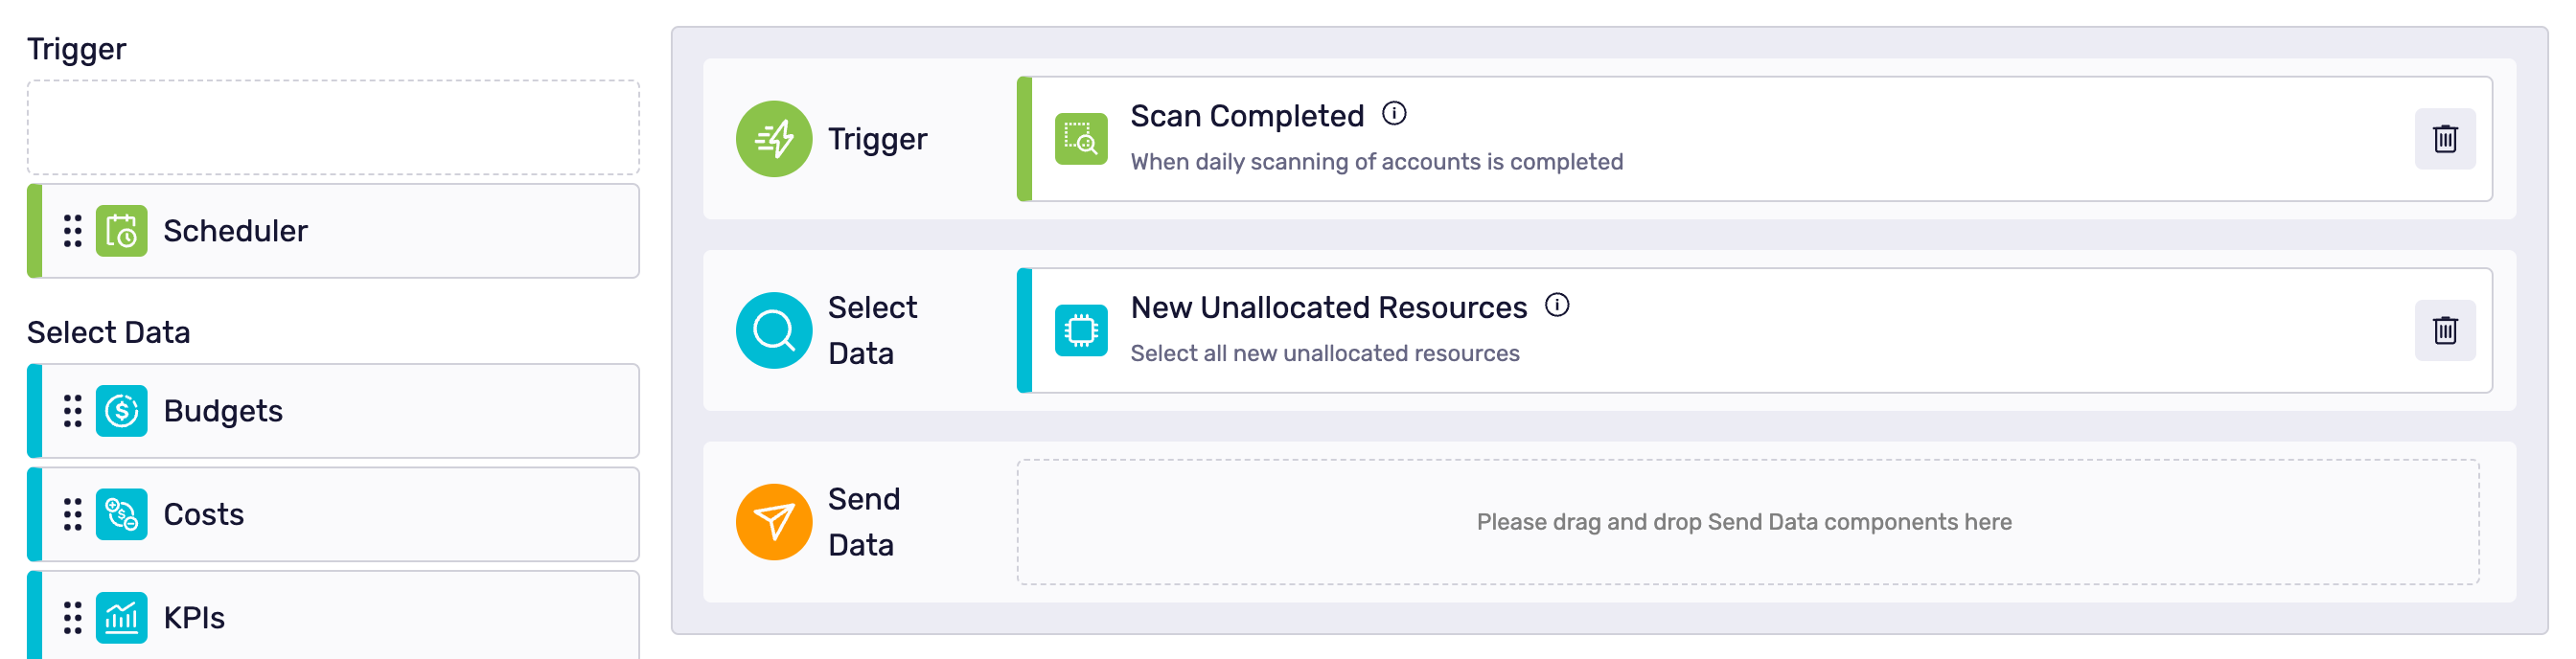
Select Data
First, click and drag New Unallocated Resources to the Select Data window and click the gear icon.
Send Data
Send Data Email
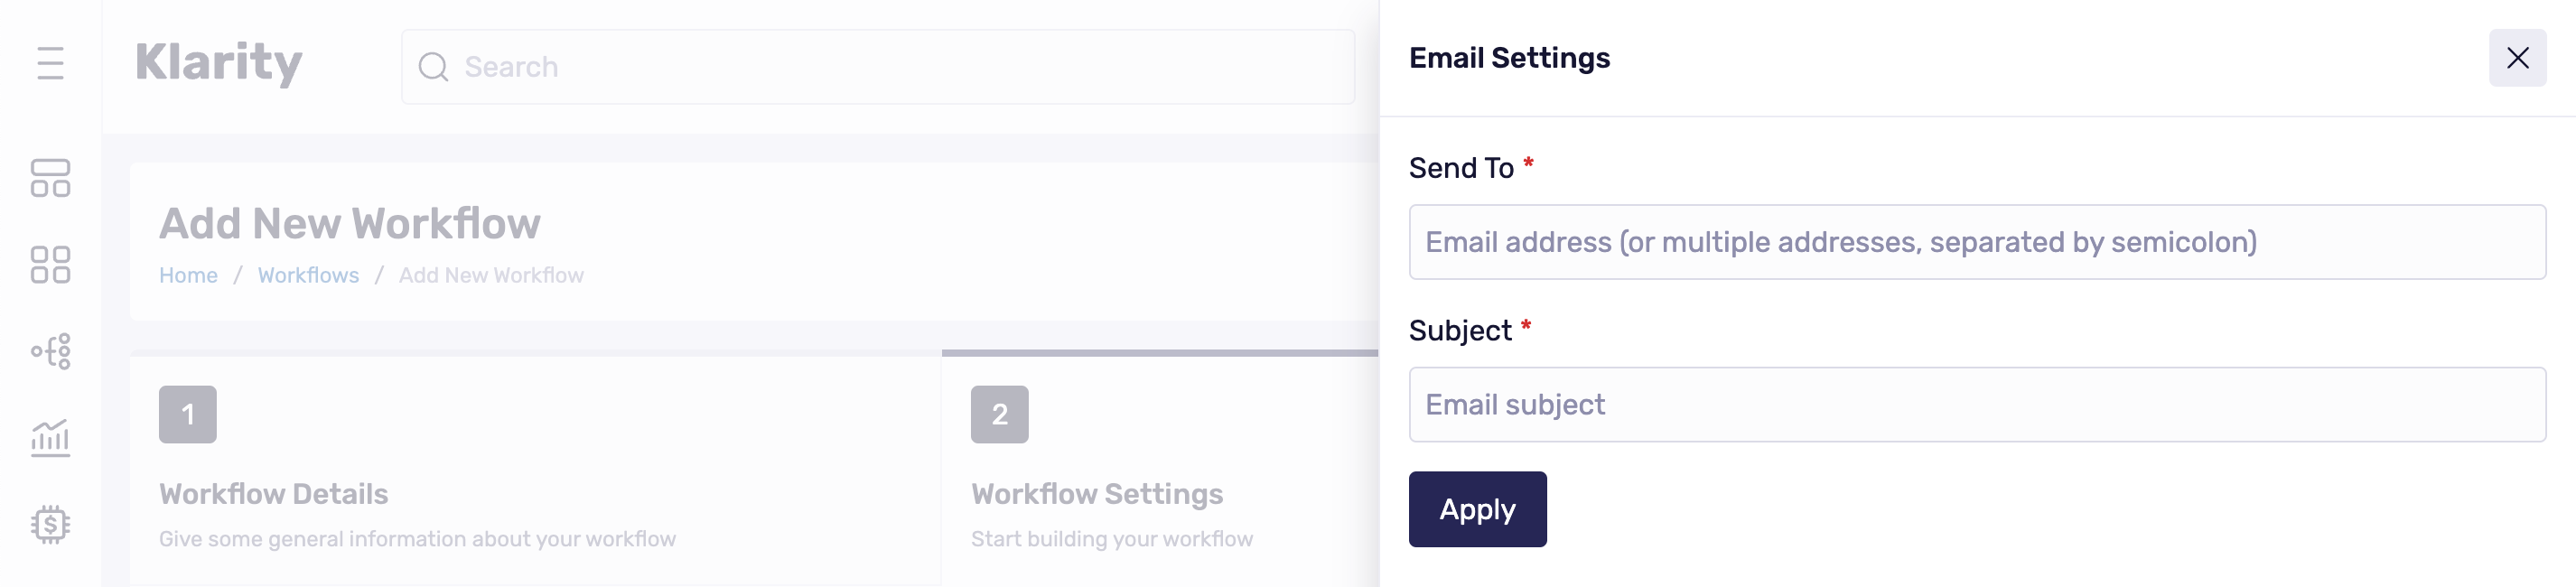
If you want the New Unallocated Resources notifications to be sent via email, click and drag Email to the Send Data window and click the gear icon.
![]()
Under Send to, type the email recipient. If you have multiple recipients, separate them by a comma.
Type a email subject.
Then, click Apply to save the changes.
Finally, click Add Workflow, and you're done.
Send Data ServiceNow
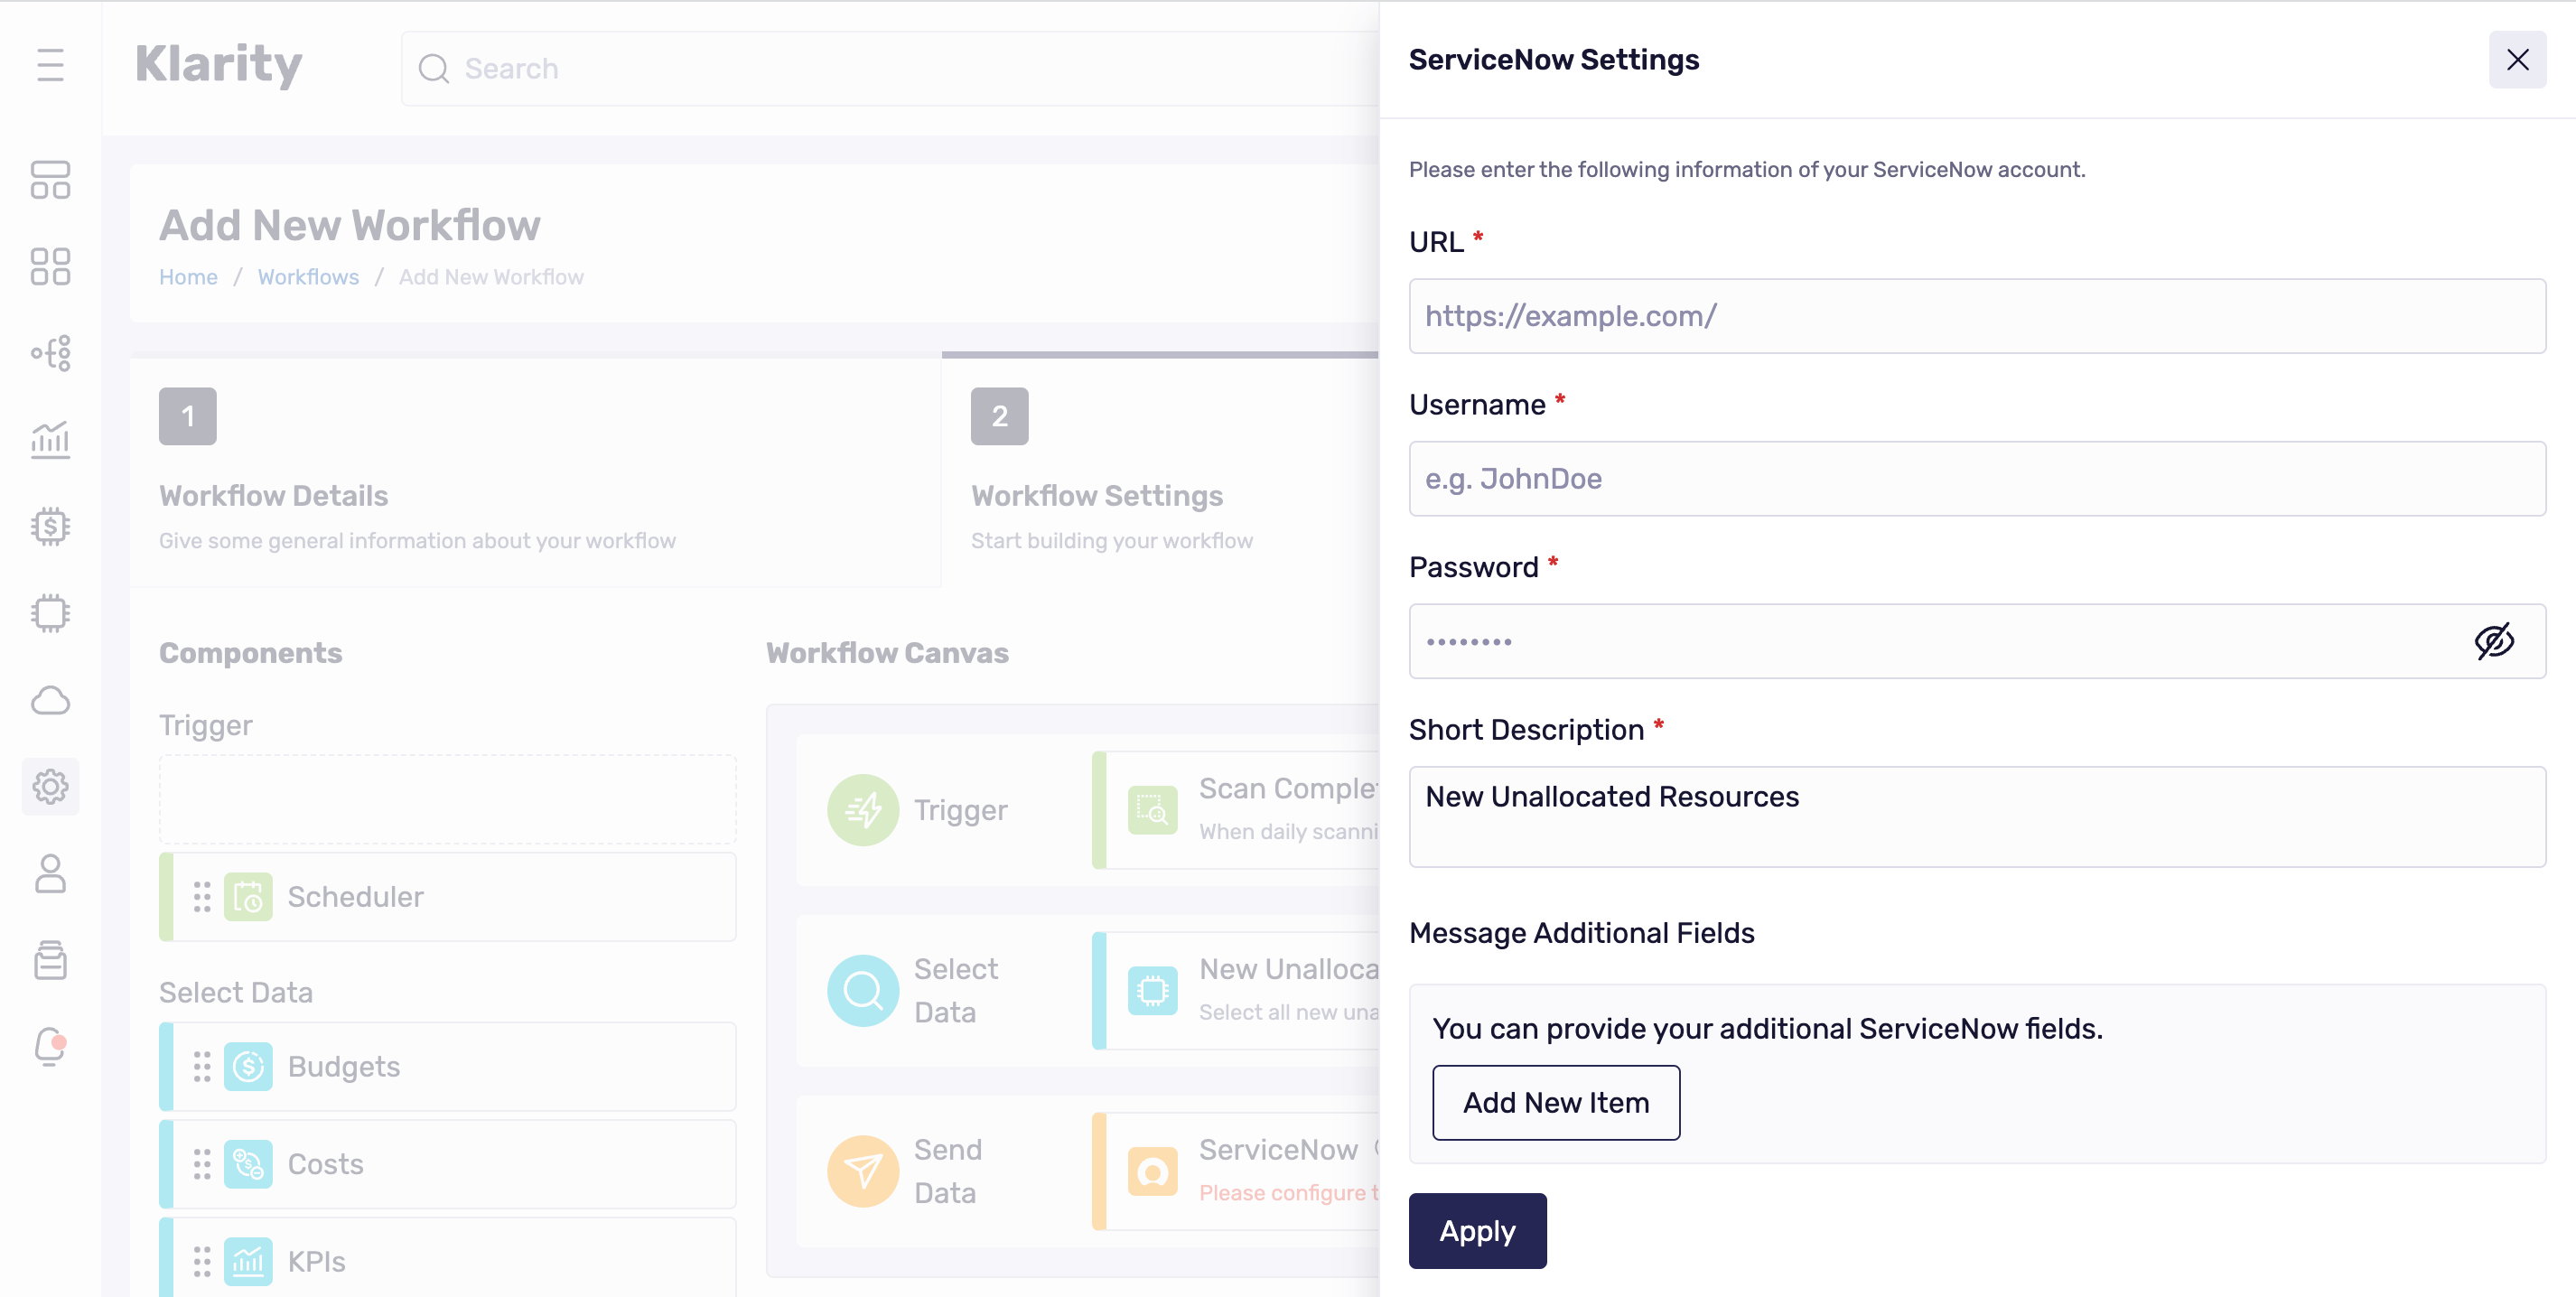
If you want to create a ServiceNow ticket, click and drag ServiceNow to the Send Data window and click the gear icon.
![]()
First, you must enter your ServiceNow account details:
- URL: The full path to the Rest API endpoint can create a new object in the ServiceNow instance. E.g.:
https://dev12345.service-now.com/api/now/table/incident - Username: The username used to authenticate to the ServiceNow instance.
- Password: Password used to authenticate to the ServiceNow instance.
- URL: The full path to the Rest API endpoint can create a new object in the ServiceNow instance. E.g.:
Short Description: This is a field for a
short descriptionof the ticket (character limit of 160).Additional Fields: (Optional) - list of custom ServiceNow
keyand customvaluefields. You can use[text_markers].They will be replaced with the real values during workflow executions in each field.Then, click Apply to save the changes.
Finally, click Add Workflow, and you're done.
Send Data Slack
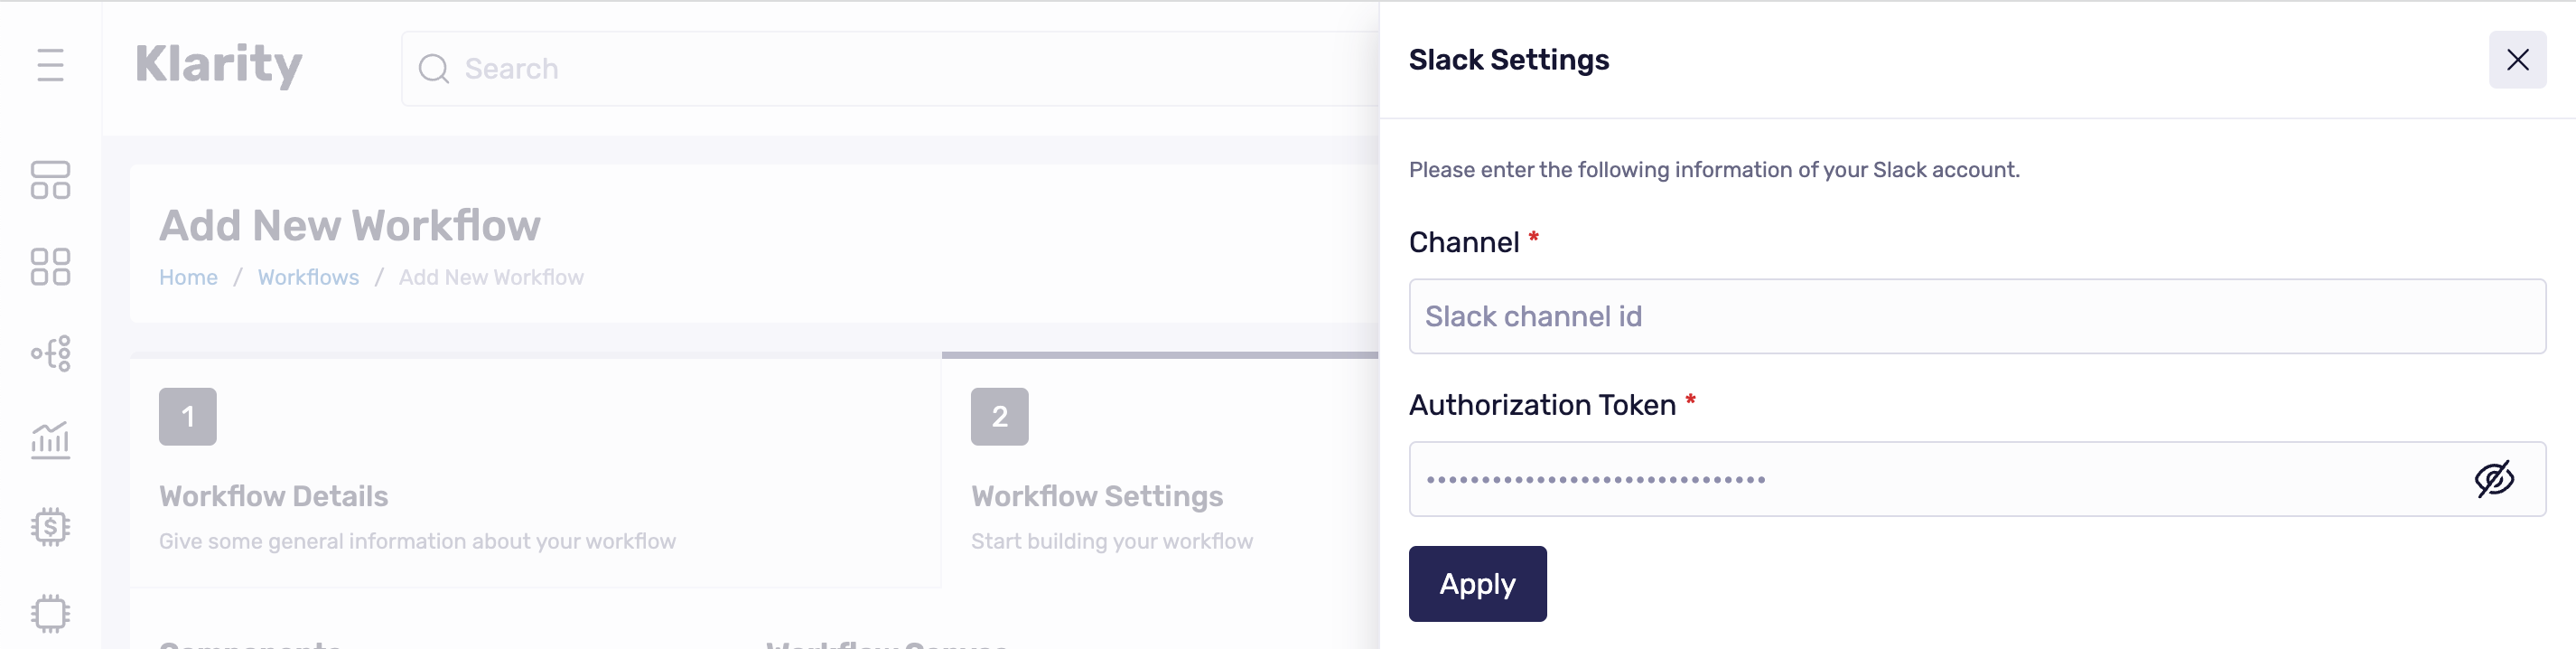
If you want the New Unallocated Resources notifications to be sent via Slack, click and drag Slack to the Send Data window and click the gear icon.
![]()
First, you must enter your Slack account details.
- Token: Authentication tokens where the messages will be sent.
- Channel: The Slack channel where the message will be sent.
Then click Apply to save the changes.
Finally, click Add Workflow, and you're done.